AnyX Guide Topic: setup

  • Time Synchronisation

    Time Synchronisation

    0bb955e8 time sync img

    Time Synchronisation

    Time Synchronisation

    Accurate globally synced time is critical to the proper operation of many modern cryptographic tools. It affects certificte allocation/revocation, sign-in audit logs, etc.

    The Agilicus system requires that your individual endpoints (browsers, Agent Connectors) have proper network time at all times. Typically this means enabling NTP.

    During sign-in or installation you may see a warning indicating that your time is not accurate. Enable your time-sync service for your operating system to continue.

    Linux

    On systemd-derived Linux distributions, NTP is provided y the time-sync target. This in turn might use ntpd or chrony:

    systemctl status time-sync.target
    ● time-sync.target - System Time Synchronized
         Loaded: loaded (/lib/systemd/system/time-sync.target; static)
         Active: active since Tue 2022-04-12 16:01:41 EDT; 1 month 19 days ago
           Docs: man:systemd.special(7)

    You can check that your NTP is synced using one of these commands:

    chronyc  tracking
    Reference ID    : CF22301F (backoffice-1.incentre.net)
    Stratum         : 4
    Ref time (UTC)  : Wed Jun 01 14:11:18 2022
    System time     : 0.000066093 seconds fast of NTP time
    Last offset     : -0.000524711 seconds
    RMS offset      : 0.000274038 seconds
    Frequency       : 18.516 ppm slow
    Residual freq   : -0.004 ppm
    Skew            : 0.036 ppm
    Root delay      : 0.066371940 seconds
    Root dispersion : 0.002734751 seconds
    Update interval : 1035.0 seconds
    Leap status     : Normal
    $ ntpq -p
         remote           refid      st t when poll reach   delay   offset  jitter
    ==============================================================================
    +muug.ca         132.163.97.1     2 u  377 1024  377   40.083   -2.270   3.861
    -nowhere.zeromea 10.0.11.202      2 u 1066 1024  377   20.776  -13.097  11.333
    *zero.gotroot.ca 30.114.5.31      2 u  979 1024  377   68.439   -3.066   2.814
    +time.cloudflare 10.106.8.139     3 u  555 1024  377   36.048   -2.940   2.268

    Windows

    Microsoft Windows uses the Windows Time Service, which in turn uses the Network Time Protocol (NTP) on UDP port 123.

    You can force a one-time sync with:

    w32tm /resync

    See Microsoft “Windows Time service tools and settings” for more information.

    You can check your current NTP peers (your upstream time servers) with the below command:

    C:\WINDOWS\system32>w32tm /query /peers
    #Peers: 1
    
    Peer: time.windows.com,0x9
    State: Active
    Time Remaining: 32683.0895075s
    Mode: 3 (Client)
    Stratum: 3 (secondary reference - syncd by (S)NTP)
    PeerPoll Interval: 10 (1024s)
    HostPoll Interval: 10 (1024s)
    
    C:\WINDOWS\system32>w32tm /query /status
    Leap Indicator: 0(no warning)
    Stratum: 4 (secondary reference - syncd by (S)NTP)
    Precision: -23 (119.209ns per tick)
    Root Delay: 0.0464631s
    Root Dispersion: 7.7952278s
    ReferenceId: 0xA83DD74A (source IP:  168.61.215.74)
    Last Successful Sync Time: 2022-06-01 10:09:57
    Source: time.windows.com,0x9
    Poll Interval: 10 (1024s)

    Embedded Devices

    Embedded devices running e.g. Ubiquity EdgeMax, pfSense, OpenWRT, etc, all have their own NTP-enable. See their documentation or web/cli interface for more information.
  • Sign Up

    Sign Up

    Agilicus Platform Signup

    Platform

    Have a question? The Chat icon in the lower left goes directly to our team. If you prefer, you can also email support@agilicus.com.

    Start your no-obligation trial today.

    Quick Start: Details

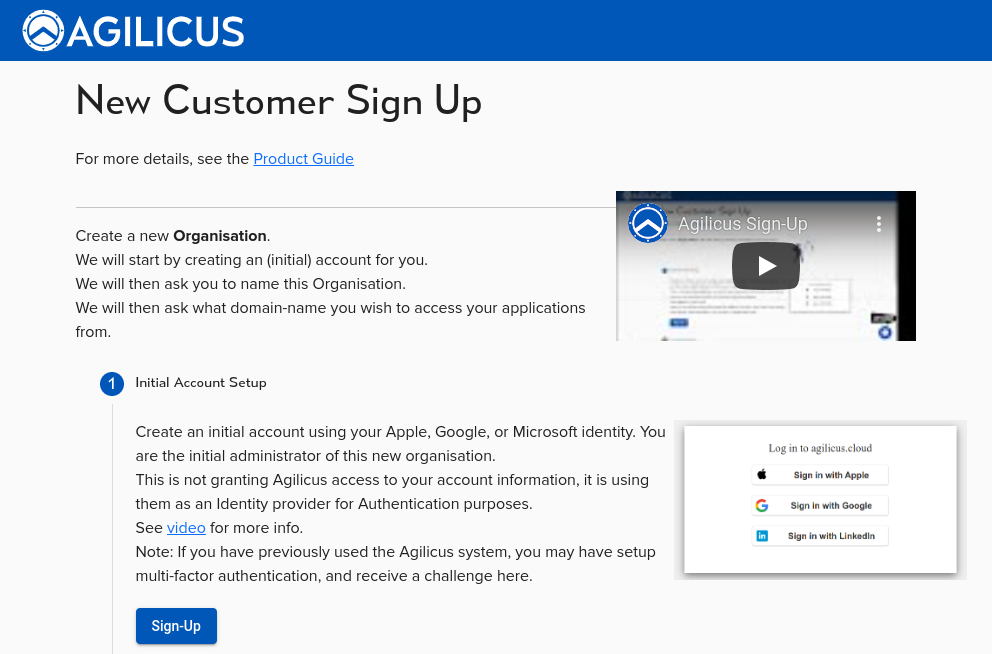
    To begin, click on the Sign-Up button.

    We don’t use passwords. Instead, you’ll link to your Google or Microsoft account. Select either ‘Microsoft’ or ‘Google’. You will then see a familiar sign-in screen.

    Step 1A: Select Identity Provider

    Select either ‘Microsoft’ or ‘Google’. You will then see a familiar sign-in screen.

    If you use Google Workplace, or Gmail, use ‘Google’.

    If you use Microsoft Office 365, Azure, Entra, Hotmail, Outlook, use ‘Microsoft’.

    You will then be redirected to the normal sign-in experience for your Identity Provider.

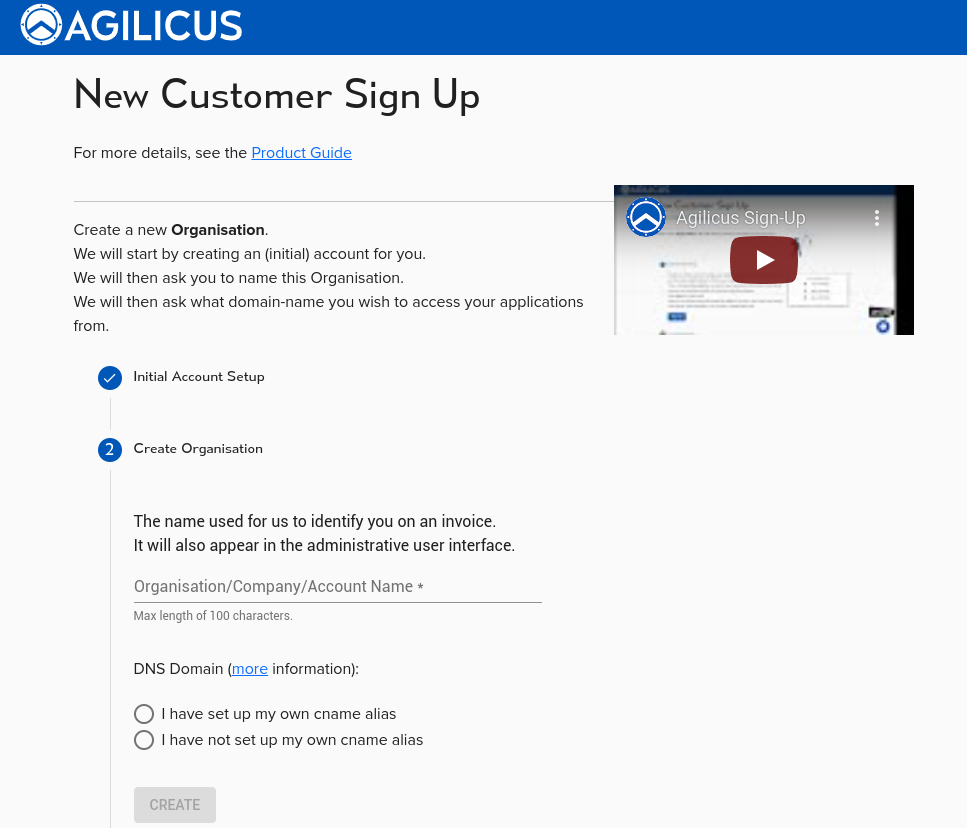
    Step 2: Set Up Your Organisation Name

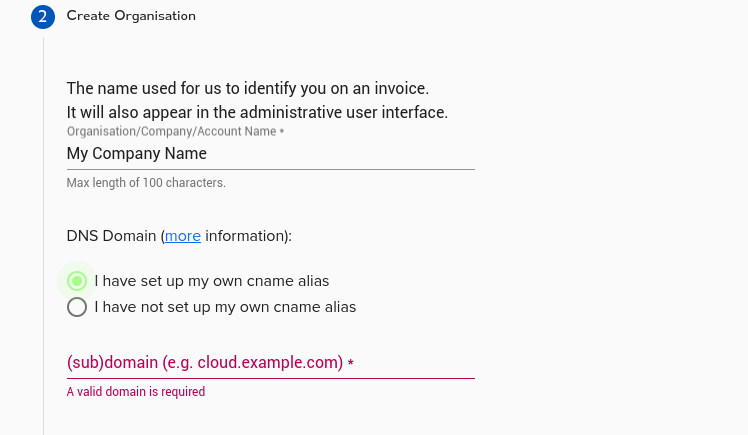
    Here you are being asked to name your setup. This is typically your company name. This name will be seen on invoices and other administrative sections.

    Regular users won’t see it.

    Step 3: Choose a Domain Name

    Every resource you create will have a web address format like this: https://<RESOURCENAME>.<DOMAINNAME.>

    You have two choices:
    1. Simply use a domain we provide (like “myorg.agilicus.cloud”).
    2. Use your own sub-domain (like ‘cloud.mydomain.com’). This is recommended for better security training.

    Learn more about CNAME and wildcard.

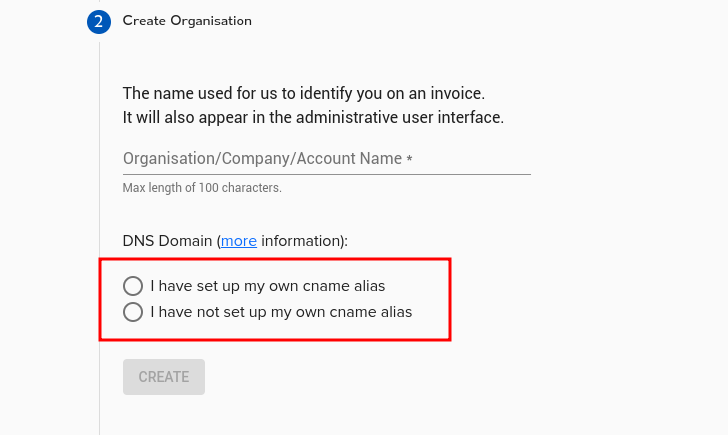
    Option 1: Use an Agilicus Domain

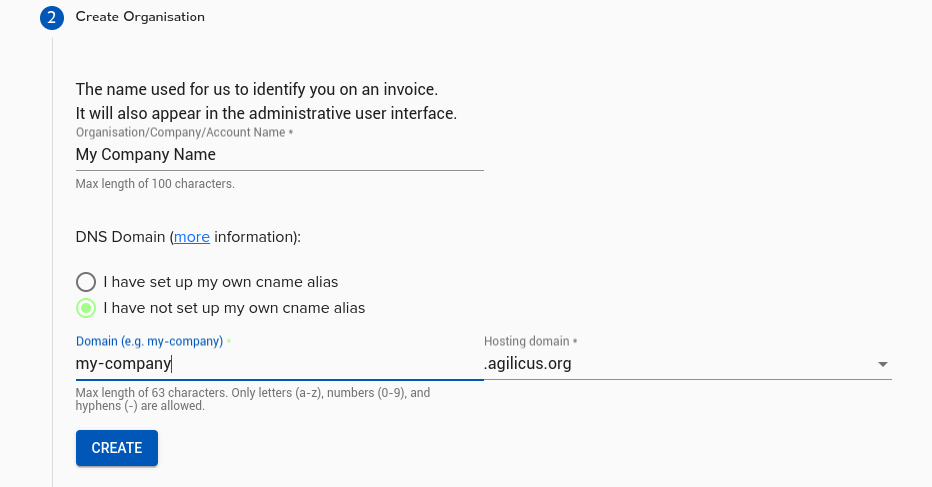
    Pick “I have not set up my own cname alias”.

    Choose a sub-domain and an Agilicus domain, then click “Create”.

    Option 2: Use Your Own Domain

    Pick “I have set up my own cname alias”. In your DNS tool (like GoDaddy), create a new sub-domain. Point a wildcard CNAME record (like *.cloud.MYDOMAIN) to ca-1.agilicus.ca. If you use internal and external DNS, set up both. Click “Create”.

    Step 4: Sign In to Your New Account

    You’re nearly done! The system is now creating 3 new web areas:
    1. admin.MYDOMAIN: The admin webpage.
    2. auth.MYDOMAIN: For authentication (you won’t go here directly).
    3. profile.MYDOMAIN: A launch pad for end users.

    After these are set up, you’ll be prompted to sign in again. Sign in using the same account from Step 1. You’ll see a guide to help you further, and you’re all set!

  • Sign-In Theming

    Sign-In Theming

    about-agilicus

    Theming Agilicus AnyX

    Logos, Fonts, Colours: Theming Agilicus AnyX

    Agilicus AnyX supports personalising the sign-in and usage environment to match your corporate brand. This is more than just asthethic: a consistent look and feel helps train users to reduce the likelihood of a successful spear-phishing attack.

    Setting up your theme on Agilicus AnyX is quite simple. The basic steps are:

    1. Download template
    2. Modify template
    3. Test locally in browser
    4. Upload template
    5. Test live

    So lets get started. Before you start, you will want 3 files that can often be found on your company website:

    1. favicon.png. This should be a square-aspect ratio, usually 256×256 or 512×512, of your company logo. It will show in a browser tab.
    2. logo.png. This should be rectangular in size, approximately 1600×300 resolution. This will show in Profile in place of the Agilicus logo. We recommend a transparent background, and a foreground that will look proper with a blue background (#0057b8).
    3. my-login.svg. This should be a square-aspect ratio svg, it will show in Profile in place of the Agilicus logo. The foreground should work with a blue background (#0057b8)

    The Agilicus AnyX uses a strong, restrictive content-security-policy. This prevents linking to external 3rd-party css/js/images/fonts during the sign-in process. These must be mirrored into the theme file and served via the platform to be used.

    Theming Agilicus AnyX

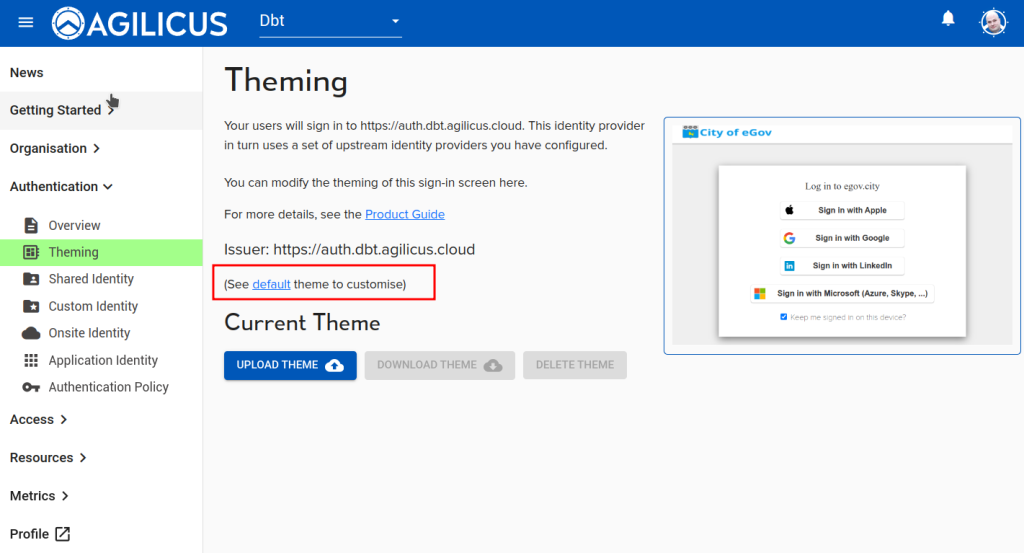
    First, we will download the ‘default’ theme.

    This default theme can be unpacked somewhere on your computer.

    The ONLY files you can modify are in the ‘theme’ subdirectory. The rest are read-only and just for the purpose of testing on your desktop.

    When you re-pack this file, repack from the root directory, e.g. your new zip file should look the same as below, with an ‘index.html’ file in the top directory, and a theme-subdirectory.

    You may add fonts/logos/etc to the theme directory and refer to them by relative path.

    Once you have downloaded and unpacked this file, you will see the below contents. Do not change files other than in the theme directory (your changes will be ignored by the system). Overwrite the favicon.png and logo.png files in the theme directory. You may now proceed to testing.

    ├── agilicus_error.html
    ├── approval.html
    ├── challengedeclined.html
    ├── endsession_prompt.html
    ├── error.html
    ├── footer.html
    ├── header.html
    ├── index.html
    ├── login.html
    ├── mfa.html
    ├── oob.html
    ├── password.html
    ├── README.md
    ├── scripts
    │   ├── end_session.js
    │   ├── login.js
    │   ├── mfachallenge.js
    │   ├── password.js
    │   └── wasthisyou.js
    
    ├── static
    │   ├── font
    |   |    . . .
    │   ├── img
    │   │   ├── apple-icon.svg
    │   │   ├── bitbucket-icon.svg
    │   │   ├── coreos-icon.svg
    │   │   ├── email-icon.svg
    │   │   ├── github-icon.svg
    │   │   ├── gitlab-icon.svg
    │   │   ├── google-icon.svg
    │   │   ├── ldap-icon.svg
    │   │   ├── linkedin-icon.svg
    │   │   ├── microsoft-icon.svg
    │   │   ├── oidc-icon.svg
    │   │   ├── saml-icon.svg
    │   │   └── yahoo-icon.svg
    │   ├── index.html
    │   └── main.css
    ├── theme
    │   ├── favicon.png
    │   ├── logo.png
    │   ├── my-login.svg
    │   └── styles.css
    └── wasthisyou.html

    Testing Your Changes

    On your desktop, in the directory you have unpacked the files, there is a file ‘index.html’. Double-click this, it should open in your browser. You can now see a list of links to the various pages, try each one to assess your changes. You may edit the styles.css and reload in the browser to iterate.

    Once you are satisfied with your changes, proceed to the re-pack and re-upload.

    Upload Template

    e7e91e52 image

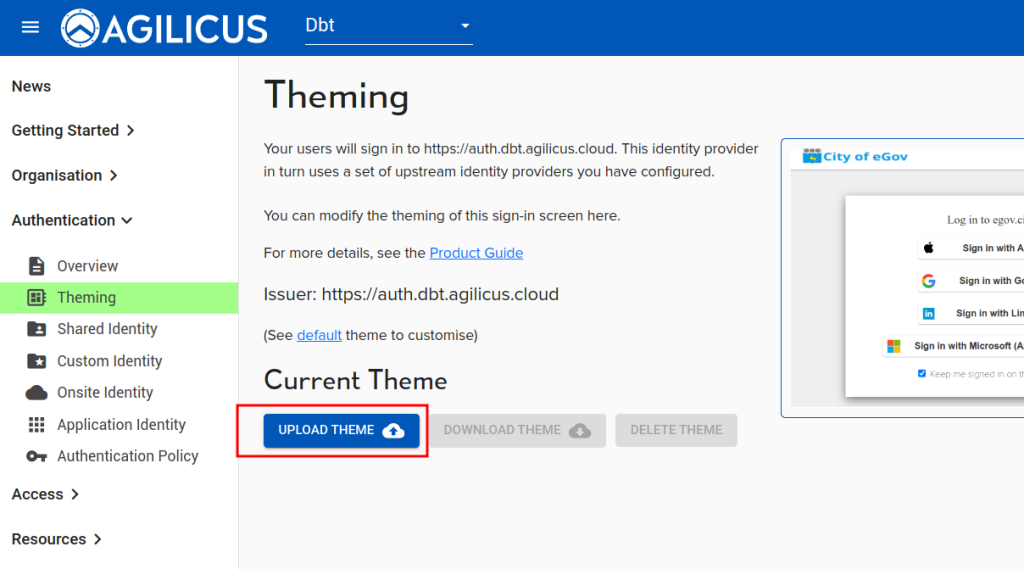
    Now that you are satisfied with your changes, make a zip-file of the entire directory structure you unpacked. E.g. ‘index.html’ will be in the root directory of the zip, and theme will be a sub-directory.

    From your browser, use the UPLOAD THEME button in Authentication/Theming. Select the zip file you just made.

    The theme will take affect after approximately 60-90 seconds. You may then test by signing-in again (e.g. in an incognito window).

    NOTE: Browser Caching

    Your browser may cache the icons and fonts. Flush your cache if they do not seem to have changed.

    Custom fonts

    You may add your own fonts. To do so, we will do these steps:

    1. Create a font-face entry in theme/styles.css
    2. Add font-files to theme/my-font/
    3. Adjust h1/body entries in theme/styles.css to reference your font
    @font-face {
        font-family: 'My Font';
        src: url('/static/theme/my-font/my-font.woff2') format('woff2'),
            url('/theme/my-font/my-font.ttf') format('truetype'),
        font-weight: 900;
        font-style: normal;
    }

    Once you have added your font, in theme/styles.css, you might change these two lines:

    h1,h2,h3,h4,h5,h6{font-family: 'My-Font';}
    body{font-family: 'My-Font';}

    Next Steps, Other Ideas

    You might consider modifying the styles.css to set a background image, to change hover behaviour, etc.

    To change the background image and colours, consider e.g. put an image called ‘background.jpg’ in the theme dir, then add a background-color/image/repeat to body or navbar as appropriate:

    .theme-body {
      background-color: beige;
      background-image: url("background.jpg");
      background-repeat: no-repeat;
    }
    ...
    .theme-navbar {
      background-color: beige;
    }
    8e06cb00 image

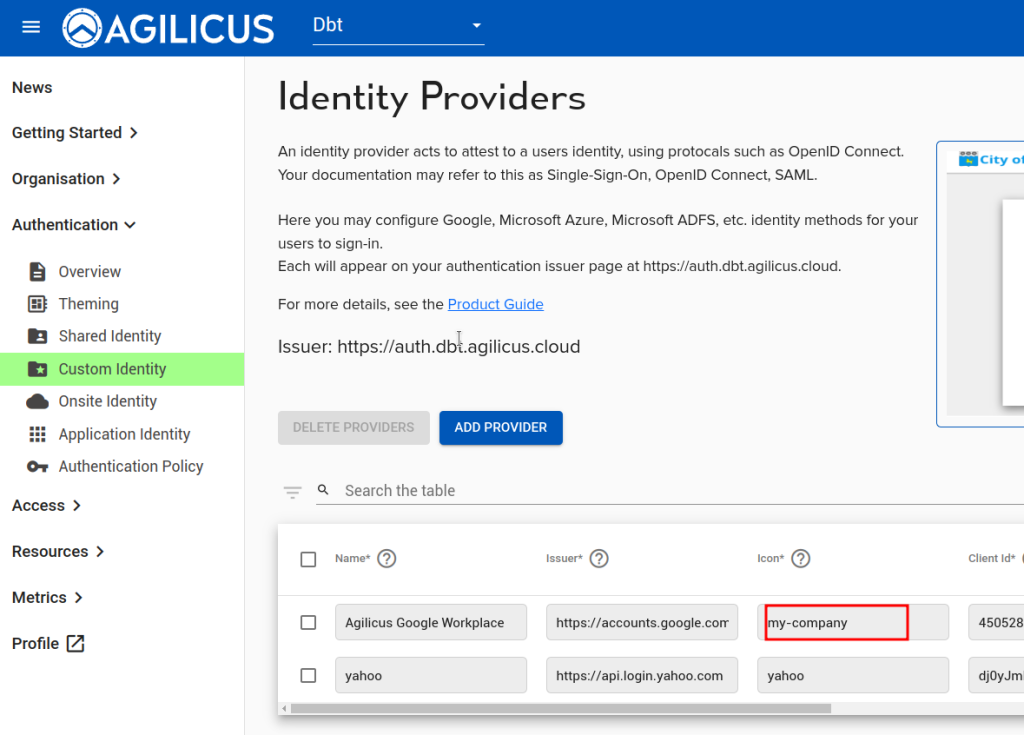
    You may also have your own identity-provider and wish to change its icon (the Microsoft and Google ones are default). To do so, you will need an SVG file which is square in aspect ratio (see the my-login.svg as an example).

    Add your ‘my-company.svg’ file, add a section in styles.csss to reference it:

    .dex-btn-icon--my-company {
      background-color: #FFFFFF;
      background-image: url(my-company.svg);;
    }

    Once done, set the ‘Icon’ field in your identity provider to match the name.

    The default footer is an empty ‘div’ with class theme-footer, you may modify this in your styles.css if you wish.

    .theme-footer::after {
      content: "I AM A FOOTER";
      color: white;
    }
  • Theory of Operation: CNAME + DOMAIN

    Theory of Operation: CNAME + DOMAIN

    3c720137 undraw domain names re 0uun

    CNAME + DOMAIN

    Use your own domain name with Agilicus AnyX.

    Setup Planning: Domain Name (CNAME) Setup

    b8441575 image

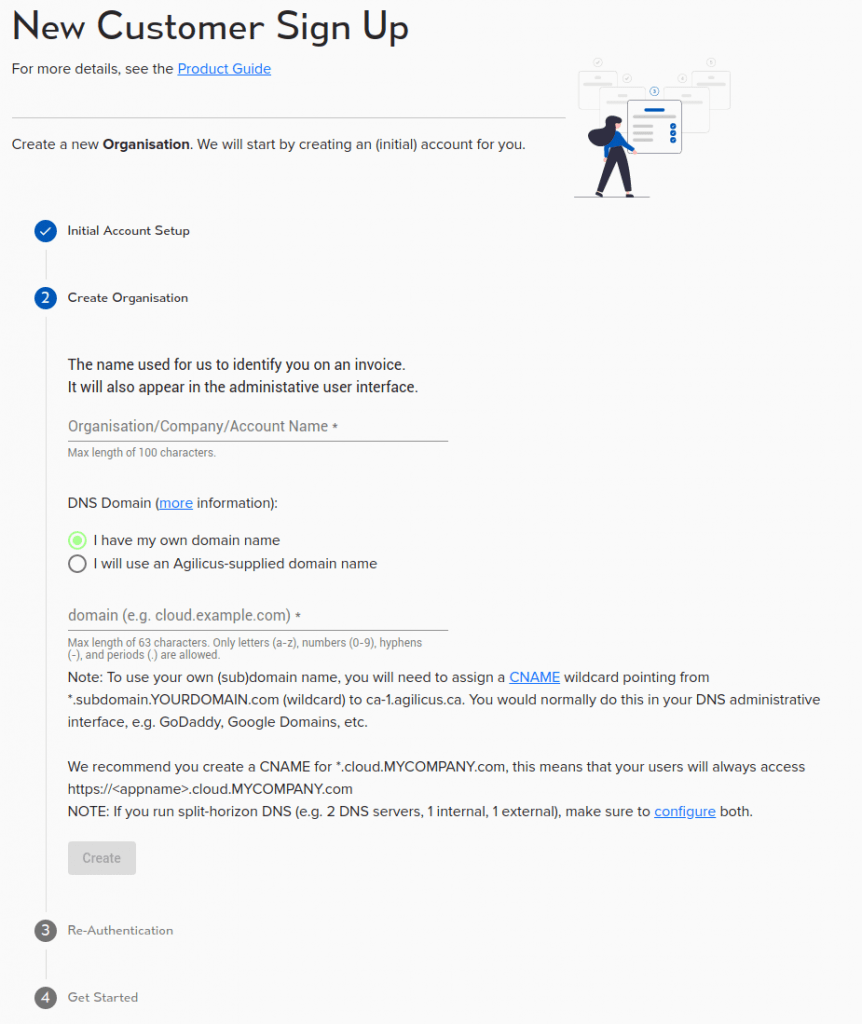
    When creating a new Organisation through the Signup process, you are asked 2 questions:

    1. “Organisation/Company/Account Name”
    2. “DNS Domain”

    On the “DNS Domain” you have 2 choices:

    1. “I have my own domain name”
    2. “I will use an Agilicus-supplied domain name”

    The “Organisation/Company/Account Name” is used for billing purposes, and for metrics. It does not appear to the end-users of your company.

    The ‘DNS Domain’ is used by all users (administrative and end-user). Notably,

    • https://admin.DOMAIN 🠒 the administrator will sign-in here to configure and update the system
    • https://auth.DOMAIN 🠒 for any sign-in activity, the user will be redirected here during the sign-in process according to the OpenID Connect specification
    • https://profile.DOMAIN 🠒 end-users can see a ‘launcher’ of all applications in the organisation, and adjust their multi-factor authentication preferences
    • https://APPNAME.DOMAIN 🠒 for each application you configure, a public URL will be created via its name and the domain you choose.

    If you choose to use an Agilicus-supplied domain name, we will attempt to use your organisation name in conjunction with agilicus.{cloud|net|org}.

    If you choose “I have my own domain name”, the administrator and end users will never see our domain. We recommend this option. In this model, you are delegating a sub-domain of your own to our system to manage on your behalf. So for example, you can say “*.cloud.MYDOMAIN” is managed.

    For the domain, if you choose to provide your own sub-domain, you must first put an entry in your Domain Name Server (DNS) to prove you own it, and to allow us to host content on it. This is done by creating a CNAME record with a wildcard. In your DNS, create a CNAME report from *.subdomain.yourdomain to ca-1.agilicus.ca. For more information about the Hows and Whys of a CNAME, see “Internet Redirect & Alias: The CNAME“. NOTE: this is a wildcard.

    406482f2 image
    Example Setup with Google DNS

    For example, we recommend using “cloud” as the subdomain. If your company web-page is “www.example.com”, you will create a CNAME of *.cloud.example.com, pointing to ca-1.agilicus.ca. You and your users will now be accessing applications as https://appname.cloud.example.com/.

    If you use a domain we supply, this can be very quick for you to get going. If you use your existing domain its simpler for your users, and, can help train them to avoid spearphishing by only using your corporate domain. The choice is yours.

    An example setup using Google DNS is shown. This will vary slightly depending on your DNS provider. If you wish to test the setup of your CNAME, we recommend using dig, as below. You may also use a web-based service such as dnslookup.online. Lookup anyname.subdomain.yourdomain.

    $ dig -t cname foo.cloud.zero-trust.ca
    ...
     ;; QUESTION SECTION:
     ;foo.cloud.zero-trust.ca.    IN  CNAME
     ;; ANSWER SECTION:
     foo.cloud.zero-trust.ca. 3600    IN  CNAME   ca-1.agilicus.ca. 

    Once you select CREATE it will take approximately 30-60 seconds to setup an environment. During this time our system is created a Federated Login system (allowing authentication against your Identity Providers), SSL certificates (100% of what we do is encrypted), and some other database setup for Audit Logging etc.

    NOTE: Split-Horizon DNS

    If you run split-horizon DNS (e.g. a name server internally which serves different answers than externally), you will need to make the same changes in both systems. This can happen e.g. if you use Microsoft Active Directory on premise as a DNS server, and a public DNS server externally.

    NOTE: Testing

    You may test your newly added CNAME using an Agilicus API. In your browser, navigate to:’https://api.agilicus.com/v1/resolve/?type=CNAME&name=auth.SUBDOMAIN.DOMAIN‘. So, for example, if you chose ‘cloud’ as the subdomain, and your main domain was ‘mycompany.com’, you would openhttps://api.agilicus.com/v1/resolve/?type=CNAME&name=auth.cloud.mycompany.comThis will return some text like:
    {“AA”:false,”AD”:false,”Answer”:[],”Authority”:[{“data”:”ns71.domaincontrol.com. dns.jomax.net. 2019051401 28800 7200 604800 600″,”name”:”mycompany.com.”,”type”:6}],”CD”:false,”Flags”:[“QR”,”RD”,”RA”],”QR”:true,”Question”:[{“name”:”auth.cloud.dsai.mycompany.com.”,”type”:5}],”RA”:true,”RD”:true,”Responder”:”8.8.4.4″,”Status”:3,”TC”:false}You may also use a tool such as dig:dig -t cname auth.dbt.agilicus.cloud
    ; <<>> DiG 9.16.15-Ubuntu <<>> -t cname auth.dbt.agilicus.cloud
    ;; global options: +cmd
    ;; Got answer:
    ;; ->>HEADER<<- opcode: QUERY, status: NOERROR, id: 15521
    ;; flags: qr rd ra; QUERY: 1, ANSWER: 1, AUTHORITY: 0, ADDITIONAL: 1
    ;; OPT PSEUDOSECTION:
    ; EDNS: version: 0, flags:; udp: 65494
    ;; QUESTION SECTION:
    ;auth.dbt.agilicus.cloud. IN CNAME
    ;; ANSWER SECTION:auth.dbt.agilicus.cloud. 1800 IN CNAME ca-1.agilicus.ca.;; Query time: 168 msec
    ;; SERVER: 127.0.0.53#53(127.0.0.53)
    ;; WHEN: Sun Oct 17 18:24:14 EDT 2021
    ;; MSG SIZE rcvd: 82

  • Signup: Firewall Configuration

    Signup: Firewall Configuration

    cyber-insurance-compliance

    Firewall Configuration

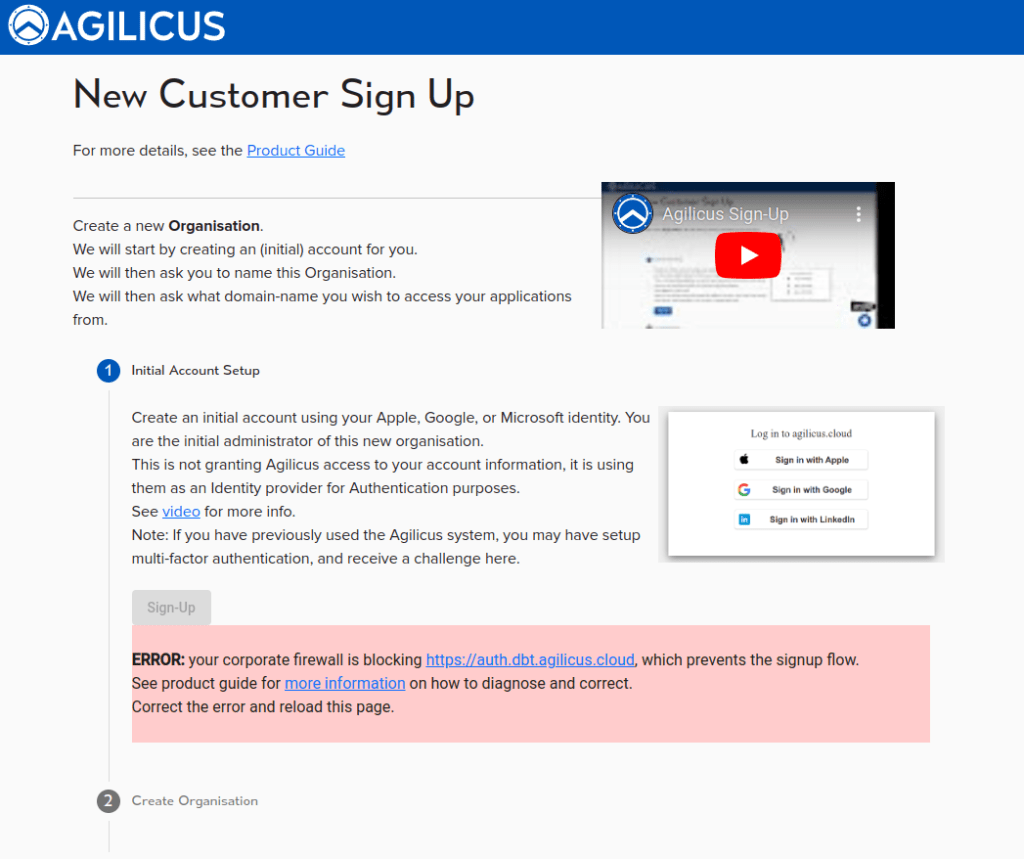
    During the new organisation Signup flow you may find an error as below. This is caused by a corporate network filter (e.g. Palo Alto) which blocks certain encrypted flows.

    Overview

    During the new organisation Signup flow you may find an error as below. This is caused by a corporate network filter (e.g. Palo Alto) which blocks certain encrypted flows.

    You may have firewalls in two locations: between your browser and the Internet (e.g. if you run endpoint protection software, or are using a device not currently on your corporate network), and, between the Agilicus Connector and the Internet.

    Firewall Configuration: End-User Browser to Internet

    bfdb9ad0 image

    In order to use your browser with the Agilicus AnyX platform, whether for signup purposes, or for ongoing usage, you need to be able to navigate to these host names:

    (where __MYDOMAIN__ is the domain name you will choose during the signup process).. You will know you need these rules if you see errors like below image.

    In addition, your name server (DNS) must be able to resolve:

    • ca-1.agilicus.ca
    • api.agilicus.com
    • www.agilicus.com

    The most common problem observed is that if you navigate to https://auth.agilicus.cloud you get an error implying the connection was RESET. This is typically done by a content-filtering firewall such as Palo Alto blocking “auth.*” as a domain name.

    To resolve, work with your outbound firewall filtering vendor to allow:

    • *.agilicus.com
    • *.agilicus.ca
    • *.agilicus.cloud

    Firewall configuraton: Agilicus Connector to Internet

    The Agilicus Connector makes outbound connections only, on port 443 HTTPS only. It will have 2 outbound TCP connections (for resilience) as well as periodic ones to its API and update server.

    Configure your outbound firewall to allow:

    • www.agilicus.com (upgrades)
    • api.agilicus.com (configuration)
    • agent-server.ca-1.agilicus.ca
    • *.__MYDOMAIN__ (authentication via auth.__MYDOMAIN__)

    If you prefer to use IP (and port) – based rules, you may use as below. Note: it is possible this list will change in the future.

    • 34.95.12.47 (www.agilicus.com)
    • 35.203.36.11 (api.agilicus.com)