Active Directory Identity Provider
Many entities will have a single corporate employee identity managed by Microsoft Active Directory. This might take the form of a self-hosted setup or SaaS. In both cases, we create an OpenID Connect `Application Group` (in ADFS or Azure). More information is available below in Appendix: Active Directory Setup, and also in https://docs.microsoft.com/en-us/windows-server/identity/ad-fs/development/ad-fs-openid-connect-oauth-concepts
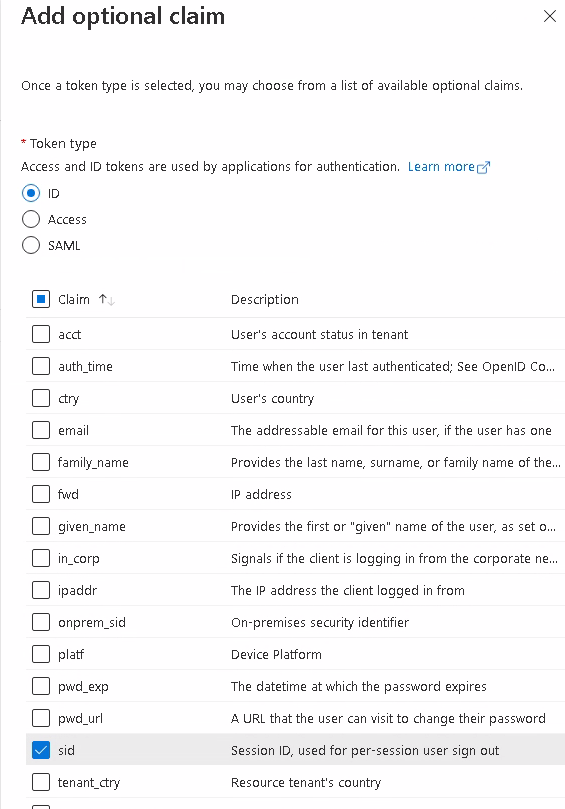
In Active Directory, enable the scopes: (https://docs.microsoft.com/en-us/azure/active-directory/develop/active-directory-optional-claims)
- OpenID
- allatclaims
- Profile
- sid
- amr (if present, used if Active Directory Multi-Factor-Authentication is used)
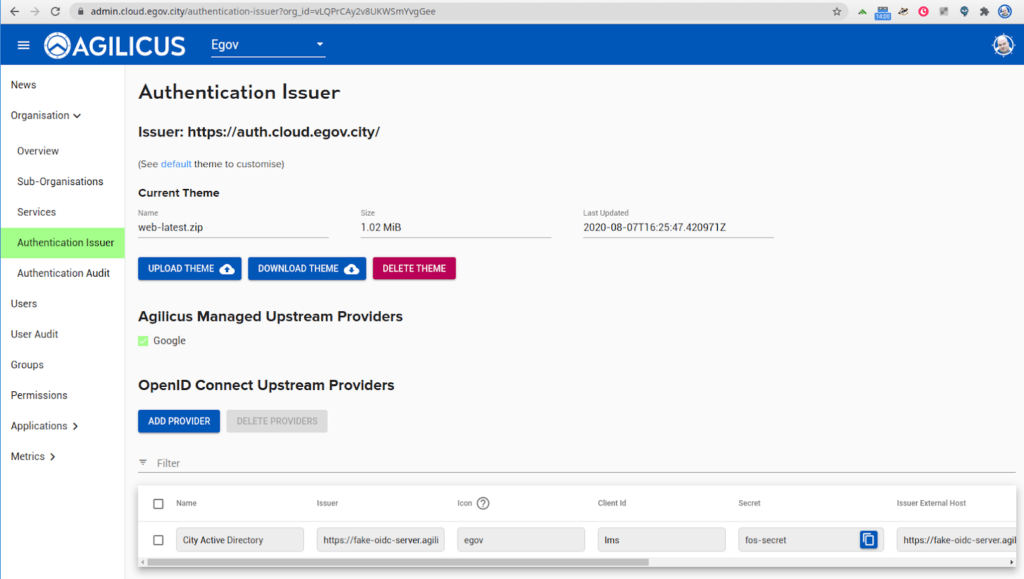
To add this identity provider, select Authentication Issuer, select “ADD PROVIDER” under OpenID Connect Upstream Providers. From here we have a set of fields:
- Name: This will be a phrase your staff will see when logging in.
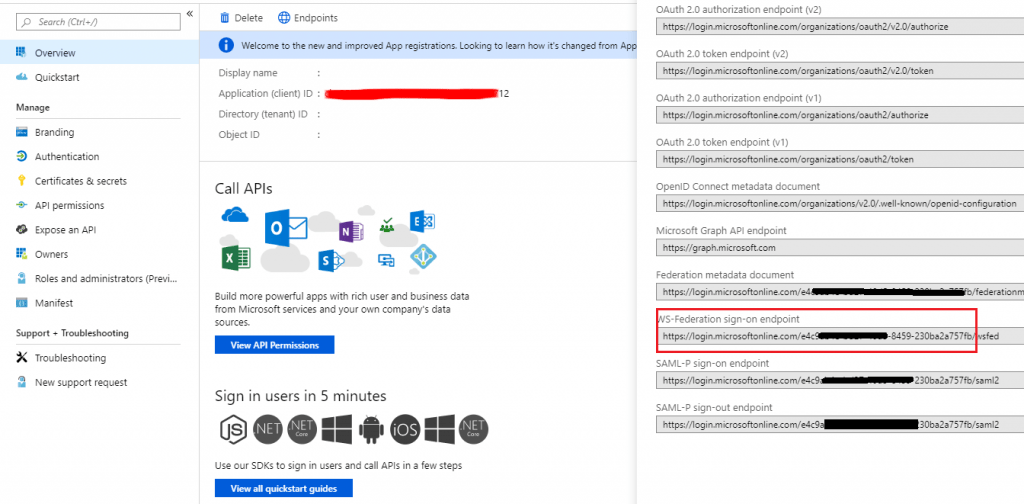
- Issuer: This is the URI of your Active Directory or ADFS endpoint, often https://my-org.ca/adfs. To find your issuer under Azure Active Directory, see appendix.
- Icon: This will be referenced in your CSS if you choose to theme, named dex-btn-icon–NAME.
- Client id: This will be generated by your ‘Create OpenID Application” interface in Active Directory.
- Secret: This will be generated when you create the application in Active Directory.
- Issuer External Host: leave this blank
- Username Key: typically UPN
- Email Key: typically UPN.
- User ID Key: typically sid
- Verifies Email: typically checked (this removes the request scoped `email_verified`)
- Redirect URI: https://auth.ca-1.agilicus.ca/callback.

Appendix: Active Directory Setup
Overview
In order to establish a relying party trust between Agilicus and your Active Directory, identifying information and a shared secret must be established between them. This is done by creating an OpenID Connect configuration in ADFS known as an Application Group, which consists of a Server application and a Web API. Both of these components together specify the Agilicus redirect URIs that need to be invoked during authorization code flows as well as permissions, scopes, claims, and a client identifier and shared secret that Agilicus uses to communicate with your ADFS server.
Details
The steps to create an Application Group in ADFS are described below. These instructions are for Active Directory Federation Services for Windows Server 2016.
- Open the AD FS Management console (Server Manager → Tools → AD FS Management)
- Right-click Application Groups and select Add Application Group; alternatively, select Application Groups and select Add Application Group from the list of available actions under the Action menu bar or the Actions pane
- Enter a Name and optionally a Description for the new application group
- In the Template list, under Client-Server applications, select the Server application accessing a web API type. Click Next
- Make note of the Client Identifier. This ID will become the “Client ID” in the Agilicus Administrative Portal.
- Enter the Redirect URI that was given in the Agilicus Administrative Portal.
- Check the option to Generate a shared secret. This will be used in the Agilicus Administrative Portal.
- Add an Identifier value that is equal to the Client Identifier generated above. Click Next
- Under Choose an access control policy, select Permit everyone. Click Next
- On the Configure Application Permissions page, under Permitted scopes, make sure OpenID, email, profile, amr (if present), and allatclaims are checked. Click Next
- Review the summary and click Next to create the Application Group
- Click Close to complete the wizard
The Application Group is now created and should be listed in the Application Groups pane. In order to populate the user tokens with the appropriate information during OAuth2 exchanges, some additional configuration steps are needed to transform Active Directory data into token claims.
- Right-click the newly created Application Group and select Properties; alternatively, select the newly created Application Group and select Properties from the list of available actions under the Action menu bar or the Actions pane
- Select the Web API entry under Applications and click Edit
- Go to the Issuance Transform Rules tab and add each of the following three rules
- Group Rule
- Click Add Rule
- Under Claim rule template, select the option Send LDAP Attributes as Claims and click Next
- Enter a name for the claim rule such as AD Group With Qualified Long Name
- Under Attribute store, select Active Directory
- In the mapping table on the first row, under the LDAP Attribute column, select the Token-Groups – Qualified by Long Domain Name option
- In the mapping table on the same row, under the Outgoing Claim Type column, select the Group option and click Finish
- Subject Rule
- Click Add Rule
- Under Claim rule template, select the option Send LDAP Attributes as Claims and click Next
- Enter a name for the claim rule such as Subject Claim
- Under Attribute store, select Active Directory
- In the mapping table on the first row, under the LDAP Attribute column, select the User-Principal-Name option
- In the mapping table on the same row, under the Outgoing Claim Type column, select the Name ID option and click Finish
- UPN Rule
- Click Add Rule
- Under Claim rule template, select the option Send LDAP Attributes as Claims and click Next
- Enter a name for the claim rule such as User Principal Name
- Under Attribute store, select Active Directory
- In the mapping table on the first row, under the LDAP Attribute column, select the User-Principal-Name option
- In the mapping table on the same row, under the Outgoing Claim Type column, select the UPN option and click Finish
- Click OK to save and close the updated Web API properties
- Click OK again to close the Application Group properties
Appendix: Azure Active Directory
Creating your Client ID and Secret

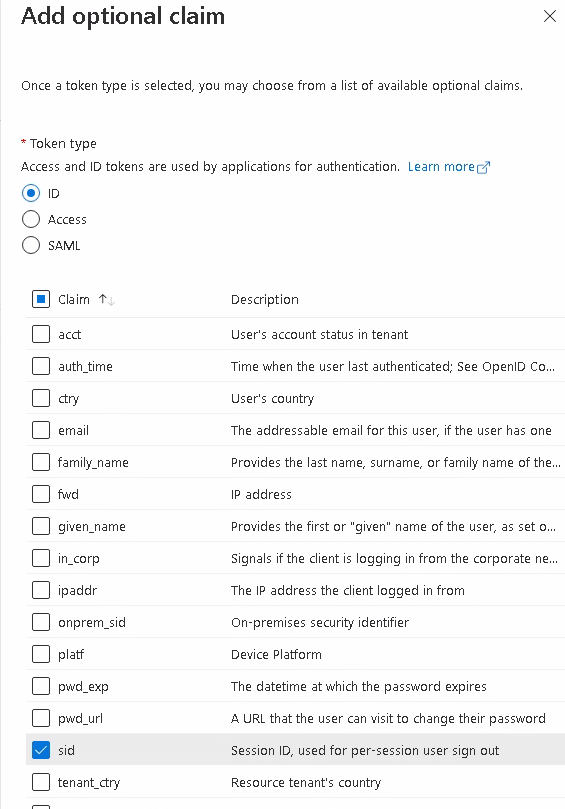
Adding the Optional Claims for sid


Finding your Issuer
Your Issuer is found by looking at the WS-Federation sign-on endpoint, changing ‘login.microsoftonline.com’ to ‘sts.windows.net’, and removing the wsfed from the end. It will look like ‘https://sts.windows.net/XXXXX-XXXX-XXXX/’.
