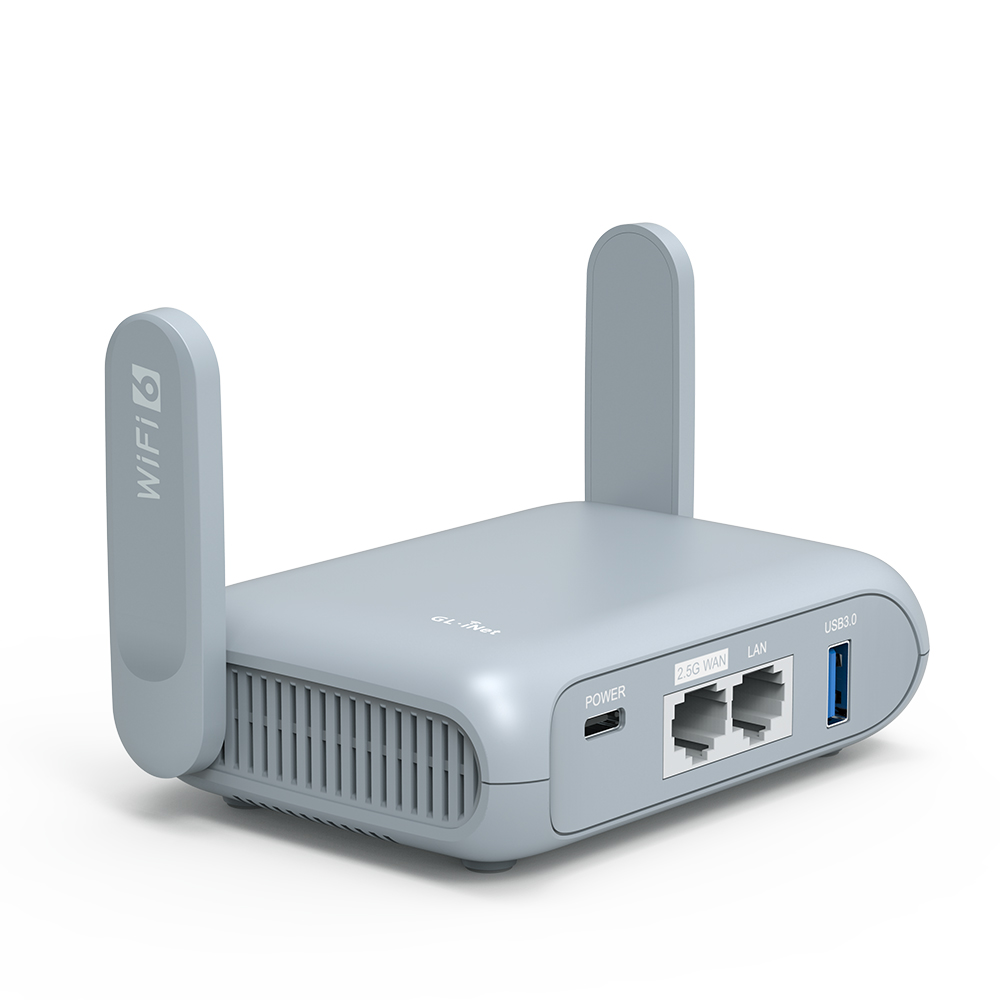
Agilicus Connector – GL-MT3000 (Beryl AX)
GL-MT3000 (Beryl AX) Background
The GL-MT3000 (Beryl AX) has 1 x Gigabit Ethernet, 1 x 2.5 Gigabit Ethernet, 512MiB of RAM, and 256MiB of eMMC storage as well as WiFi 802.11AX. It is an excellent portable platform for demonstrations and field service to run the Agilicus Connector, supporting Cellular (via LTE), WiFI, Ethernet at a low cost point and small form factor.
Installing Stock OpenWRT
You may choose to run the Agilicus Connector on the GL-MT3000 (by using the advanced interface, and running the same commands as below to install ‘curl’, ‘ttyd’, and then the Agilicus Connector. Agilicus recommends replacing GL-iNet custom OpenWRT with the stock one, both for security, as well as compatibility and support.
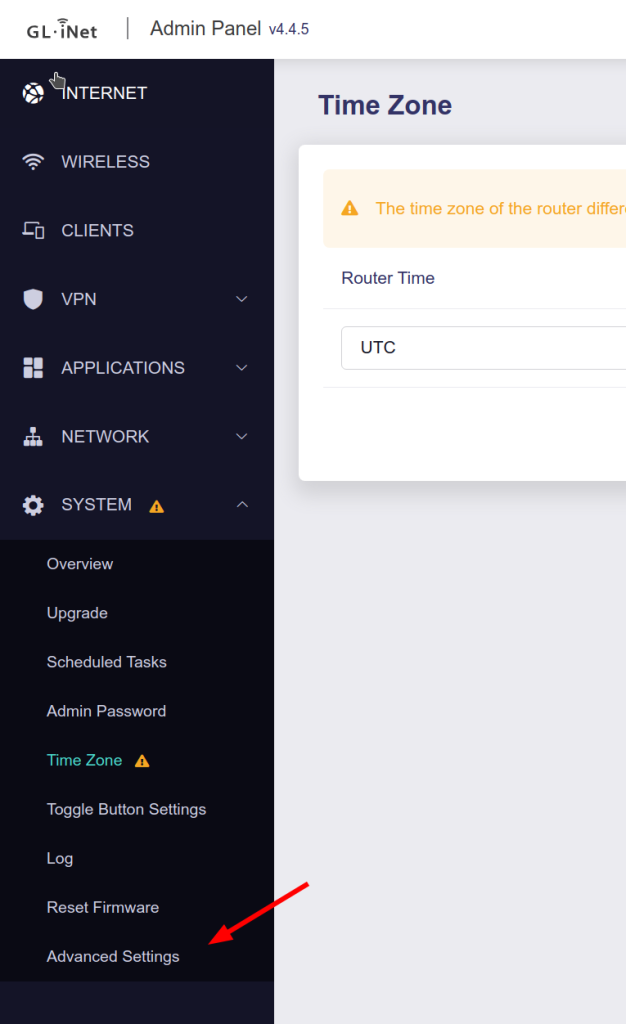
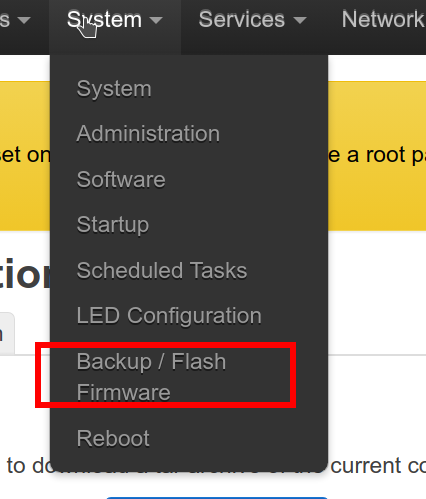
Connect your laptop to the ‘LAN’ port (or WiFi if you prefer). Sign in to the web interface at http://192.168.8.1/. Navigate to the ‘Advanced settings’, which will log you in to Luci. Download the stock firmware (https://openwrt.org/toh/gl.inet/gl-mt3000), specifically the ‘Firmware OpenWRT Upgrade’ target , and then install via the ‘Backup/Flash Firmware’.
At this stage you are running Stock OpenWRT with its enormous ecosystem of tools, and its very simple to use web interface. You may open http://192.168.1.1/ and do any initial setup.
Agilicus Connector Install
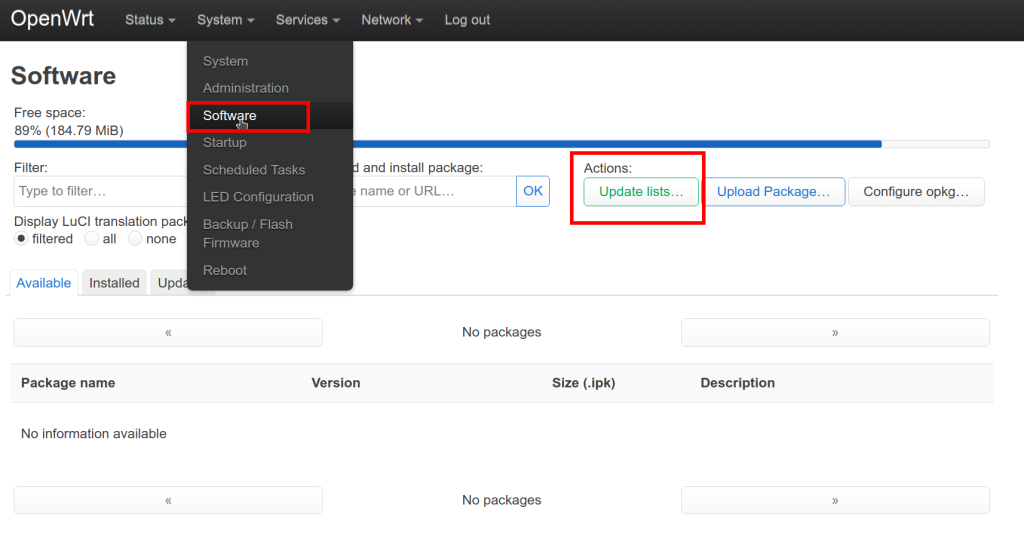
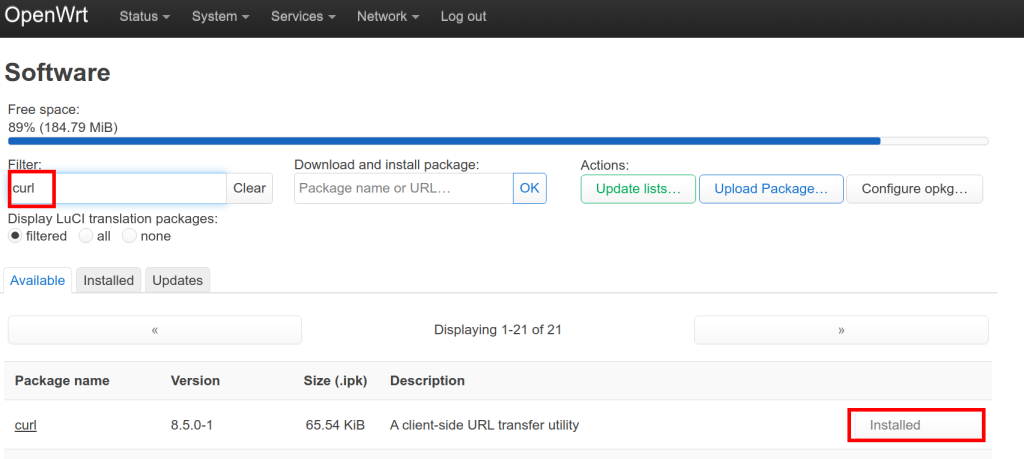
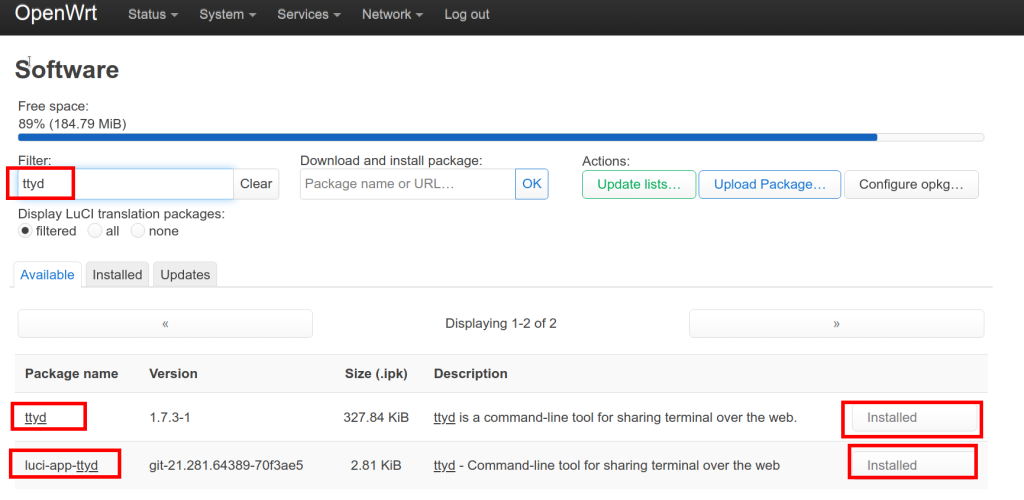
To install the Agilicus connector, first we install the pre-requisite curl. we will also install a web terminal (ttyd).
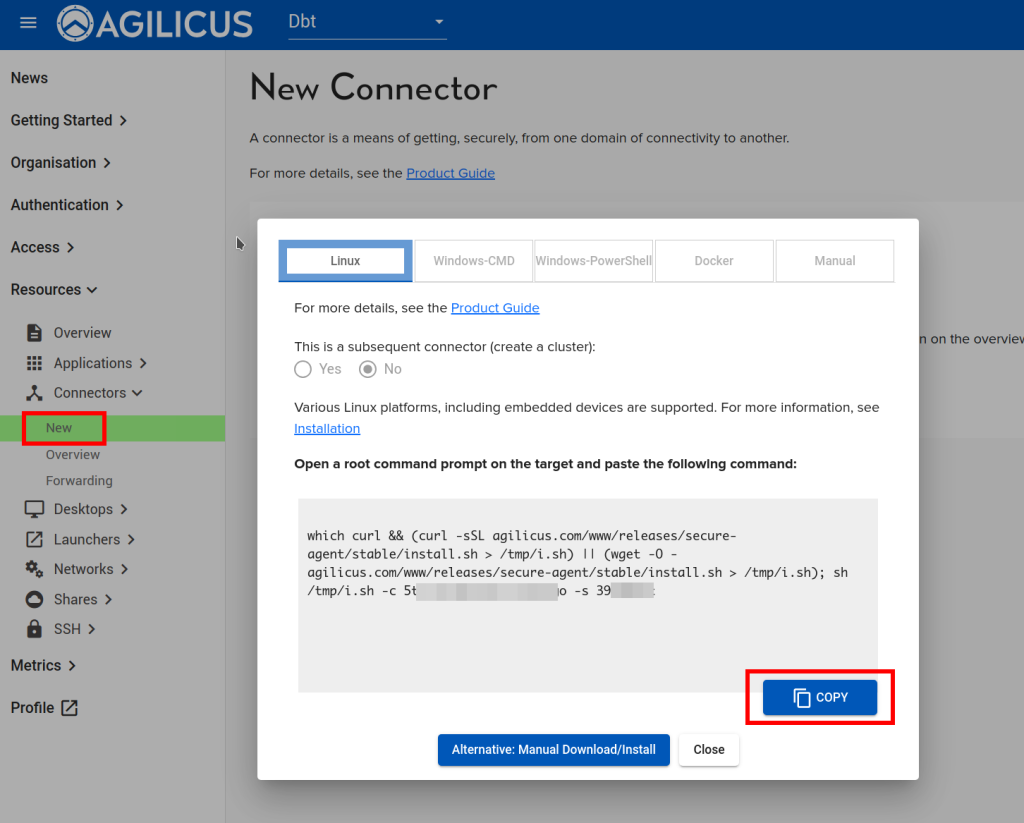
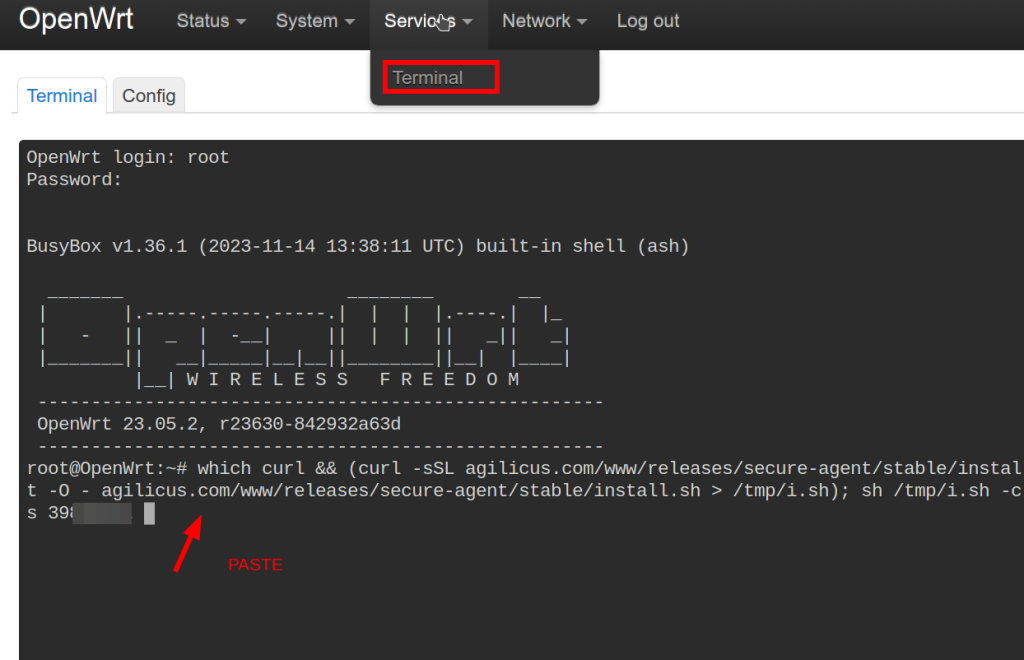
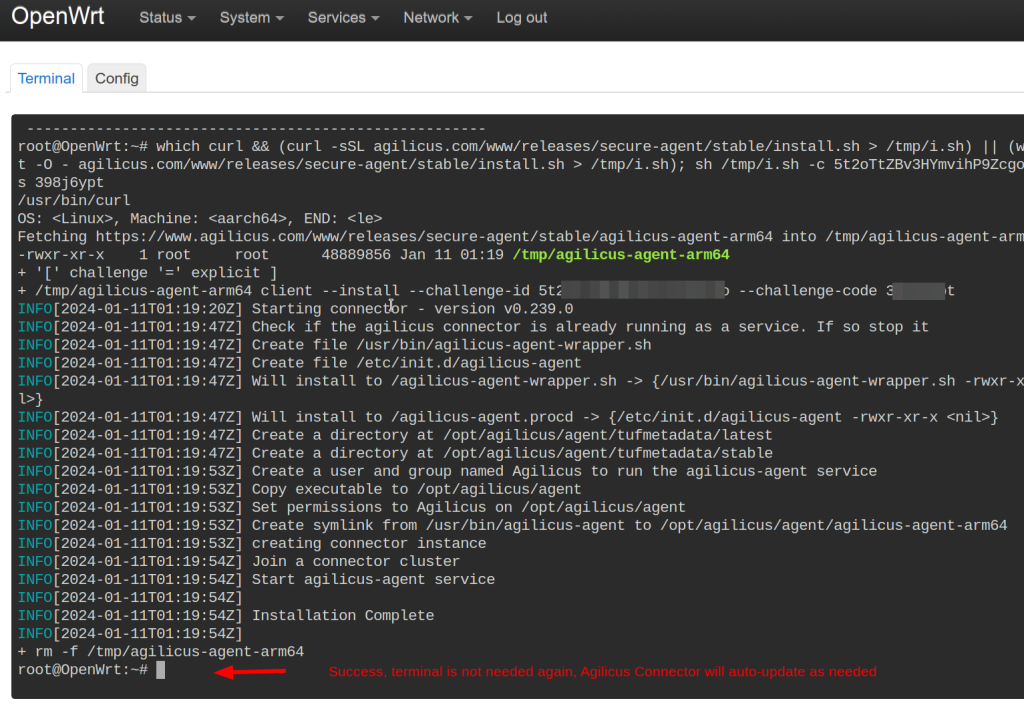
At this stage, we can install the Agilicus connector. From the Agilicus admin web interface, select ‘Resources/New/Connector’. Copy the Linux command line, paste it into the Services/Terminal on the GL-MT3000. It will complete automatically, no further configuration is needed.
(Optional) Sample Configuration: Connect to Local HTTP (OpenWRT LuCI)
This walk through shows an example of how, once the connector is installed (as per above), configuration of an HTTP interface. Once these are configured you could use the firewall to disable all external access. The high level steps are:
- Create Web Resource (Agilicus Admin)
- Assign Web Resource Permission (Agilicus Admin)
- Open Web Interface to NanoPi (Agilicus Profile or direct)
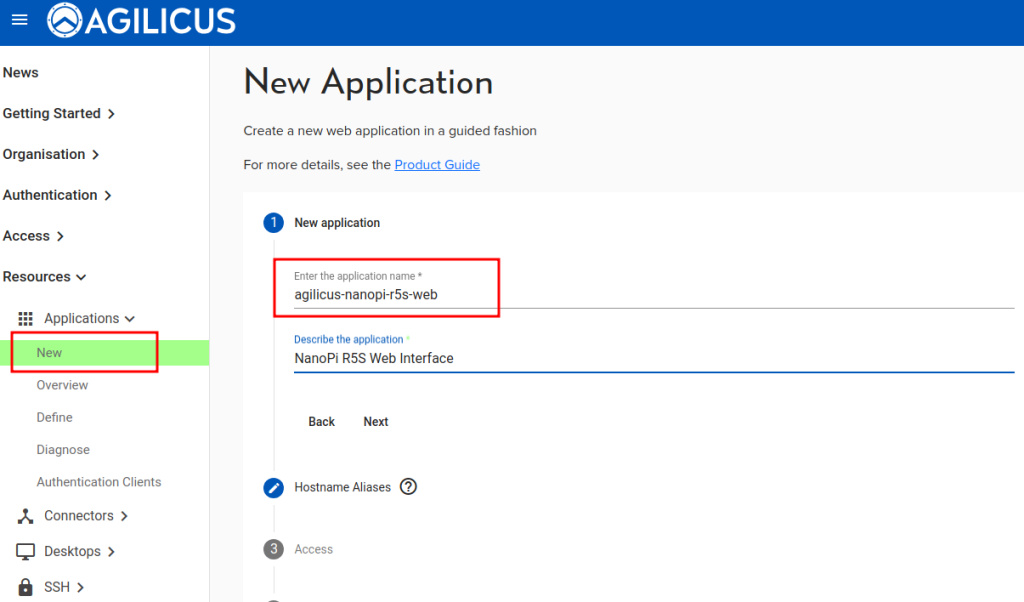
OK, let’s get started. This will take approximately 2 minutes.
Create a new application. Give it a name (which must be valid as a hostname in format). You will later be accessing this as https://NAME.DOMAIN/. You might consider ‘gl-mt3000’ as a name.
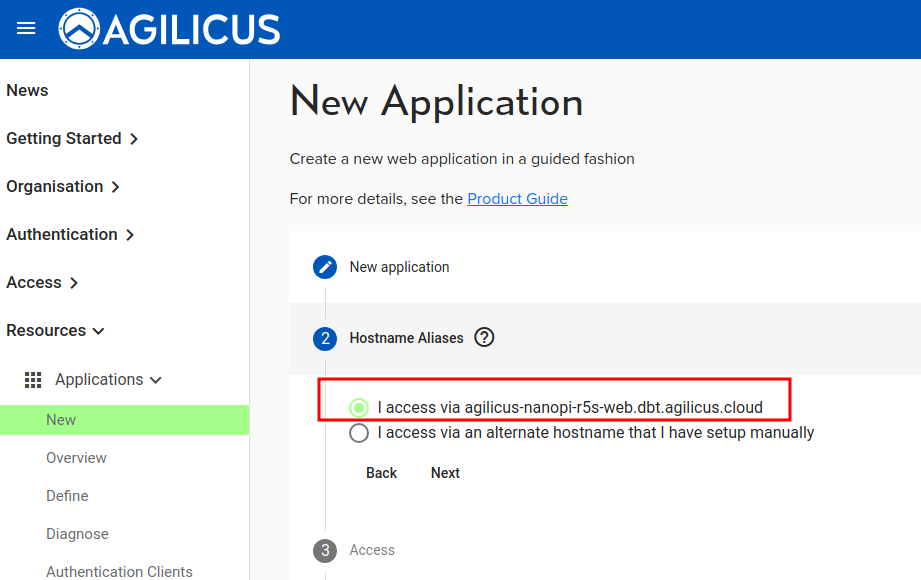
You may, if you wish, have a well-known alias to this new web interface. This is more commonly done with very public ones (e.g. a Wiki or Timesheet system). Leave it as default and the Agilicus AnyX will create the hostname for you.
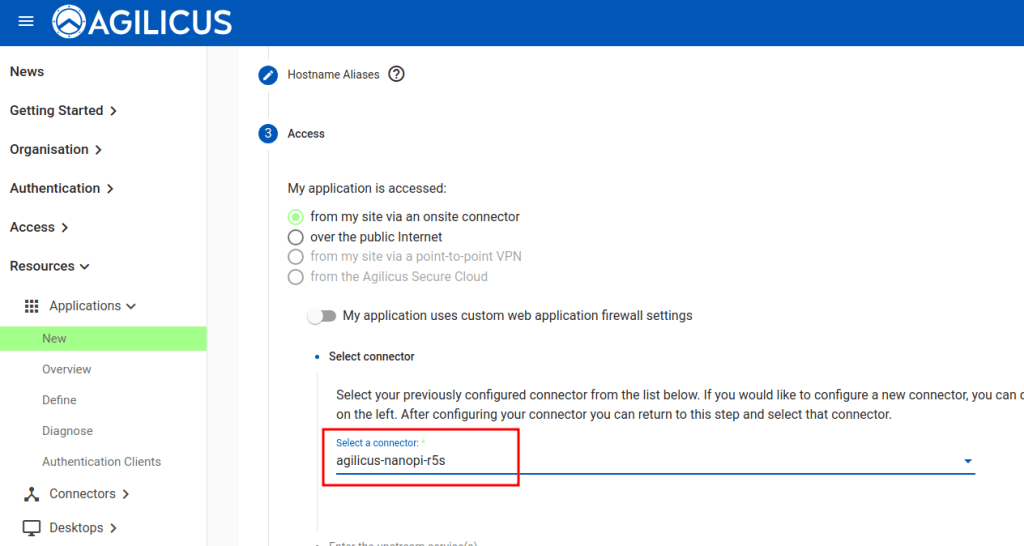
Select the connector from the previous step.
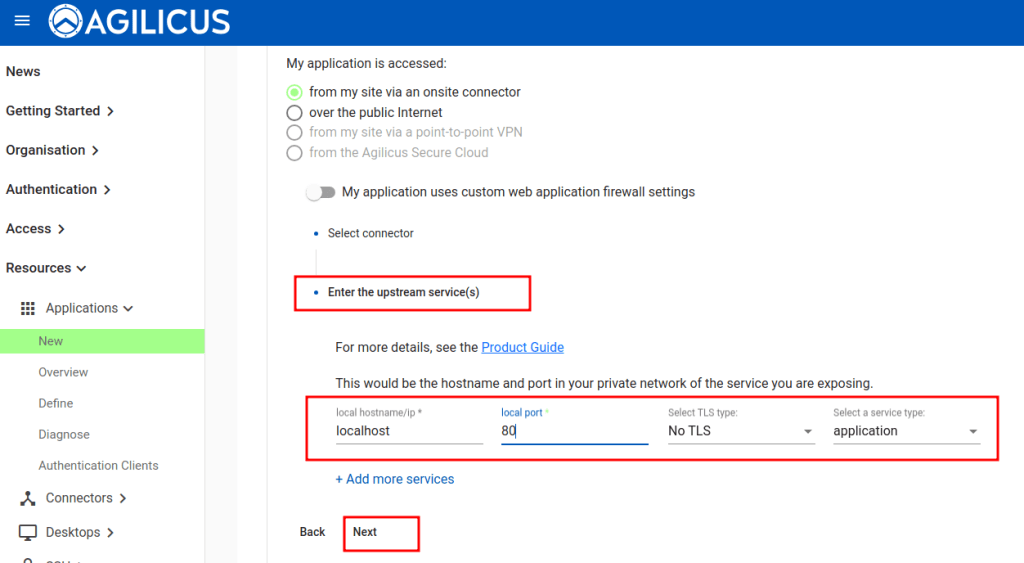
The connector has to know where to send the request (it is a proxy). The ‘upstream’ in this case is the GL-MT3000 itself, e.g. localhost port 80.
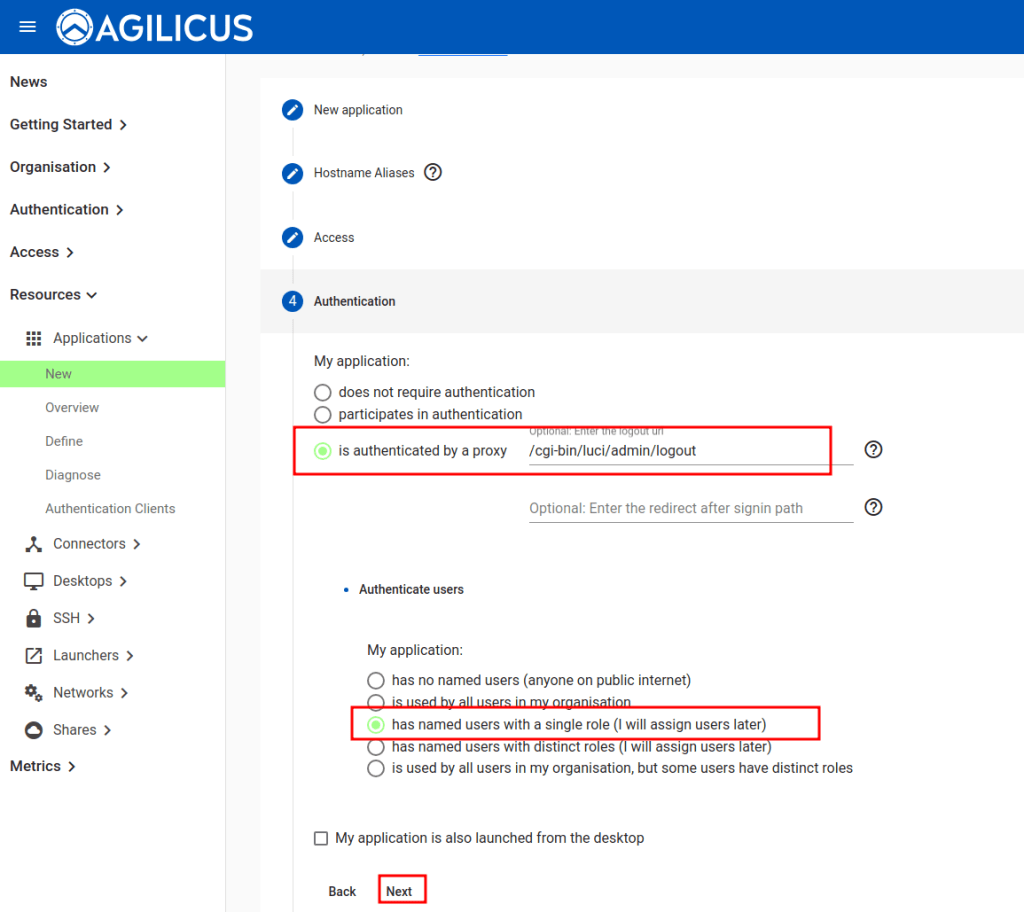
For a bit of additional security we can tie the ‘logout’ URL of the GL-MT3000 web interface to the Agilicus AnyX logout by copying in the URL of the logout. This is optional.
We also suggest that named users with a single role, configured later, for this sample. Normally you would create a group, e.g. ‘Web Admins’ and assign users to it.
At this stage we are done, select ‘Apply’.
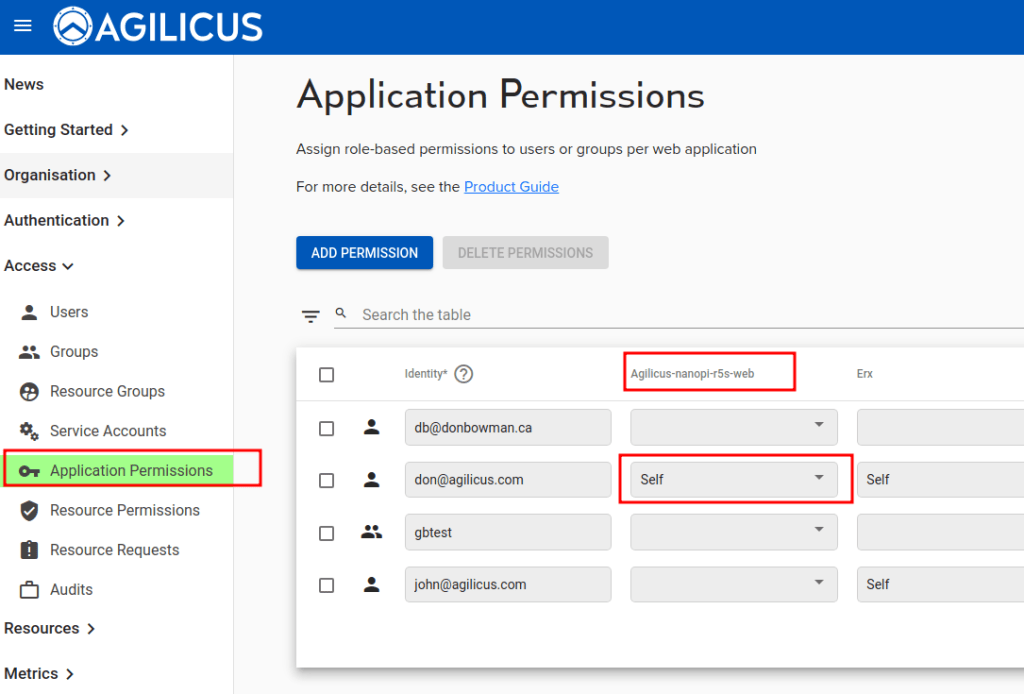
Now we will assign ourselves permission to use this new web resource.

To make the profile a bit more ‘fun’ we can now assign a logo (an icon) to the launch of this web interface. In this ‘define’ section we could also refine the Web Application Firewall rules etc.
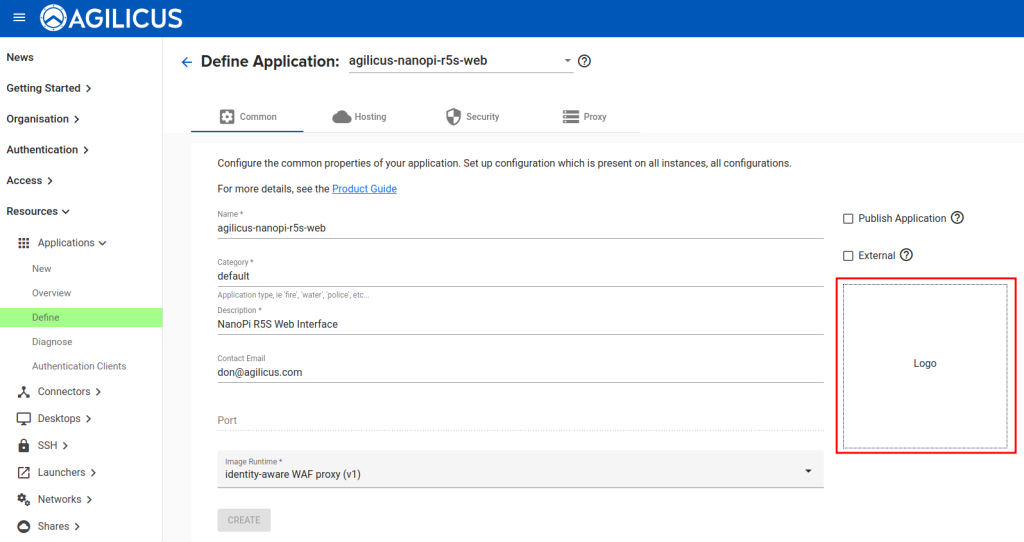
Any image file (we suggest about 512×512) is suitable for a logo.
At this stage we are done. We have:
- created and installed a connector on this GL-MT3000
- created a Web resource (to the NanoPi itself)
We can now test our work. Open https://profile.__MYDOMAIN__/
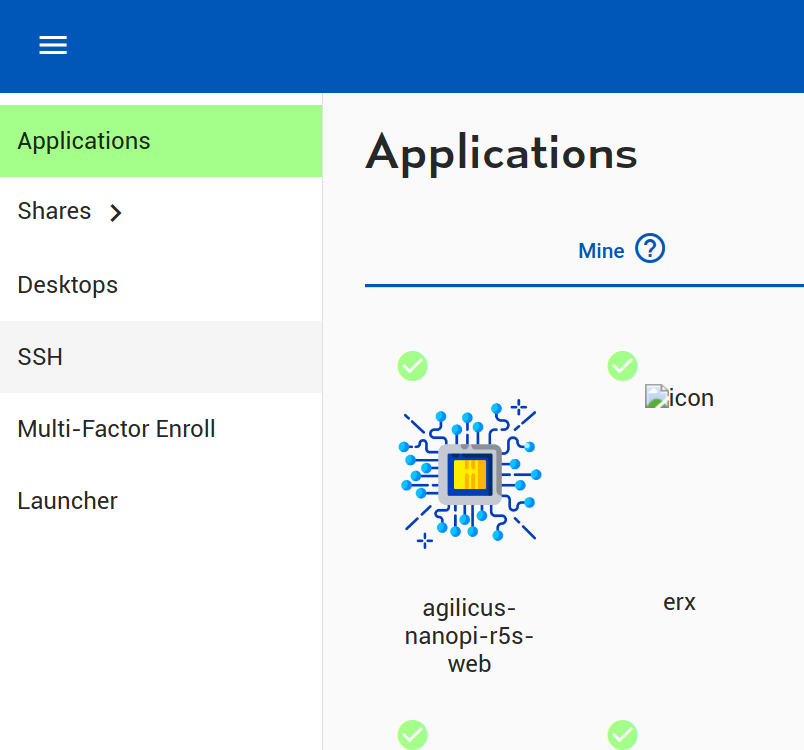
Once you have signed in, you will see an icon for the new web resource, if you click it, a new browser tab will open. Observe the URL (https://NAME.DOMAIN). You can use this directly without profile if you wish. If you sign in, you will see the GL-MT3000 web interface directly. Now try it from a different network (e.g. your mobile phone, disable WiFi). Observe you can still connect. Now try with an unprivileged user (e.g. a different Gmail account), observe you cannot sign in.
The ‘profile’ interface acts as a launch pad for the end-user. It will act as a Progressive Web Application (e.g. ‘add to homescreen’ on your mobile), giving you a single launch icon.
You may also use the resources it points to directly: it is your choice.
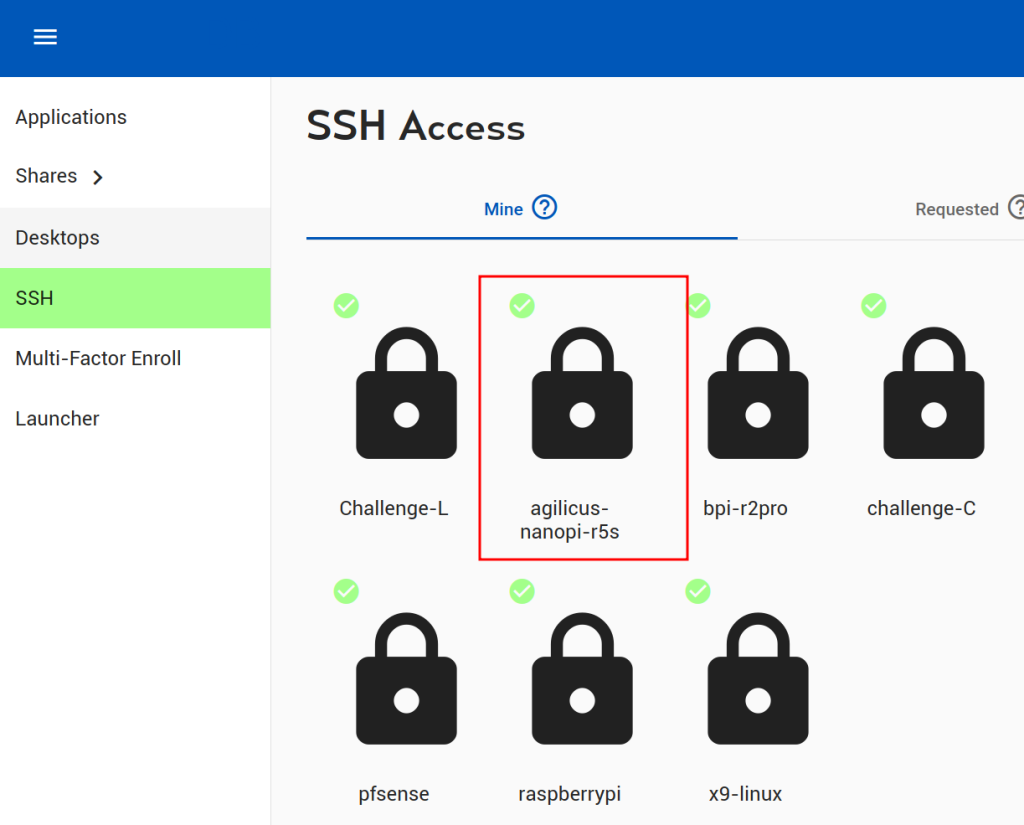
We can test the SSH access. From profile, select the resource we created earlier.
We will see a ‘login’ dialog appear, enter the username (root) and password to the GL-MT3000.
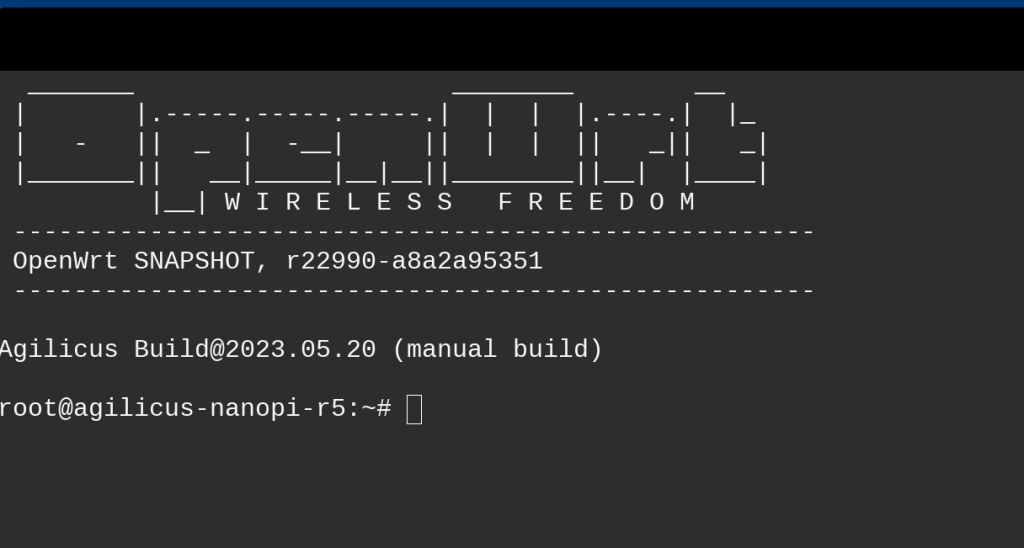
At this stage, we should see an SSH terminal.
From here, consider using the ‘Launcher’ install feature of profile, add the Browser Extension. You will now see an entry on your start menu for this SSH, opening the native client (e.g. if you have Putty or OpenSSH installed).
Similarly to the Web Resource, only users with permission are able to sign in. You may also choose to enable multi-factor authentication on your user and observe how this functions with the Web..
