Overview: Agilicus Connector Mikrotik Router
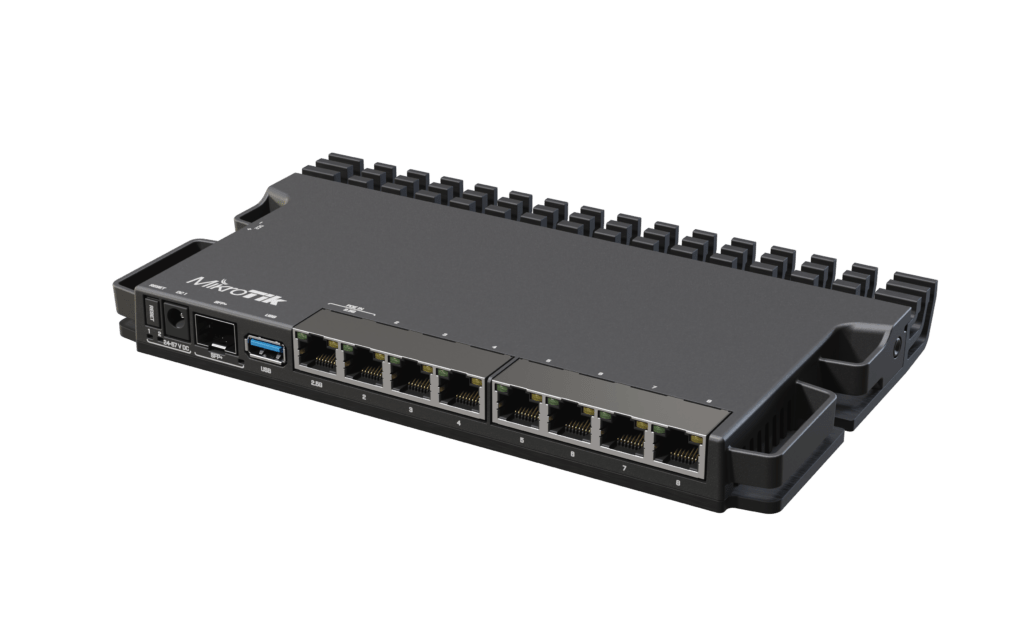
The MikroTik RB5009UG+S+IN is a small-form factor router. it is a good vantage point to run the Agilicus Connector. NOTE: this is an ARM-based device, not X86.
Other MikroTik devices may work as well, MikroTik has a broad family of devices. In order to be appropriate for the Agilicus Connector, they need to support:
- container package
- ARM or x86 processor
- 100MiB or more of storage space
- 256MiB or more of memory
The below instructions were tested on the RB5009UG+S+IN with v7.8 and v7.9RC, specifically:
/system/resource/print
                   uptime: 16h23m57s
                  version: 7.8 (stable)
               build-time: Feb/24/2023 09:03:00
         factory-software: 7.1
              free-memory: 3830.4MiB
             total-memory: 3904.0MiB
                      cpu: AMD
                cpu-count: 2
            cpu-frequency: 2903MHz
                 cpu-load: 0%
           free-hdd-space: 915.7MiB
          total-hdd-space: 980.0MiB
  write-sect-since-reboot: 301984
         write-sect-total: 301984
        architecture-name: x86_64
               board-name: CHR
                 platform: MikroTik
The below instructions were performed using the MikroTik CLI. They may also be performed via the Web GUI or the WinBox.
Detailed Installation Steps
Note: the first steps assume you have not enabled container-package and networking on the RouterOS device. If you have, skip ahead to the Setup config-volume step.
Step 1: Enable Container
For more information, see MikroTik Container Instructions.
/system/device-mode/update container=yesAfter this is complete, confirm it is enabled:
system/device-mode/print
       mode: enterprise
  container: yes
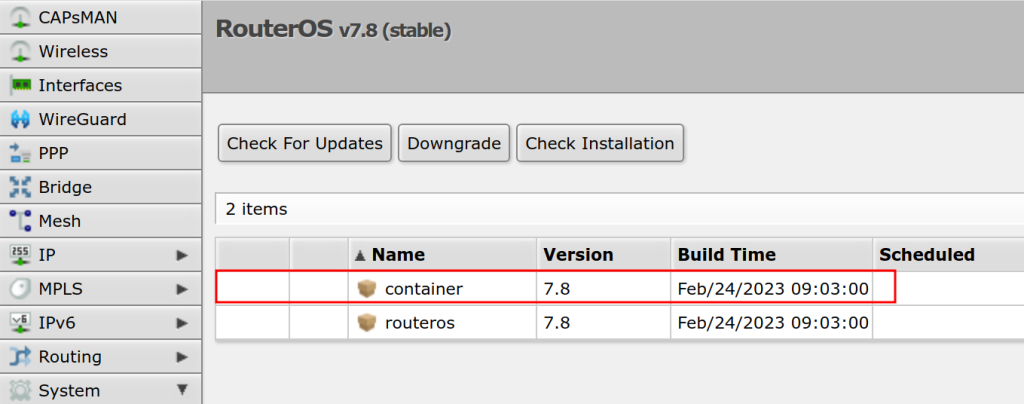
If you are using the Web or WinBox configuration, you will see a package installed as below:

Confirm the container command exists:
/container/print count-only
0
Step 2: Setup container networking
Now we will enable a virtual Ethernet bridge (veth1) and assign it to the container use. If you wish, you may use direct interfaces without NAT by assigning a second IP, or, by assigning physical ports. Later when the Agilicus connector is installed, it will need to be able to resolve DNS and perform outbound connectivity to api.agilicus.com
/interface/veth/add name=veth1 address=172.17.0.2/24 gateway=172.17.0.1
/interface/bridge/add name=dockers
/ip/address/add address=172.17.0.1/24 interface=dockers
/interface/bridge/port add bridge=dockers interface=veth1
/ip/firewall/nat/add chain=srcnat action=masquerade src-address=172.17.0.0/24
Step 3: Confirm sufficient storage space
Note: Use the internal eMMC if it exists. You will need approximately 100MiB.
/system/resource/print
 ...
           free-hdd-space: 962.0MiB
          total-hdd-space: 980.0MiB
 ...
Step 4: Create configuration mount
Note: the Mikrotik is very fussy about mounts. It must create them itself (rather than being created by e.g. sftp). It will create a magic file called ‘.type’ in the mount dir, do not delete or modify this file.
/container/mounts/add name=etc_agilicus dst=disk1/etcStep 5: Setup image registry
Note: the cr.agilicus.com/pub/images/agilicus-agent/client:stable image is multi-arch (AMD64, ARM64). If your MikroTik is not one of these, it will not function. If your MikroTik does not support multi-arch containers (e.g. prior to v7.9), you may substitute one of these two tag names:
- cr.agilicus.com/pub/images/agilicus-agent/client:stable_amd64
- cr.agilicus.com/pub/images/agilicus-agent/client:stable_arm64
/container/config/set registry-url=https://cr.agilicus.com tmpdir=/disk1/pull
/container/add remote-image=pub/images/agilicus-agent/client:stable interface=veth1 root-dir=/disk1/client mounts=etc_agilicus envlist=env_agilicus start-on-boot=yes logging=yes comment=agilicus-connector
Now lets confirm:
/container/print detail
 0 ;;; agilicus-connector
   name="fe4a1d62-95b4-479f-95b0-a6aede732c43" tag="pub/images/agilicus-agent/client:stable" os="linux" arch="amd64" interface=veth1 envlist="env_agilicus"
   root-dir=/disk/client mounts=etc_agilicus dns="" start-on-boot=yes status=stopped
Step 6: Create the config file (on your desktop PC)
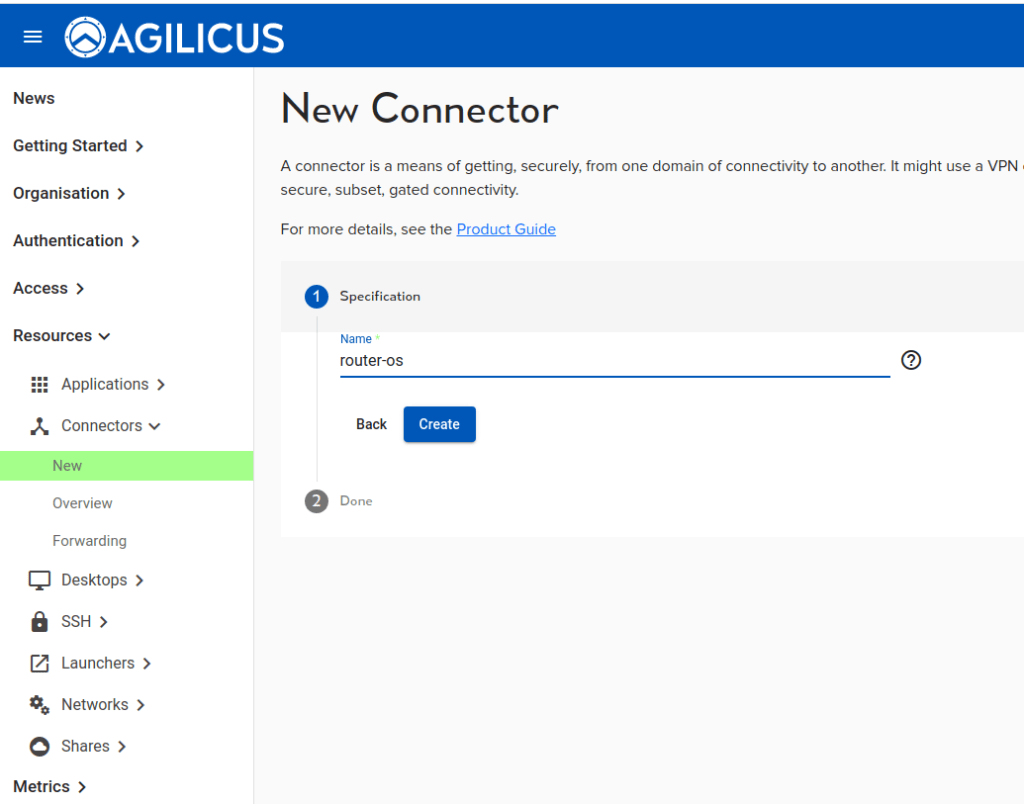
Create a connect as usual in the Resources/Connectors/New screen:

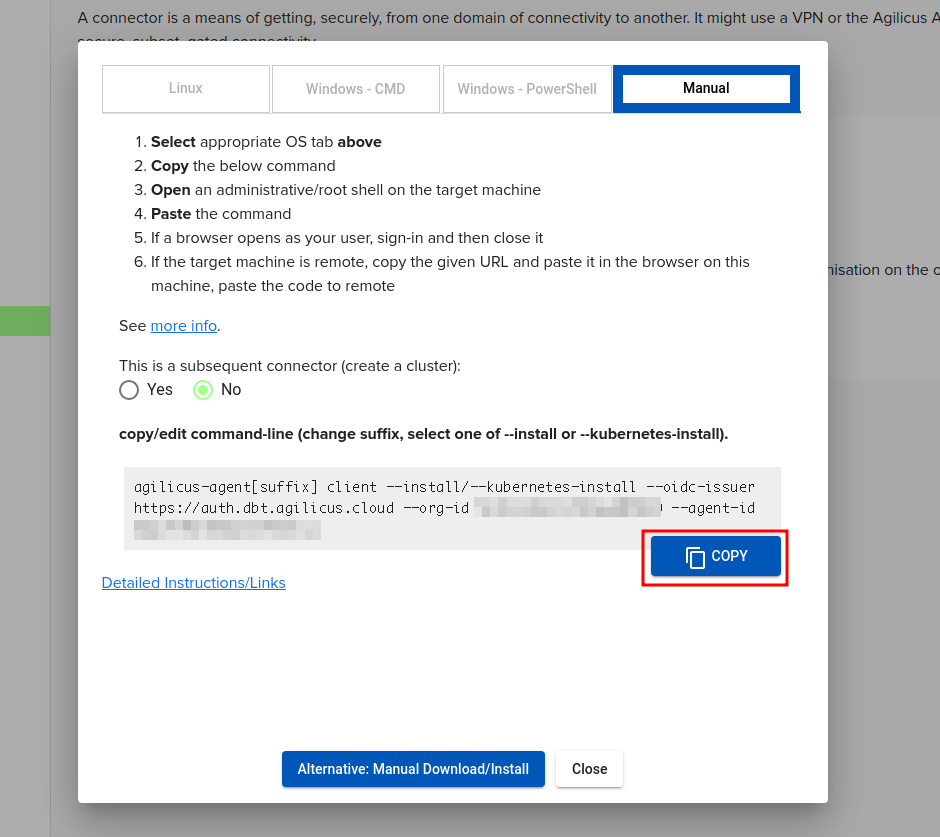
We will select the ‘Manual’ install and copy the command line. We will make some modifications to it before running.

Now, create a new empty ‘etc’ directory and cd into it.
mkdir etc
cd etc
Paste the manual install command from above and edit it before hitting enter. The sample line will look like:
agilicus-agent[suffix] client --install/--kubernetes-install --oidc-issuer https://auth.dbt.agilicus.cloud --org-id XXXXX --agent-id XXXXXModify it to be something like below and then run it. There is no need to be admin/root, this will not install any software, merely create the configuration files. We are just changing the beginning of the command line to be “agilicus-agent client –remote-install”, leave the –oidc-issuer onwards unchanged.
Note: you will need a local copy of the software on your desktop to create the config file. It does not need to be installed. If you do not have this, you can download the Linux Binary, or the Windows Binary.
agilicus-agent client --remote-install --oidc-issuer https://auth.YOURISSUER --org-id XXXX --agent-id XXXA browser will open to create the Service Account and credentials. The output will look like:
INFO[2023-03-17T20:14:28-04:00] Starting client - version v0.172.3

 You have **2** methods to provide your authentication. Use the most convenient.
 1. You may see a browser open. If you sign in to it, this flow will complete
    automatically, and ignore the url below/paste.
 2. You will see a URL appear here. Cut and paste that into a browser you are
    signed-into. It will then give you a code to paste here.

 Typically #1 is used if you are signed into this machine directly, and #2 for
 ssh or remote desktop or embedded devices.

If a browser did not open automatically, please open this link in
your desktop browser to retrieve the authentication code, and paste below:

 https://auth.MYDOMAIN/auth?client_id=XXXXX

Enter verification code:
INFO[2023-03-17T20:14:35-04:00] Will install into Will install into directory /tmp/remote-4139368021
INFO[2023-04-23T12:30:33-04:00] Download root key file
INFO[2023-04-23T12:30:33-04:00] Fetch agent configuration
INFO[2023-04-23T12:30:33-04:00] Write agent configuration file in temp directory
INFO[2023-04-23T12:30:36-04:00] Create connector instance
INFO[2023-04-23T12:30:36-04:00] creating connector instance
INFO[2023-04-23T12:30:37-04:00] Join a connector cluster
INFO[2023-04-23T12:30:37-04:00] Remote installation config created successfully
INFO[2023-04-23T12:30:37-04:00] Copy <<agent.conf.enc.yaml public_key.json pubring.gpg root.json secring.gpg>> to remote
At this stage, there should be 4 files in a directory like /tmp/remote-4139368021:
agent.conf.enc.yaml public_key.json pubring.gpg secring.gpgStep 7: Start the Agilicus Connector container
Note: its important to let the Mikrotik router create the config directory by itself. It creates a ‘magic’ file called .type inside the dir. Without this step, the config directory will be read-only within the container.
/container/start 0After this, check that it is running (and repeat until it is running)
/container/print detailStep 8: Copy the files to the router-os volume:
scp /tmp/remote-4139368021/* admin@192.168.122.33:/disk1/etc/Step 9: Restart container
Since we copied the config in after letting the container start, we must now restart it.
/container/stop 1
(wait until stopped, use /container/print to see)
/container/start 1
Step 10: Complete, Checks
At this stage we are complete. We can perform some diagnostic checks:
/container/print
 0 ;;; agilicus-connector
   name="fe4a1d62-95b4-479f-95b0-a6aede732c43" tag="pub/images/agilicus-agent/client:stable" os="linux" arch="arm64" interface=veth1 envlist="env_agilicus"
   root-dir=/disk1/client mounts=etc_agilicus dns="" start-on-boot=yes status=running
You can see the logging and output with the ‘/log/print’ command.
❗
There is a maximum of 4 instances of a given Connector allowed.
In the admin web interface, if you see multiple and did not intend, you may need to remove some if you have been iterating on debugging.
