Agilicus Connector
Microsoft Windows
Install the Agilicus Connector on Microsoft Windows.
Versions Supported
The Agilicus Connector will run on any version of Windows XP or later. However, prior to Windows 10, the ‘curl’ command, used as part of the install, was not present, and you may need to manually install it.
If your Windows version is old or unpatched, it may be missing the Let’s Encrypt Intermediate certificate, see https://letsencrypt.org/certificates/
Installation
Windows 10 and later come with a command pre-installed called ‘curl‘ that allows for 1-click automatic install.
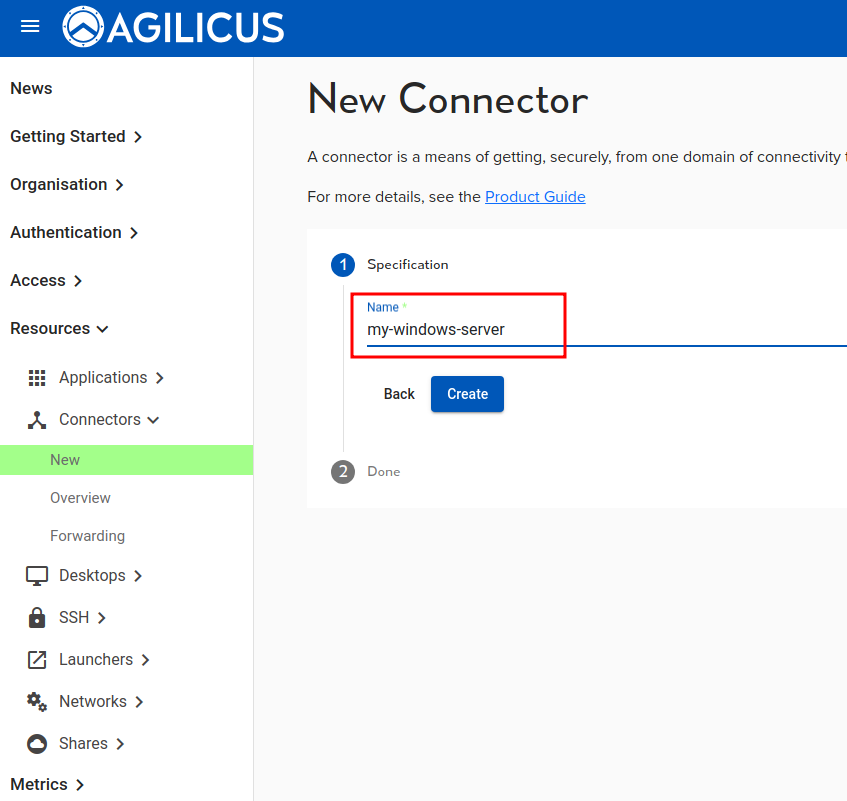
To create and install a connector, first, on your desktop PC (where you have the ADMIN url open), go to ‘resources/connectors/new’. Give your connector a name that means something to you (often the name of the machine you will install it on, or the site that it connects).
Click ‘create’. You will now be given the option to ‘Install Connector’. This brings up a dialog box as below. Select ‘WIndows – CMD’.
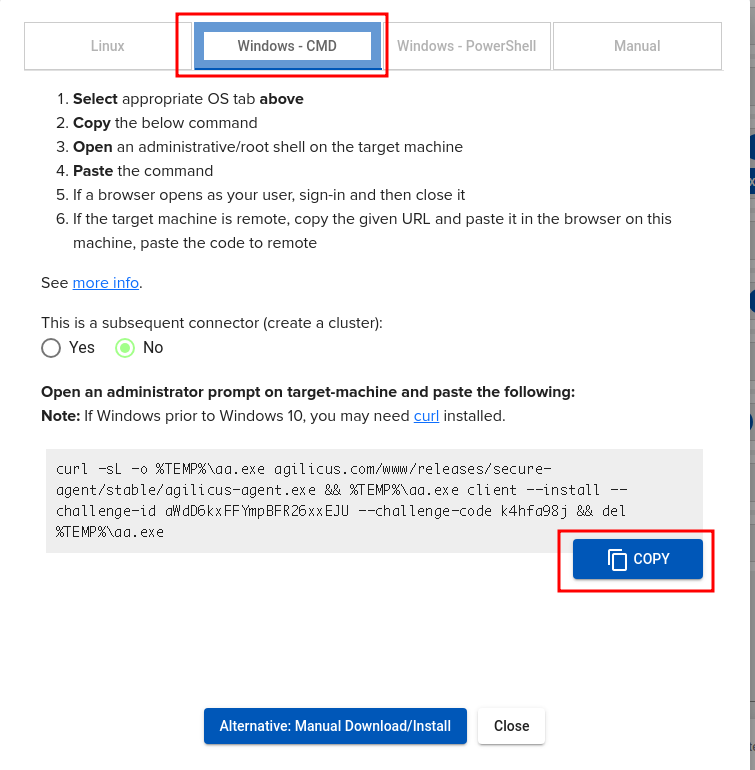
There is only 1 question on this dialog “This is a subsequent connector (create a cluster)”. Select this if you have more than one computer running the same connector instance in a high-availability cluster.
Select the ‘COPY’ button. This will place the command line into your clipboard.
At this stage we must switch to the computer where you will run the connector. It might be this same machine, it might be another accessible via Remote Desktop or VNC.
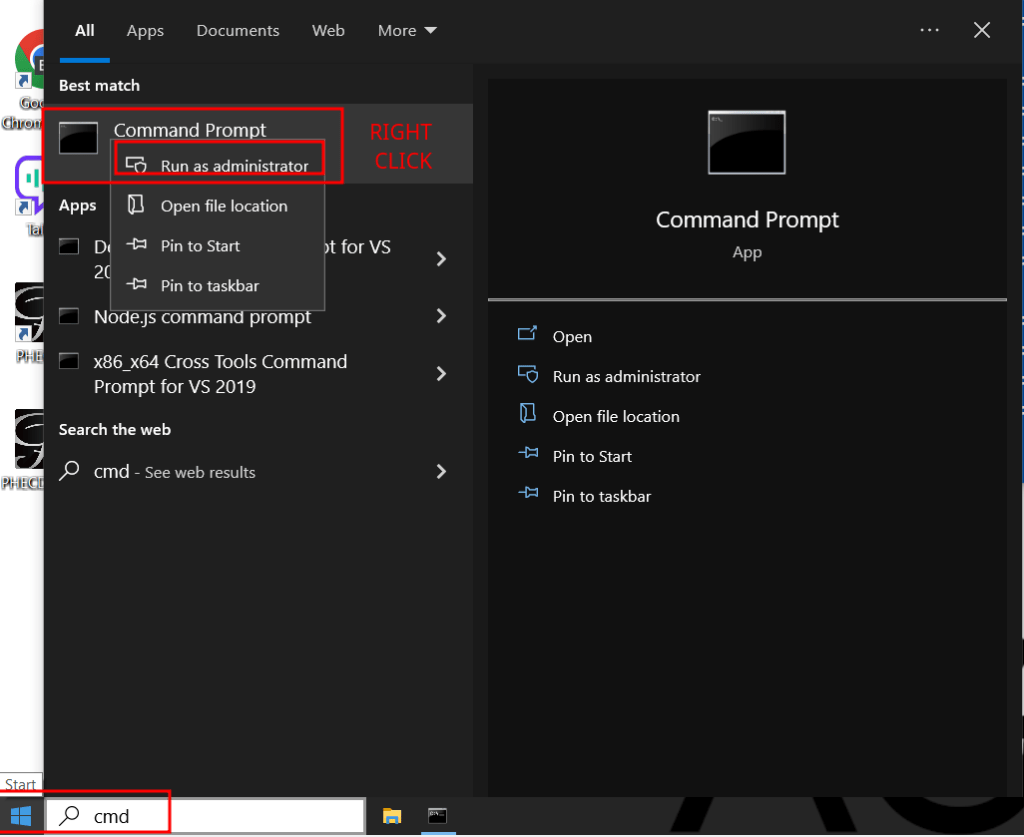
On the target computer, open a ‘Command Prompt’ as administrator:
- Go to ‘Start’
- Type ‘cmd’
- Right click ‘Command Prompt’
- Select ‘Run as administrator’
This will open a ‘cmd’ shell.
We can quickly test that ‘curl’ is installed by running ‘curl ifconfig.me’. This will print our current public IP address. Curl is pre-installed as part of Windows as for Windows 10 and Windows 2016. If you do not have curl installed, you may try the PowerShell instructions from the dialog, or, install curl manually.
C:\WINDOWS\system32>curl ifconfig.me
99.250.30.222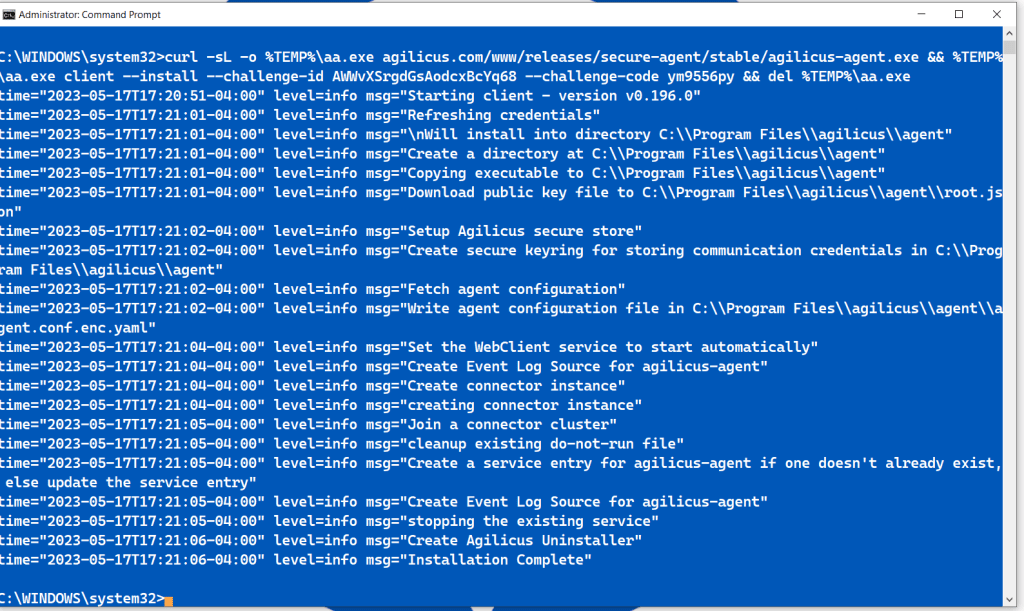
We can now paste the command we obtained from the ADMIN UI.
Paste the command as below. The correct output will be similar to what is shown, ending in ‘Installation Complete’
It is possible you will run into some errors, the most common relate to:
- Time setup. Your computer should be time-synced (using NTP). This is important for proper cryptography.
- Firewall. Your computer may block outbound access to https://www.agilicus.com
- Intermediate Certificate. If your computer has not run Windows update since 2021, it may be missing the Let’s Encrypt intermediate certificate.
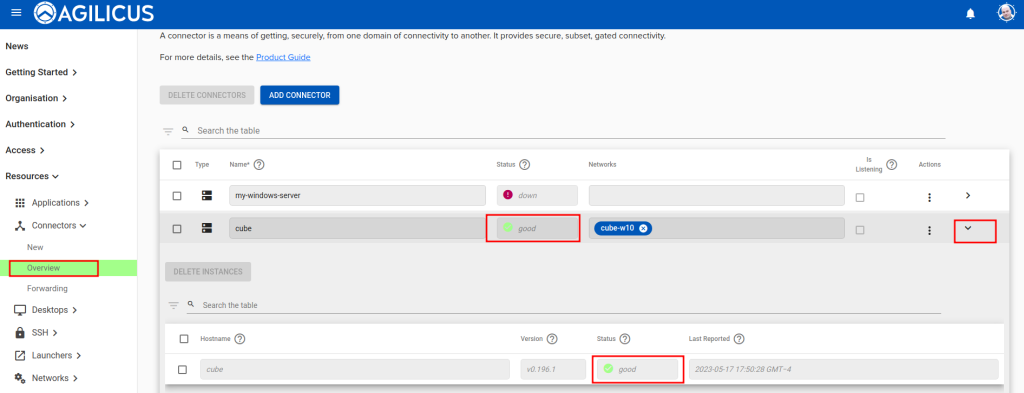
At this stage you are complete and may close the command window.
In the ADMIN UI you can check the status of your connector, it should move to ‘GREEN/GOOD’ (you may need to refresh this screen).
General Notes
NOTE: Timeout
For security reasons, the command you will paste has a time limit before it expires of 10 minutes. If it expires, simply generate a new one in the ADMIN interface and paste it.
In this case, you will see an error like: “Installation failed due to the following error: could not claim challenge code: 400 Bad Request. Do not run the command again; generate a new one. See https://www.agilicus.com/anyx-guide/agilicus-connector/#h-installation“
NOTE: WebClient Service
You may need to manually enable the Windows WebClient service if you will use the connector to mount a remote WebDav Share to this machine. Normally this is set to run on demand, but in some environments it may be disabled.
NOTE: Windows Failover Clustering High Availability
To configure the Agilicus Agent for 1+1 ACTIVE/PASSIVE on Windows Cluster Server, use a Generic Service. For more information, see Agilicus Windows Cluster Server
NOTE: Windows Defender False Positive
Some installations have observed, using the PowerShell installation instructions, a false-positive detection for Trojan:Script/Sabsik.TE.B!ml. This has been submitted to Microsoft for re-evaluation, but they have been unable to reproduce. If this occurs, you can override this detection for this specific binary.
NOTE: 2012 PowerShell: Could not create SSL/TLS secure channel
Older versions of Windows may be missing the R3 root certificates (see Microsoft note). This can prevent usage of modern cryptographic https sites. Let’s Encrypt has more information, including a diagram of the full chain of trust.
You may find you need to run Windows Update, or, manually remove the old R3 intermediate and add the new one from Let’s Encrypt.NOTE: CHANGE RUNNING USER/PERMISSIONS
In some circumstances you may change the user the connectr runs as (the windows service user) after initial installation. If you do this, it is important to change ownership of all of the files in C:\Program Files\Agilicus to make the user.
Diagnostic Logs – Windows Eventvwr
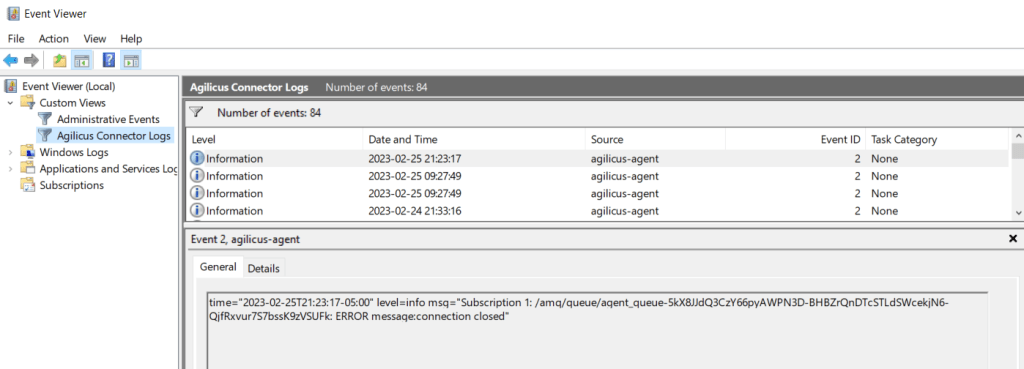
The Agilicus Connector sends diagnostic and access logs to Windows Eventvwr by default. To view these logs on a standalone-basis, you might consider creating a custom view.
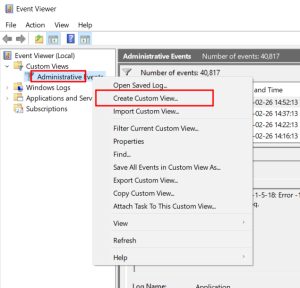
- Open Microsoft Windows eventwr (from Start menu, type ‘eventvwr’)
- Right click in custom views
- Create Custom View
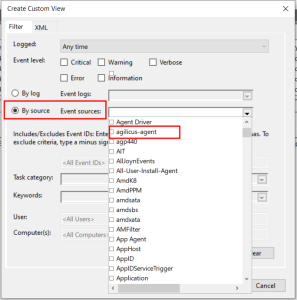
- Select ‘By Source’, and ‘agilicus-connector‘. Enable each Event Level of interest (e.g. Critical, Warning)
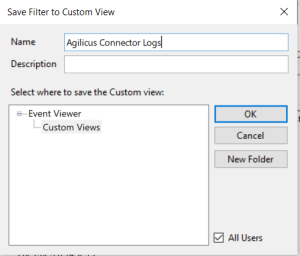
- Save as ‘Agilicus Connector Logs’
Once this is complete, you will see a new custom view as below. You may then browse the logs or e.g. right-click and save a text file for forwarding.
File Permissions Correction
If your connector shows a warn status, it could mean that the file does not have sufficient permission for Agilicus’ connector. To give access files/folders the correct permissions,
Automatic Permission Fix Instructions
Download and run this script (in Powershell) as access.ps1, or, follow the manual instructions below.
$path="C:\Program Files\agilicus"
$user=Get-CimInstance -Class Win32_service -filter "Name = 'agilicus-agent'"| select -expand startname
if ( $user -Match "LocalSystem" ) { $user="NT AUTHORITY\SYSTEM"}
$acl = Get-ACL -Path $path
$AccessRule = New-Object System.Security.AccessControl.FileSystemAccessRule($user,"FullControl","ContainerInherit,ObjectInherit","None","Allow")
$acl.SetAccessRule($AccessRule)
$acl.SetAccessRuleProtection($False,$True)
$acl | Set-Acl -Path $path
Manual Permission Fix Instructions
See which user accounts are running the service
- Right-click on the Start button to open the WinX Menu
- Select Run
- Type services.msc in the Run box which opens
- Windows Services Manager will open.
- Under the Name column, you will see Agilicus Connector
- You will see the user running this service in the Log On As Column
Update the Folder with correct user/permissions
- Right-click the folders (Typically “C:\Program Files\agilicus”)
- Select Properties. The Properties dialog box appears.
- Access the Properties dialog box.
- Select the Security tab.
- Click Edit. The security tab opens in a new window.
- Click Add… The Select Users, Computers, or Groups dialog box appears.
- In the Enter the object names to select text box, type <username> and check
- Click OK. The Properties dialog box reappears.
- Click OK on the Security window.
- Access the Properties dialog box.
- Select the Security tab.
- Click Edit
- In the Group or user name section, select <username>
- In the Permissions section, use the checkboxes to select Full control Allow
- Click Apply
- Click Okay
