NanoPI R2S
Simple Embedded System with Agilicus Connector
NanoPi R2S Background
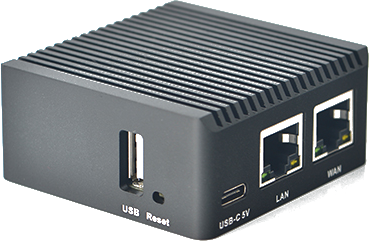
The NanoPI R5S has 2 x Gigabit Ethernet, 1GiB of RAM, and 32GB of eMMC storage. With its large passive heatsink it is an ideal platform to use as a small router. It also makes an ideal platform to run the Agilicus Connector.
The NanoPi R2S will run several operating systems (Ubuntu, Armbian, OpenWRT). In this document we discuss using it with OpenWRT.
Installing OpenWRT
As received, the NanoPi R2S will (usually) be running FriendlyWRT. You may feel free to use this, however it has some security flaws. Agilicus recommends using the native OpenWRT build. You may build it yourself, or obtain from the OpenWRT Project.
- Connect your laptop to the LAN ports (furthest to the USB-C power connector).
- Open a browser to http://192.168.2.1/
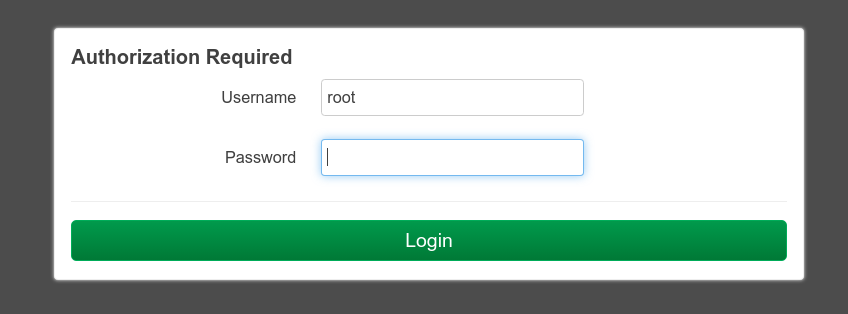
- Sign in as ‘root’, password ‘password’
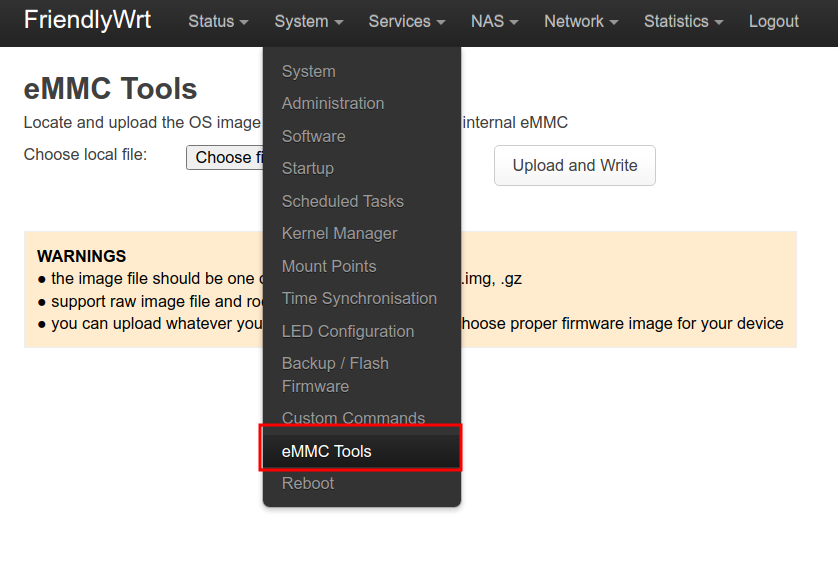
- Navigate to ‘System/eMMC Tools’
- Download (on your laptop) https://downloads.openwrt.org/releases/23.05.3/targets/rockchip/armv8/openwrt-23.05.3-rockchip-armv8-friendlyarm_nanopi-r2s-squashfs-sysupgrade.img.gz
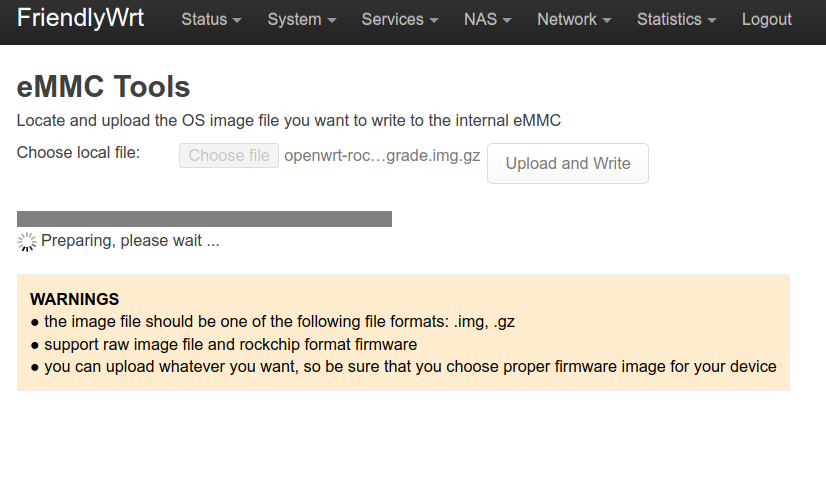
- Select ”Choose File’ and the file you just downloaded
- Select ‘Upload and Write’
- Wait approximately 90 to 120 seconds
At this stage you are running the Agilicus-supplied OpenWRT image.
Agilicus Connector Install
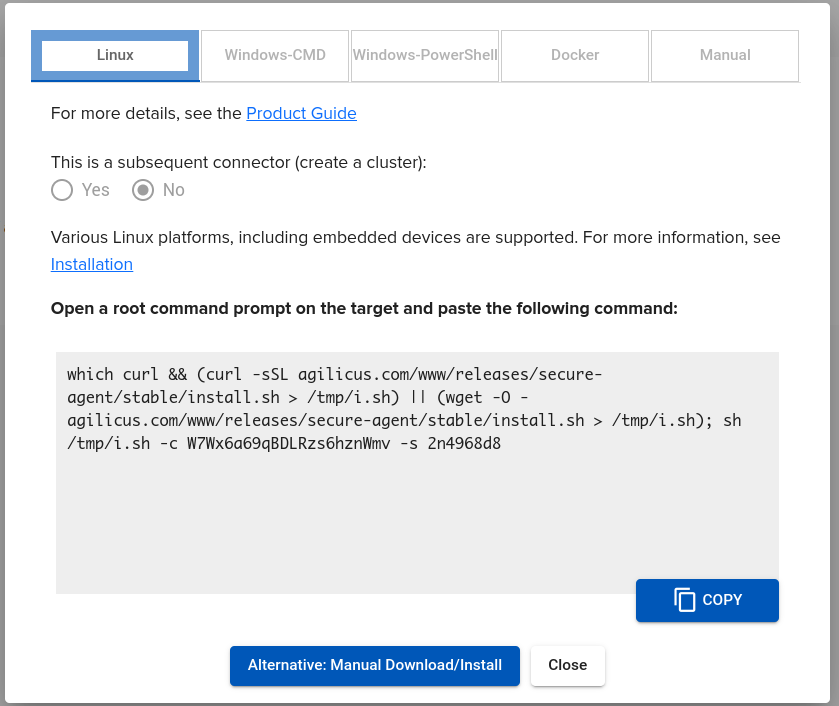
Using the Agilicus administrative portal, create a new connector. Use the ‘Linux’ instructions, copy.
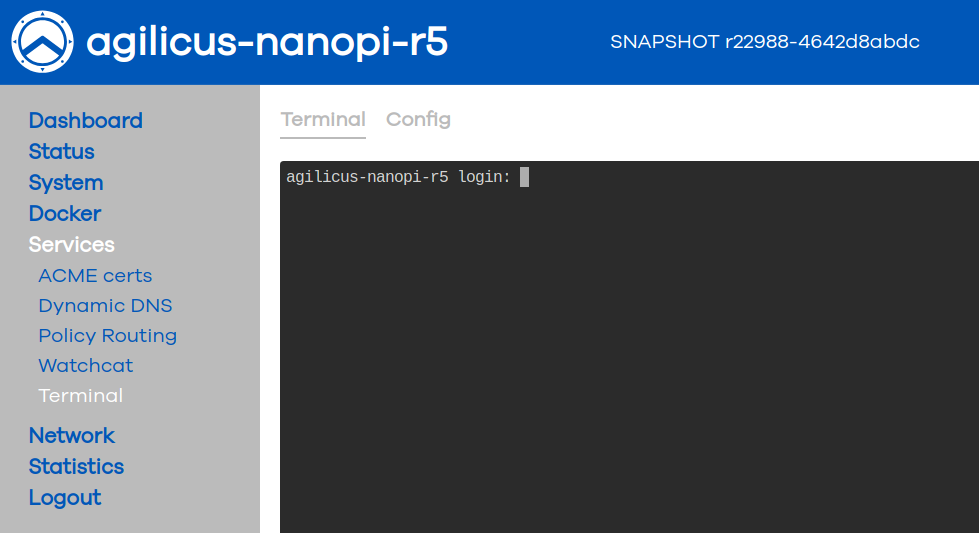
In the OpenWRT admin interface (http://192.168.2.1/), select ‘Services/Terminal’. Sign in as root and the password you selected. Paste (shift-insert).
At this time the connector should be installed and you may close the terminal.
You may wish to enable access to this router via the Agilicus AnyX platform (notably SSH and Admin web interface).
NOTE: DHCP Server Enable
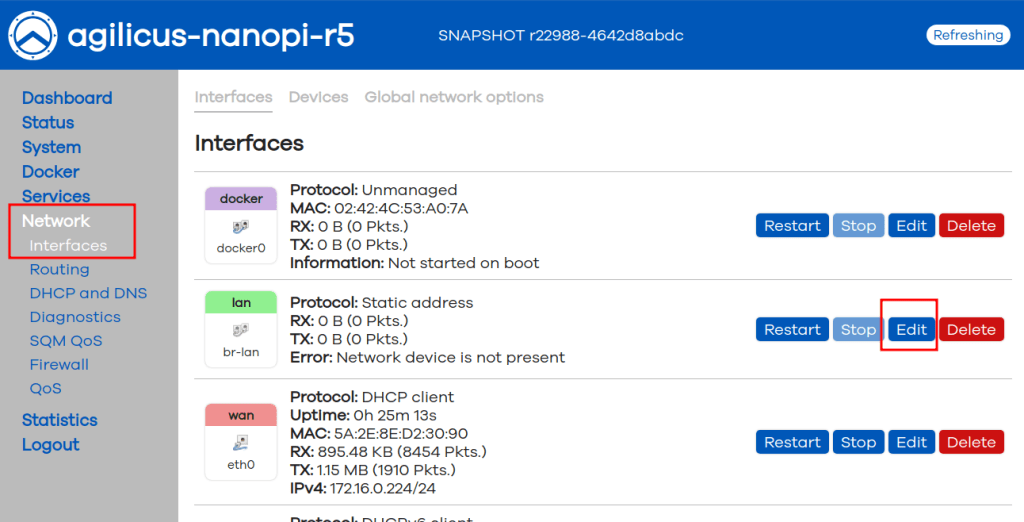
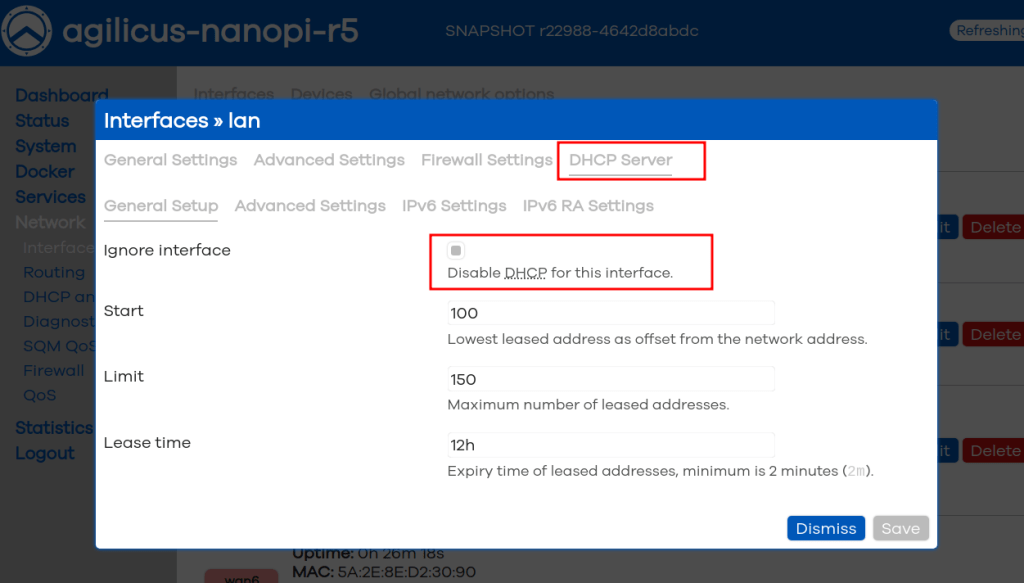
Depending on your use, you may wish to have a DHCP server on the LAN ports, you can enable this under ‘Network/Interfaces/LAN’. You may also configure your desired IP range here.
❗
It is appropriate to have a DHCP server on these LAN ports if this is an isolated network. If you are connecting to a larger network with an existing DHCP server, you probably wish to instead change the protocol on the LAN ports to DHCP Client.
NOTE: Time Sync (NTP)
Modern cryptography requires clock sync and accuracy on all devices. Typically this is performed via Network Time Protocol, however, in some environments this is blocked (e.g. HTTPS-only outbound).
If your clock is not sync’d (see System/Time Synchronisation menu), you might be able to use a local NTP server. If not, you can enable an HTTPS-based sync as below:
service htpdate enable
service htpdate start
This is going to use the Agilicus API to provide an HTTP-based (over HTTPS port 443) time service. Configuration can be observed in /etc/config/htpdate:
config htpdate 'htpdate'
	option enabled 0
	list server 'https://api.agilicus.com'
	option proxy_host ''
	option proxy_port '8080'
	option debug 0
	option sanity_check 1
	#list option '-4'
Security Hardening
Web Terminal Disable
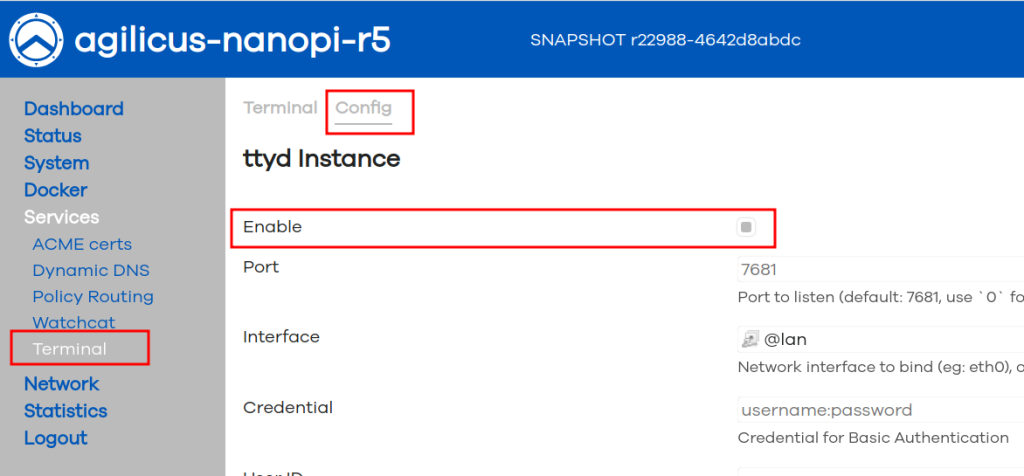
Once you have installed the Agilicus Connector, we recommend disabling the web terminal. On ‘Services/Termina’, select the config tab and remove the check-box beside ‘Enable’.
You may re-enable the web terminal later if you need it. However, we recommend using SSH instead for future command-line access.
The web terminal operates on a secondary TCP port (7681) and is not needed for normal operation.
SSH Setup
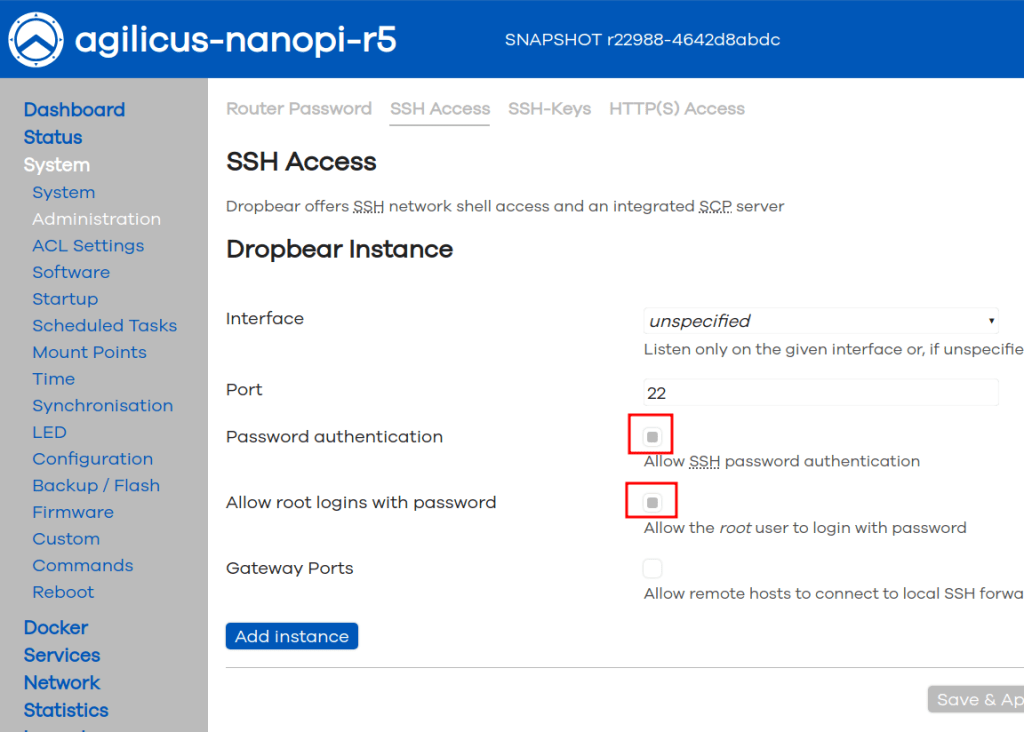
Agilicus recommends disabling password access to SSH in favour of SSH Keys.
On System/Administration, the SSH Access tab, uncheck ‘Password authentication’ and uncheck ‘Allow root logins with password’.
The rationale here is that password stuffing and guessing is a thing. Eventually someone will guess your l33t-hax0r password. Removing any ability to use passwords reduces the risk. In some controls environments any passwords can be disallowed.
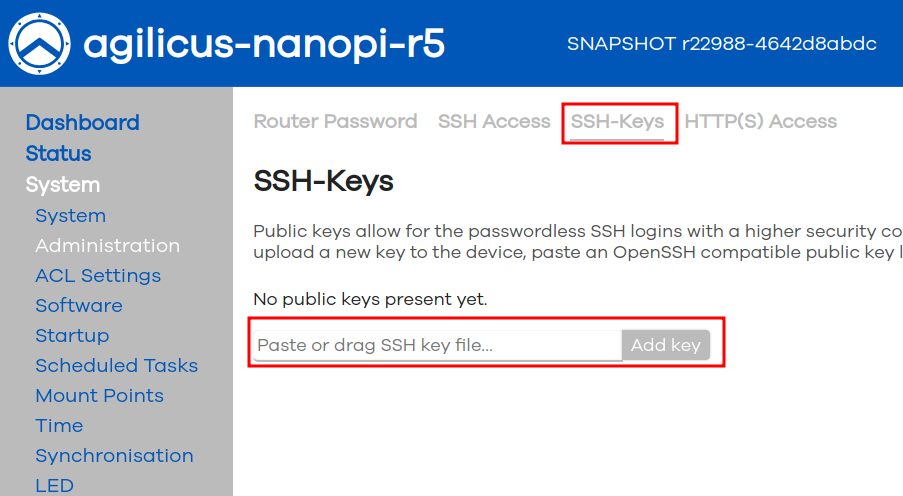
Once you have disabled password access, we recommend adding a SSH Key. Agilicus recommends using ed25519 SSH keys since they are smaller and more secure. Add your public key to the router here and place the private key (with passphrase!) in your SSH Agent on your desktop.
SSH keys are not only more secure, but also more convenient.
One downside to note: the Agilicus web interface for SSH is not currently compatible with SSH keys. If you wish to have SSH access to this device via the Agilicus Profile web interface, keep password on.
Firewall
At this stage, configure the firewall and NAT settings to suit on each of the interfaces. If the Agilicus Connector is providing Service Forwarder services, remember to open this ports on the router too.
We can check which ports are listening by running netstat -nlpt as below. Things with 0.0.0.0:PORT are available from outside the device. Things listening on 127.0.0.1, fe80::, ::1, etc, are locally bound only. In the example below, ‘uhttpd’ (the admin web interface), ‘dropbear’ (SSH) and ‘ttyd’ (the web terminal) are the only things listening.
root@agilicus-nanopi-r5:/# netstat -nlpt
Active Internet connections (only servers)
Proto Recv-Q Send-Q Local Address           Foreign Address         State       PID/Program name
tcp        0      0 0.0.0.0:443             0.0.0.0:*               LISTEN      2403/uhttpd
tcp        0      0 0.0.0.0:22              0.0.0.0:*               LISTEN      1049/dropbear
tcp        0      0 0.0.0.0:80              0.0.0.0:*               LISTEN      2403/uhttpd
tcp        0      0 172.16.0.224:53         0.0.0.0:*               LISTEN      1029/dnsmasq
tcp        0      0 172.17.0.1:53           0.0.0.0:*               LISTEN      1029/dnsmasq
tcp        0      0 127.0.0.1:53            0.0.0.0:*               LISTEN      1029/dnsmasq
tcp        0      0 0.0.0.0:7681            0.0.0.0:*               LISTEN      3942/ttyd
tcp        0      0 :::443                  :::*                    LISTEN      2403/uhttpd
tcp        0      0 fe80::582e:8eff:fed2:3090:53 :::*                    LISTEN      1029/dnsmasq
tcp        0      0 ::1:53                  :::*                    LISTEN      1029/dnsmasq
tcp        0      0 fe80::3400:a4ff:fe92:b43d:53 :::*                    LISTEN      1029/dnsmasq
tcp        0      0 :::22                   :::*                    LISTEN      1049/dropbear
tcp        0      0 :::80                   :::*                    LISTEN      2403/uhttpd
tcp        0      0 2607:fea8:1c43:a103::d67d:53 :::*                    LISTEN      1029/dnsmasq
tcp        0      0 fc01::3:582e:8eff:fed2:3090:53 :::*                    LISTEN      1029/dnsmasq
tcp        0      0 2607:fea8:1c43:a103:582e:8eff:fed2:3090:53 :::*                    LISTEN      1029/dnsmasq
tcp        0      0 fc01:0:0:3::d67d:53     :::*                    LISTEN      1029/dnsmasq
Sample Configuration: Connect to Local HTTP + SSH
This walk through shows an example of how, once the connector is installed (as per above), configuration of an HTTP and SSH interface to this local device. Once these are configured you could use the firewall to disable all external access. The high level steps are:
- Create Connector (Agilicus Admin)
- Install Connector (NanoPi Web Terminal)
- Create SSH Resource (Agilicus Admin)
- Create Web Resource (Agilicus Admin)
- Assign Web Resource Permission (Agilicus Admin)
- SSH to NanoPi from Agilicus Profile (Agilicus Profile)
- Open Web Interface to NanoPi (Agilicus Profile or direct)
OK, let’s get started. This will take approximately 5 minutes.
