Agilicus Connector – NanoPI R5S
NanoPi R5S Background
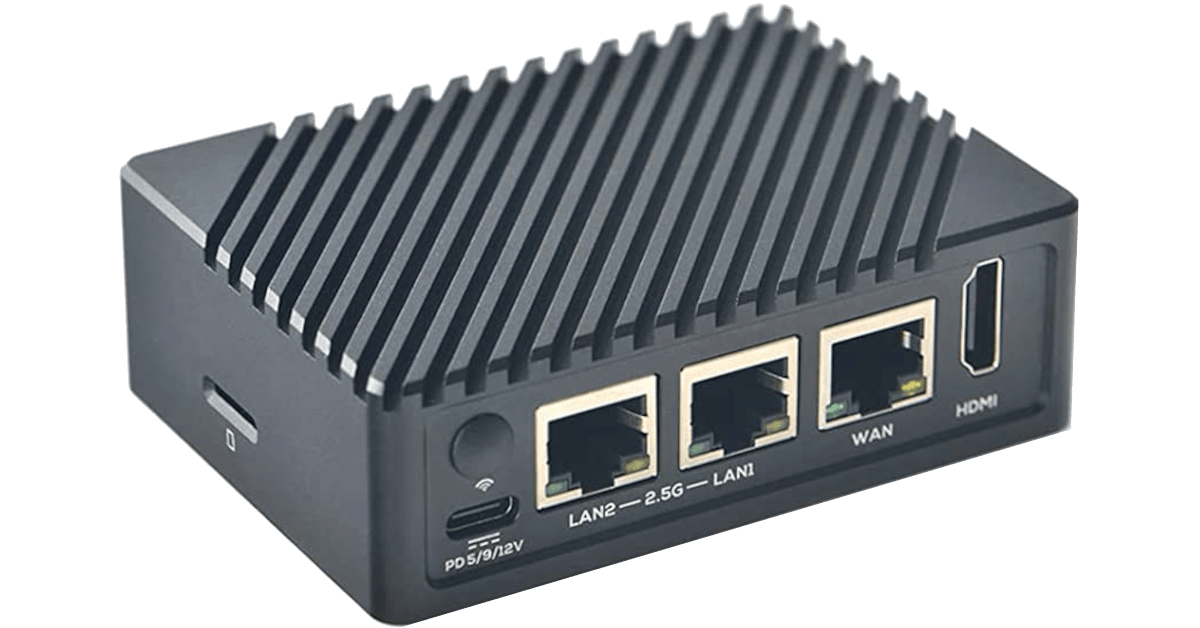
The NanoPI R5S has 1 x Gigabit Ethernet, 2 x 2.5 Gigabit Ethernet, 4GiB of RAM, and 32GB of eMMC storage. With its large passive heatsink it is an ideal platform to use as a small router. It also makes an ideal platform to run the Agilicus Connector.
The NanoPi R5S will run several operating systems (Ubuntu, Armbian, OpenWRT). In this document we discuss using it with OpenWRT. Specifically, Agilicus makes available a hardened-version of OpenWRT for this platform.
Installing Agilicus OpenWRT
As received, the NanoPi R5S will (usually) be running FriendlyWRT. You may feel free to use this, however it has some security flaws. Agilicus recommends using our build. You may build it yourself, or for convenience we supply an image here.
- Connect your laptop to one of the two LAN ports (closest to the USB-C power connector).
- Open a browser to http://192.168.2.1/
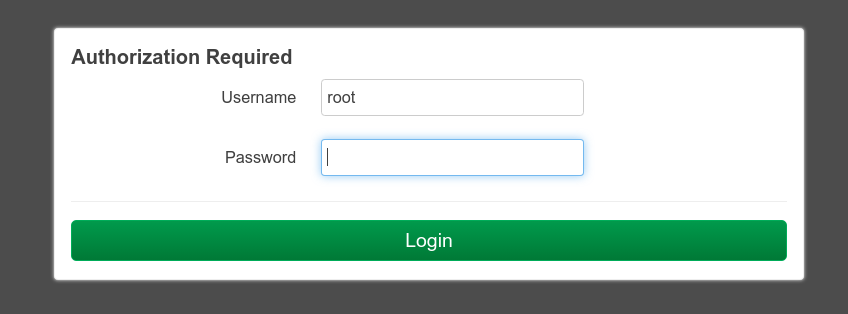
- Sign in as ‘root’, password ‘password’
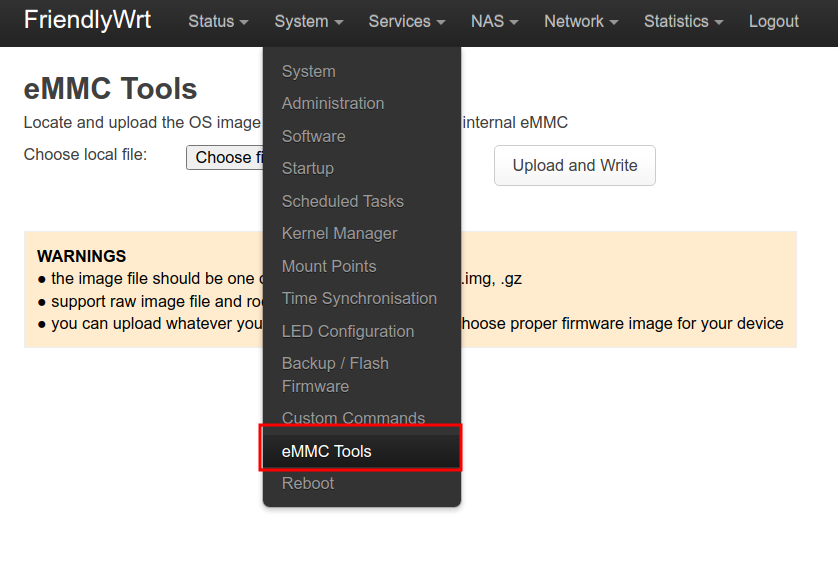
- Select ‘System/eMMC Tools’
- Download openwrt-rockchip-armv8-friendlyarm_nanopi-r5s-squashfs-sysupgrade.img.gz (previous release)
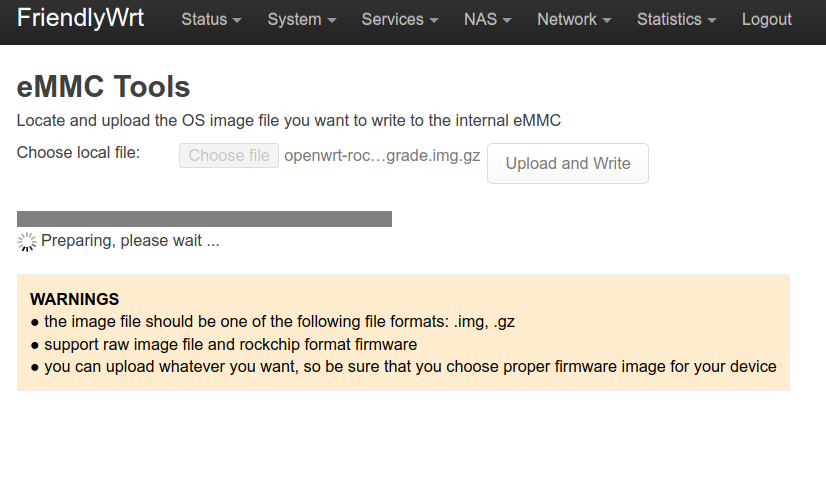
- Select ‘Choose File’. Select the file you downloaded
- Select ‘Upload and Write’
- Wait approximately 90s (until the lights stop flashing and it indicates its complete)
- Power off, power on
At this stage you are running the Agilicus-supplied OpenWRT image.
Router Setup
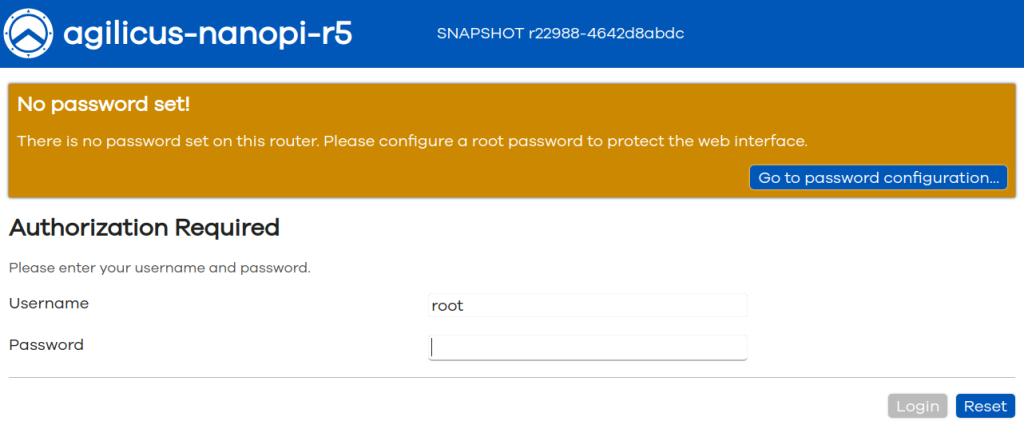
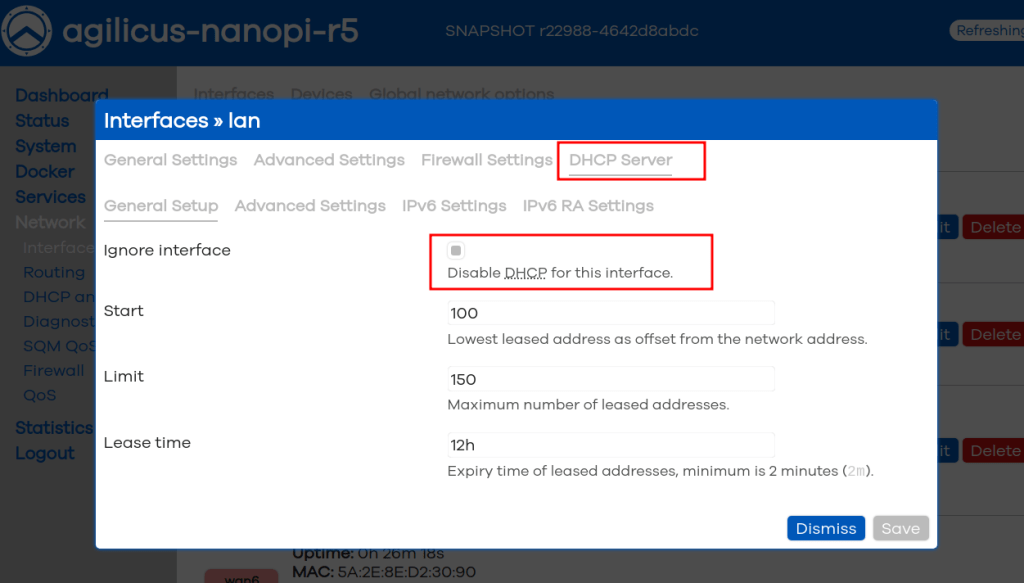
We have chosen to disable DHCP server by default (to avoid the risk of plugging this device into an existing network and causing confusion). To initially connect, plug your laptop into one of the LAN ports (closest to the USB-C connector) and set the IP on your laptop to ‘192.168.2.2’ and connect to http://192.168.2.1/ via your browser.
On first sign-in, you will be prompted to set a password. Choose something strong (later we will suggest a way that the router is blocked for password access entirely).
This is a standard OpenWRT (23.04) image, and the normal User Guides show different configuration options.
The default configuration is:
WAN (DHCP client, all inbound blocked, outbound NAT)
LAN (static 192.168.2.0/24, all inbound allowed, default route through WAN).
SSH enabled (with passwod)
Web enabled (with password)
No UPnP services nor mDNS/Avahi are enabled by default.
Agilicus Connector Install
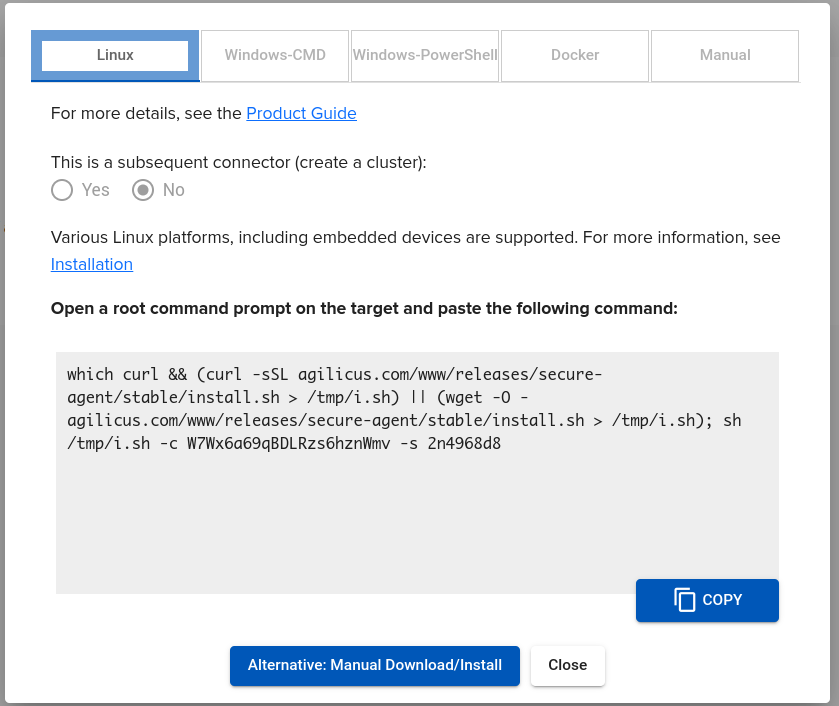
Using the Agilicus administrative portal, create a new connector. Use the ‘Linux’ instructions, copy.
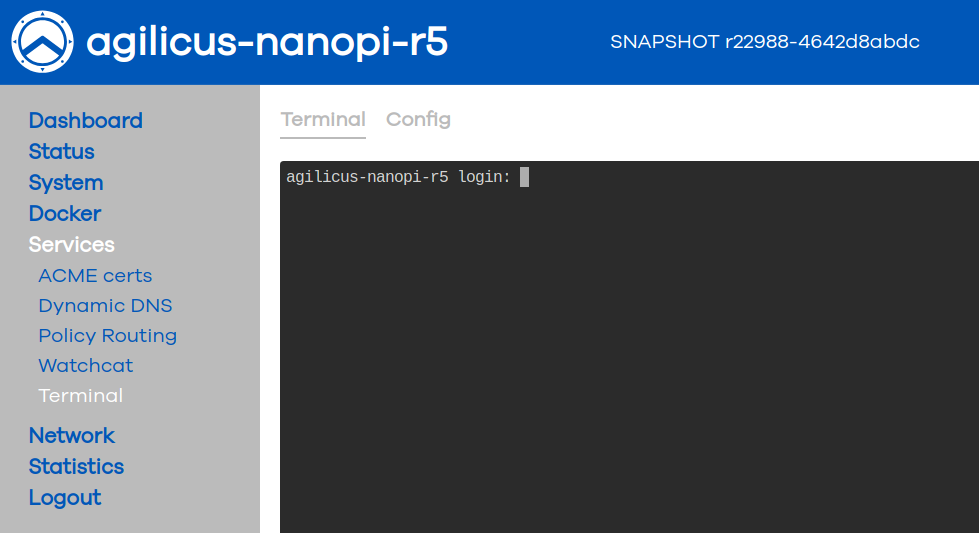
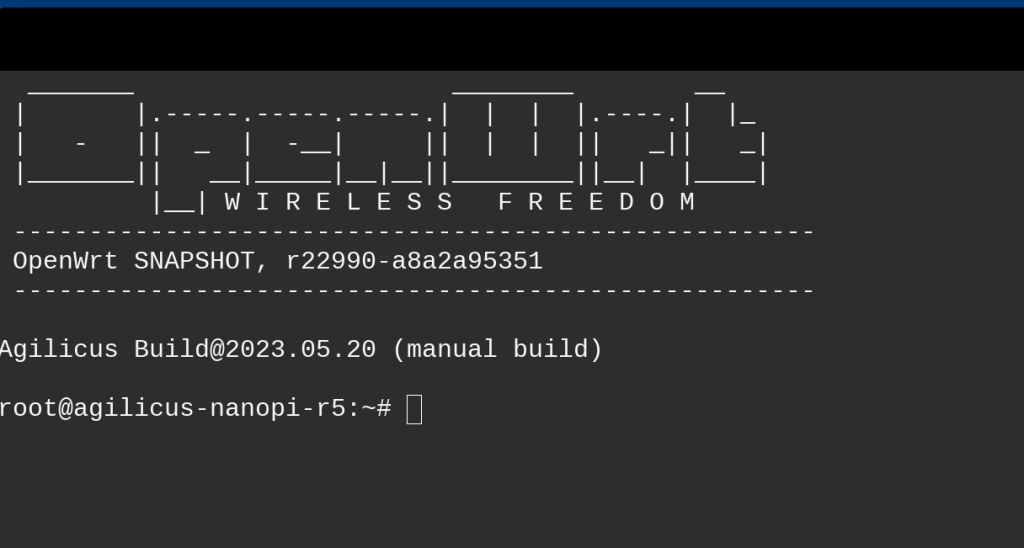
In the OpenWRT admin interface (http://192.168.2.1/), select ‘Services/Terminal’. Sign in as root and the password you selected. Paste (shift-insert).
At this time the connector should be installed and you may close the terminal.
You may wish to enable access to this router via the Agilicus AnyX platform (notably SSH and Admin web interface).
NOTE: DHCP Server Enable
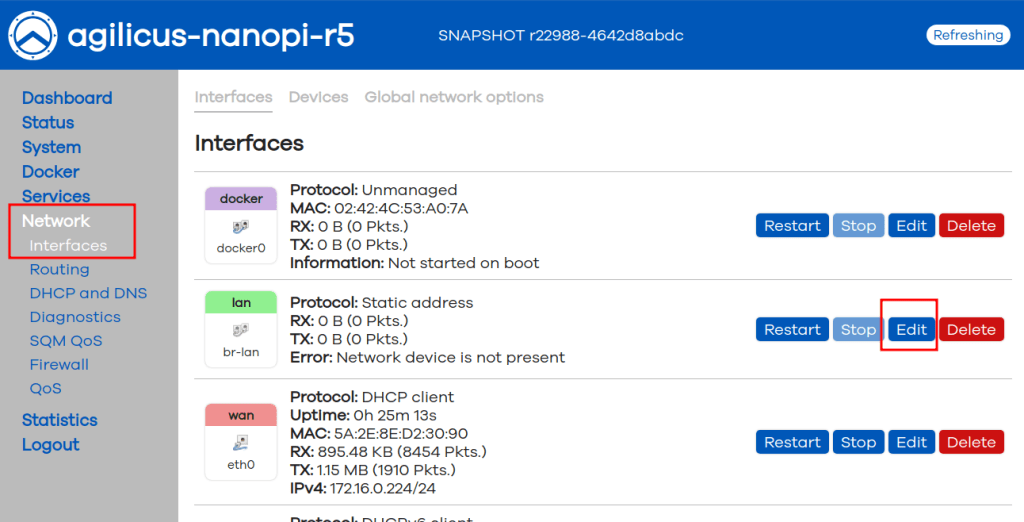
Depending on your use, you may wish to have a DHCP server on the LAN ports, you can enable this under ‘Network/Interfaces/LAN’. You may also configure your desired IP range here.
❗
It is appropriate to have a DHCP server on these LAN ports if this is an isolated network. If you are connecting to a larger network with an existing DHCP server, you probably wish to instead change the protocol on the LAN ports to DHCP Client.
NOTE: Time Sync (NTP)
Modern cryptography requires clock sync and accuracy on all devices. Typically this is performed via Network Time Protocol, however, in some environments this is blocked (e.g. HTTPS-only outbound).
If your clock is not sync’d (see System/Time Synchronisation menu), you might be able to use a local NTP server. If not, you can enable an HTTPS-based sync as below:
service htpdate enable
service htpdate start
This is going to use the Agilicus API to provide an HTTP-based (over HTTPS port 443) time service. Configuration can be observed in /etc/config/htpdate:
config htpdate 'htpdate'
	option enabled 0
	list server 'https://api.agilicus.com'
	option proxy_host ''
	option proxy_port '8080'
	option debug 0
	option sanity_check 1
	#list option '-4'
Security Hardening
Web Terminal Disable
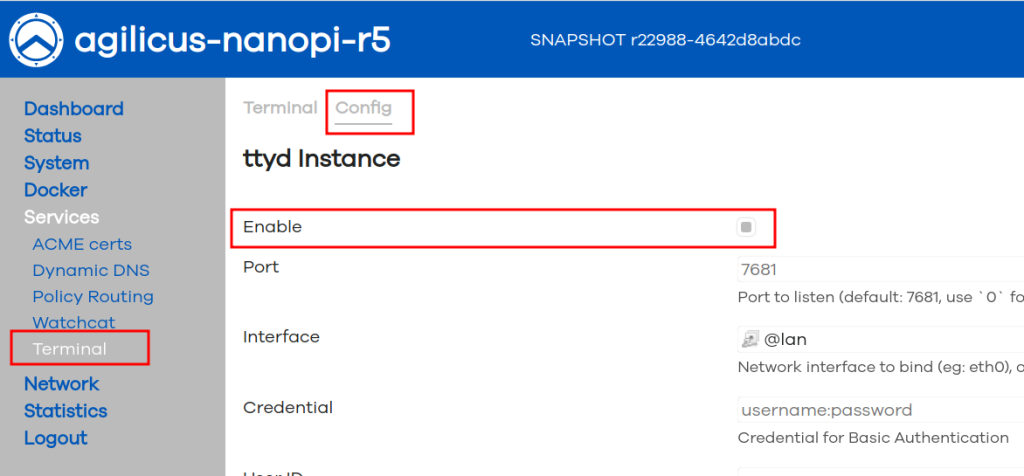
Once you have installed the Agilicus Connector, we recommend disabling the web terminal. On ‘Services/Termina’, select the config tab and remove the check-box beside ‘Enable’.
You may re-enable the web terminal later if you need it. However, we recommend using SSH instead for future command-line access.
The web terminal operates on a secondary TCP port (7681) and is not needed for normal operation.
SSH Setup
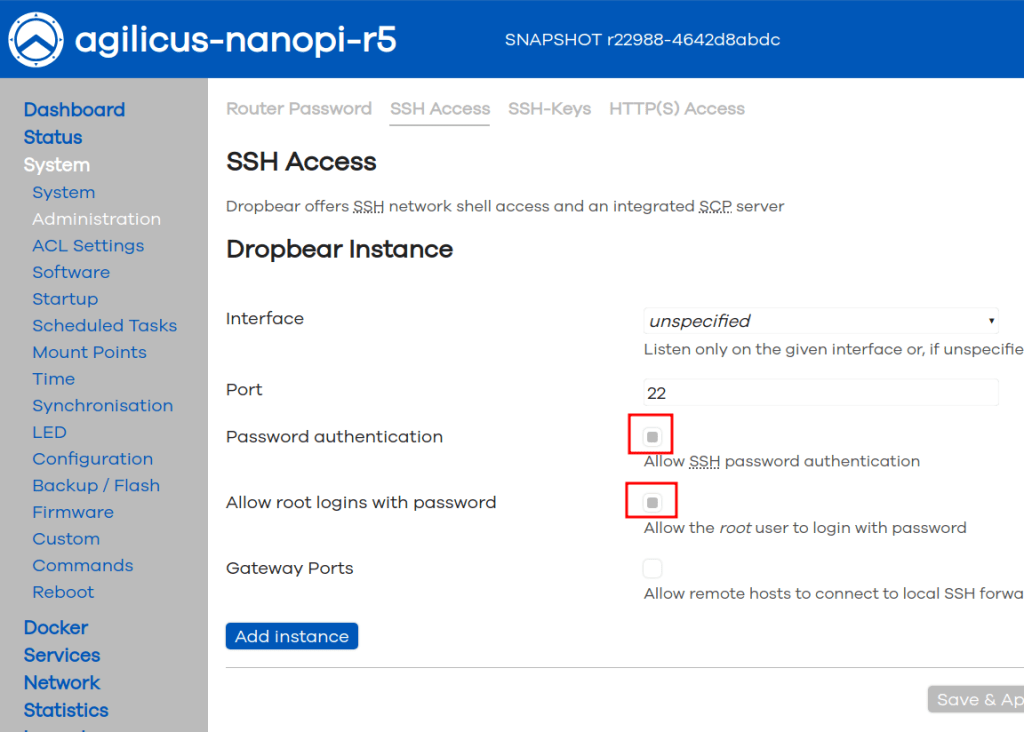
Agilicus recommends disabling password access to SSH in favour of SSH Keys.
On System/Administration, the SSH Access tab, uncheck ‘Password authentication’ and uncheck ‘Allow root logins with password’.
The rationale here is that password stuffing and guessing is a thing. Eventually someone will guess your l33t-hax0r password. Removing any ability to use passwords reduces the risk. In some controls environments any passwords can be disallowed.
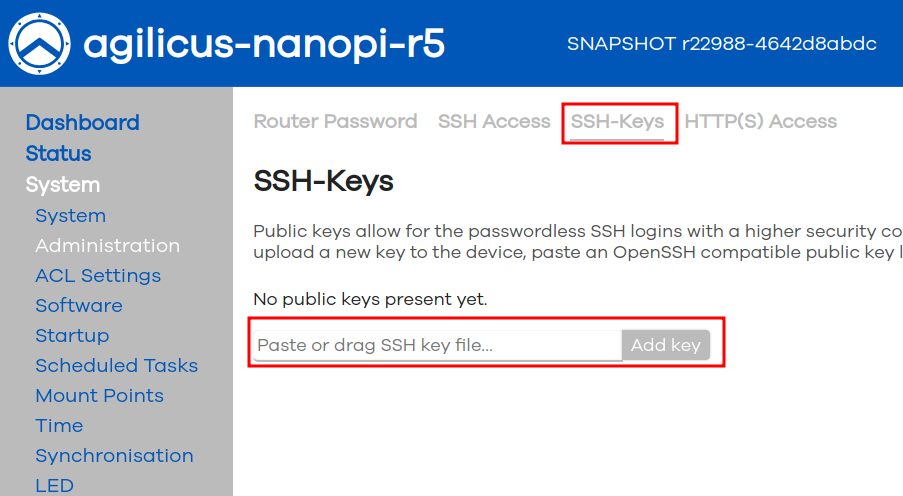
Once you have disabled password access, we recommend adding a SSH Key. Agilicus recommends using ed25519 SSH keys since they are smaller and more secure. Add your public key to the router here and place the private key (with passphrase!) in your SSH Agent on your desktop.
SSH keys are not only more secure, but also more convenient.
One downside to note: the Agilicus web interface for SSH is not currently compatible with SSH keys. If you wish to have SSH access to this device via the Agilicus Profile web interface, keep password on.
Firewall
At this stage, configure the firewall and NAT settings to suit on each of the interfaces. If the Agilicus Connector is providing Service Forwarder services, remember to open this ports on the router too.
We can check which ports are listening by running netstat -nlpt as below. Things with 0.0.0.0:PORT are available from outside the device. Things listening on 127.0.0.1, fe80::, ::1, etc, are locally bound only. In the example below, ‘uhttpd’ (the admin web interface), ‘dropbear’ (SSH) and ‘ttyd’ (the web terminal) are the only things listening.
root@agilicus-nanopi-r5:/# netstat -nlpt
Active Internet connections (only servers)
Proto Recv-Q Send-Q Local Address           Foreign Address         State       PID/Program name
tcp        0      0 0.0.0.0:443             0.0.0.0:*               LISTEN      2403/uhttpd
tcp        0      0 0.0.0.0:22              0.0.0.0:*               LISTEN      1049/dropbear
tcp        0      0 0.0.0.0:80              0.0.0.0:*               LISTEN      2403/uhttpd
tcp        0      0 172.16.0.224:53         0.0.0.0:*               LISTEN      1029/dnsmasq
tcp        0      0 172.17.0.1:53           0.0.0.0:*               LISTEN      1029/dnsmasq
tcp        0      0 127.0.0.1:53            0.0.0.0:*               LISTEN      1029/dnsmasq
tcp        0      0 0.0.0.0:7681            0.0.0.0:*               LISTEN      3942/ttyd
tcp        0      0 :::443                  :::*                    LISTEN      2403/uhttpd
tcp        0      0 fe80::582e:8eff:fed2:3090:53 :::*                    LISTEN      1029/dnsmasq
tcp        0      0 ::1:53                  :::*                    LISTEN      1029/dnsmasq
tcp        0      0 fe80::3400:a4ff:fe92:b43d:53 :::*                    LISTEN      1029/dnsmasq
tcp        0      0 :::22                   :::*                    LISTEN      1049/dropbear
tcp        0      0 :::80                   :::*                    LISTEN      2403/uhttpd
tcp        0      0 2607:fea8:1c43:a103::d67d:53 :::*                    LISTEN      1029/dnsmasq
tcp        0      0 fc01::3:582e:8eff:fed2:3090:53 :::*                    LISTEN      1029/dnsmasq
tcp        0      0 2607:fea8:1c43:a103:582e:8eff:fed2:3090:53 :::*                    LISTEN      1029/dnsmasq
tcp        0      0 fc01:0:0:3::d67d:53     :::*                    LISTEN      1029/dnsmasq
Sample Configuration: Connect to Local HTTP + SSH
This walk through shows an example of how, once the connector is installed (as per above), configuration of an HTTP and SSH interface to this local device. Once these are configured you could use the firewall to disable all external access. The high level steps are:
- Create Connector (Agilicus Admin)
- Install Connector (NanoPi Web Terminal)
- Create SSH Resource (Agilicus Admin)
- Create Web Resource (Agilicus Admin)
- Assign Web Resource Permission (Agilicus Admin)
- SSH to NanoPi from Agilicus Profile (Agilicus Profile)
- Open Web Interface to NanoPi (Agilicus Profile or direct)
OK, let’s get started. This will take approximately 5 minutes.
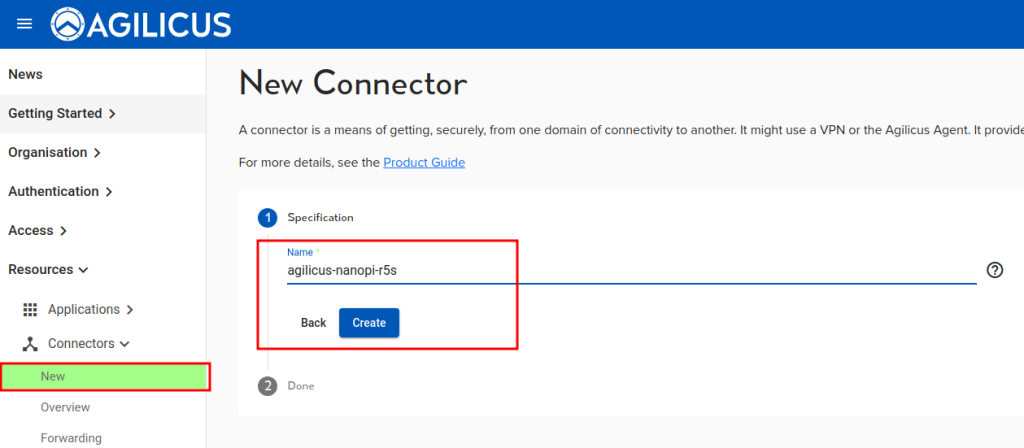
First, create the connector on the NanoPi. Skip this is you have already done so above.
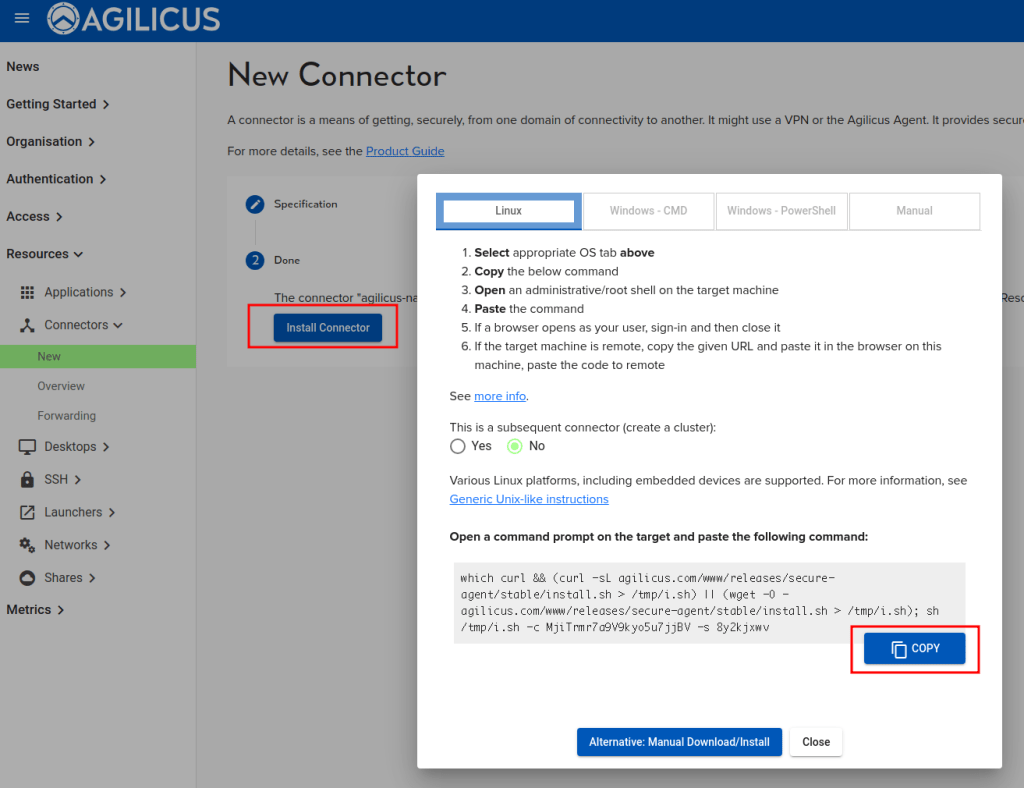
Select install. On the dialog, select ‘Linux’. Select ‘Copy’
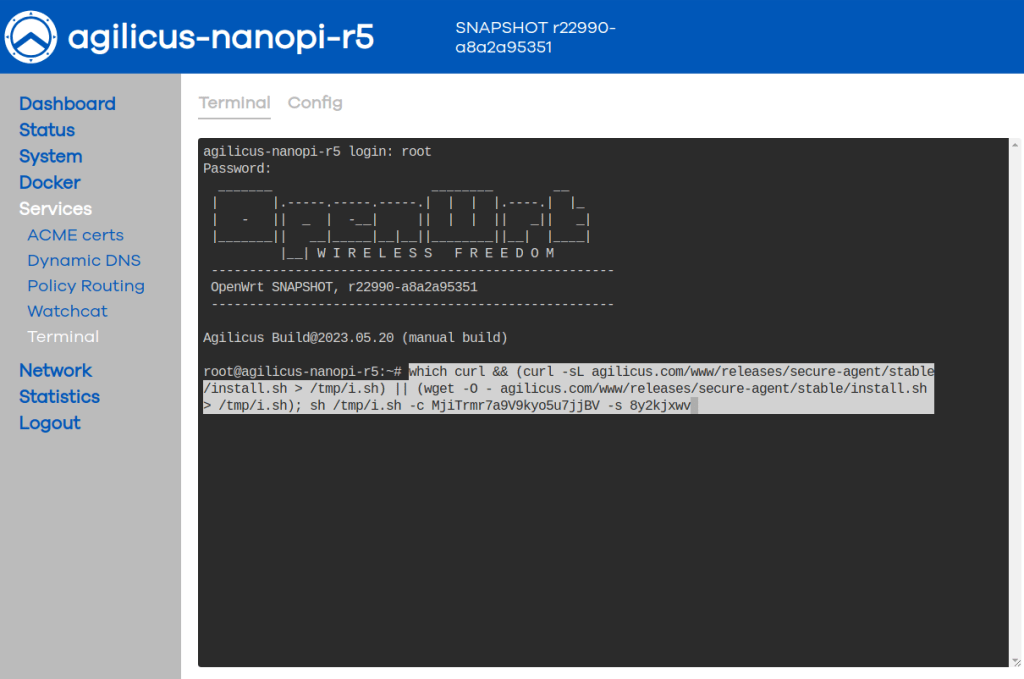
On the NanoPi web interface, open the terminal, sign in. Press ‘Shift-Insert’ to paste the line you copied above.
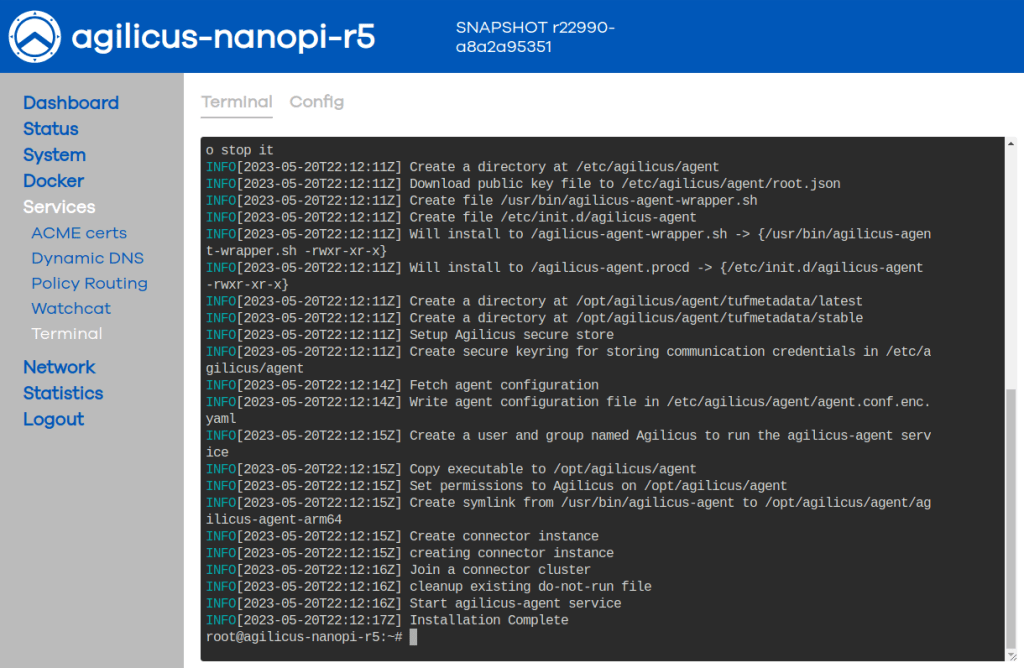
You should see output as to the left, taking about 30 seconds.
Errors you might see include:
- Time issues. The NanoPi does not have a battery-backed real-time clock. It is setup to use Network Time Protocol (NTP). If your firewall blocks this, or the WAN port is not connected, you must solve this first. Cryptography and certificates require good time sync. See below for an https-only solution that is simple to firewall.
- Outbound firewall blocking www.agilicus.com or api.agilicus.com (both on port 443)
At this stage the connector is installed on this device. We will move on and configure SSH access next.
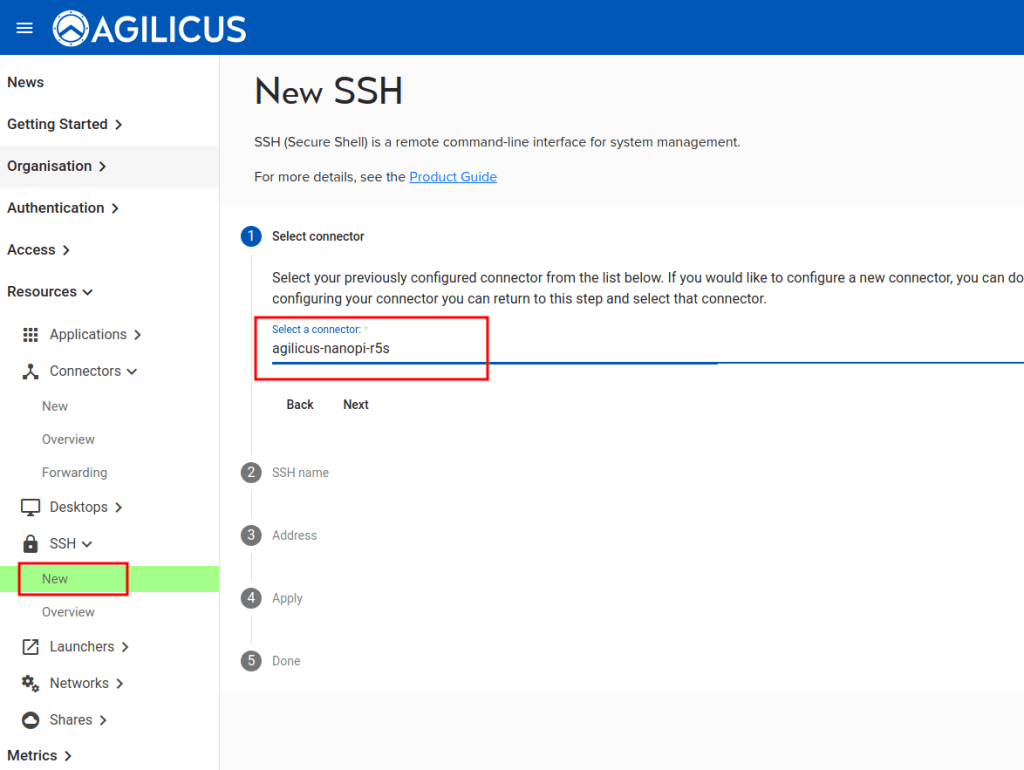
Create a new SSH resource. Select the connector we created above.

Create a new SSH resource. Select the connector we created above.
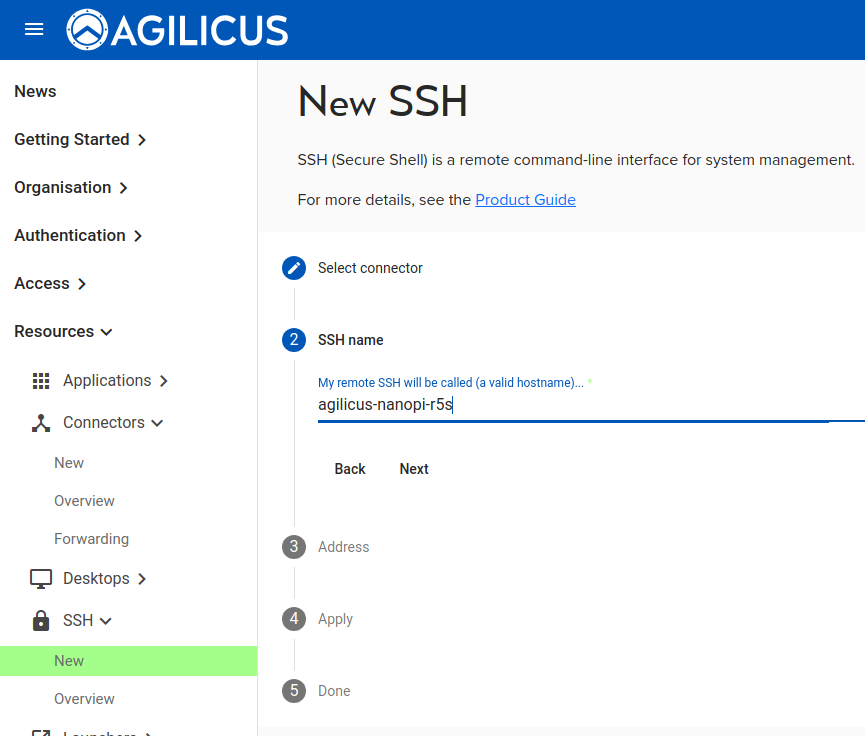
Give the SSH resource a name. We will see this later in the Web Interface and from the command line. The name must be valid as a hostname (e.g. no spaces).
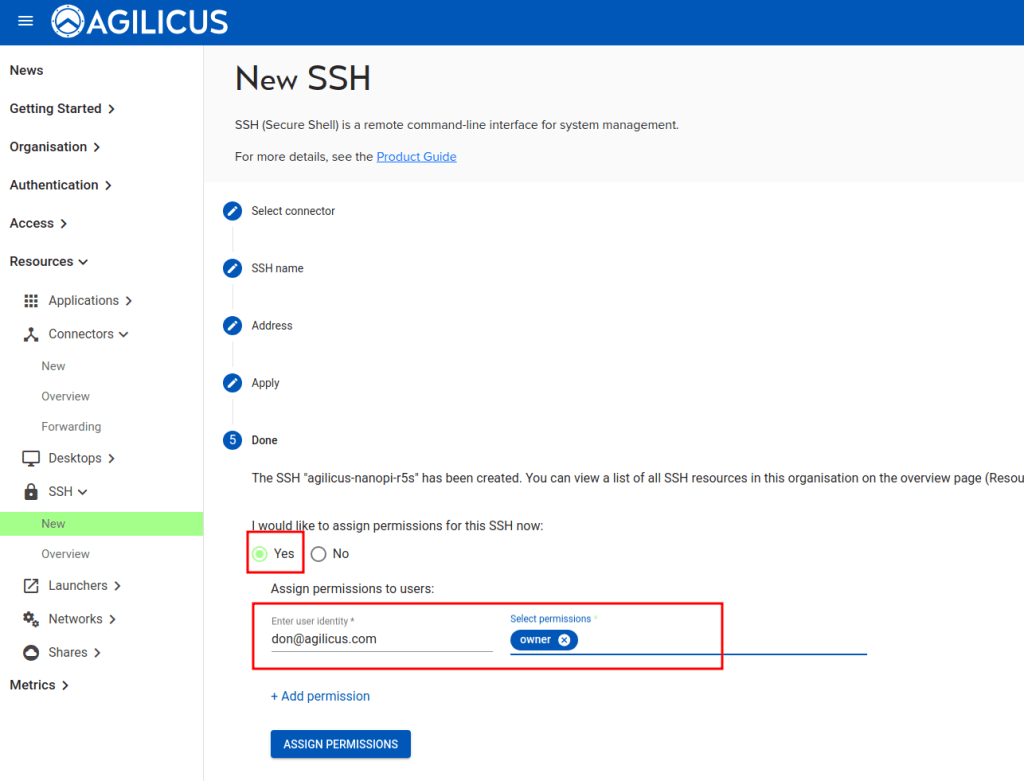
Assign permissions. For this sample, we are assigning permissions to a single user. More commonly one would create a group (e.g. SSH Admins) to simplify.
At this stage, we have finished the SSH setup. We can use it from the Agilicus Profile (web-based, any device), from the Start menu on a desktop operating system, or via the command-line on our desktop. It will work with Putty and OpenSSH.
Now let us configure a Web Application to see the web console of the NanoPi R5S.
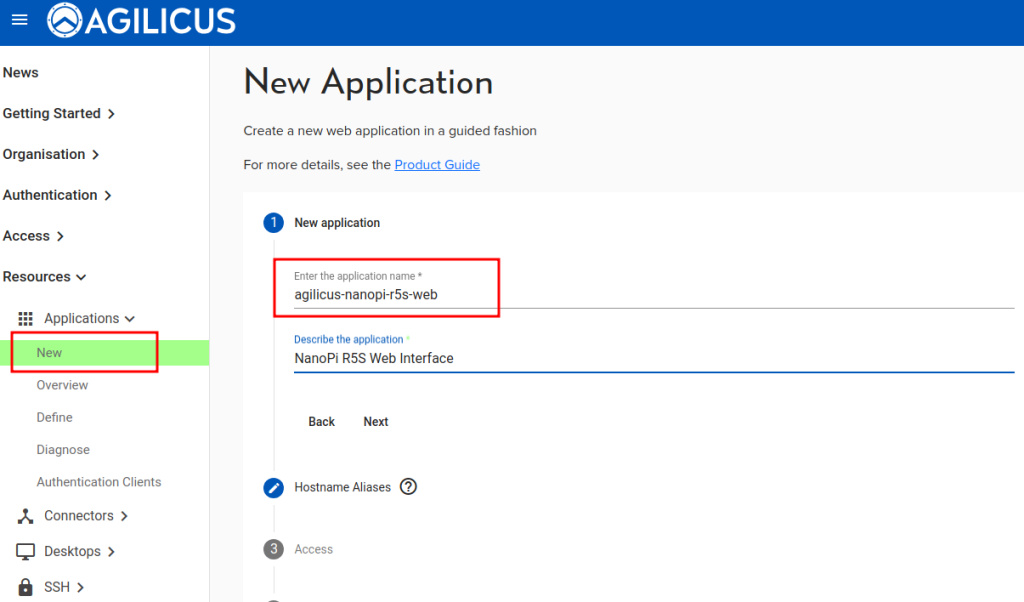
Create a new application. Give it a name (which must be valid as a hostname in format). You will later be accessing this as https://NAME.DOMAIN/
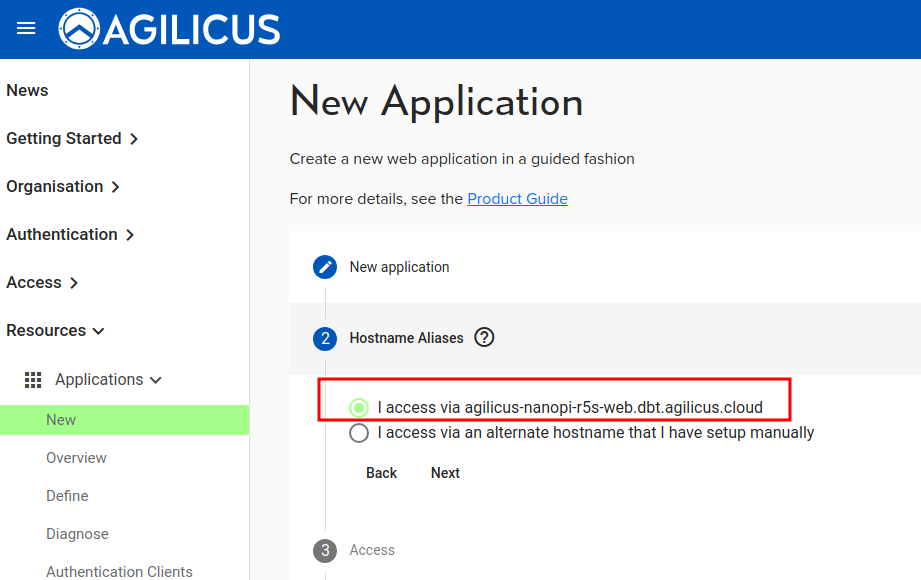
You may, if you wish, have a well-known alias to this new web interface. This is more commonly done with very public ones (e.g. a Wiki or Timesheet system). Leave it as default and the Agilicus AnyX will create the hostname for you.
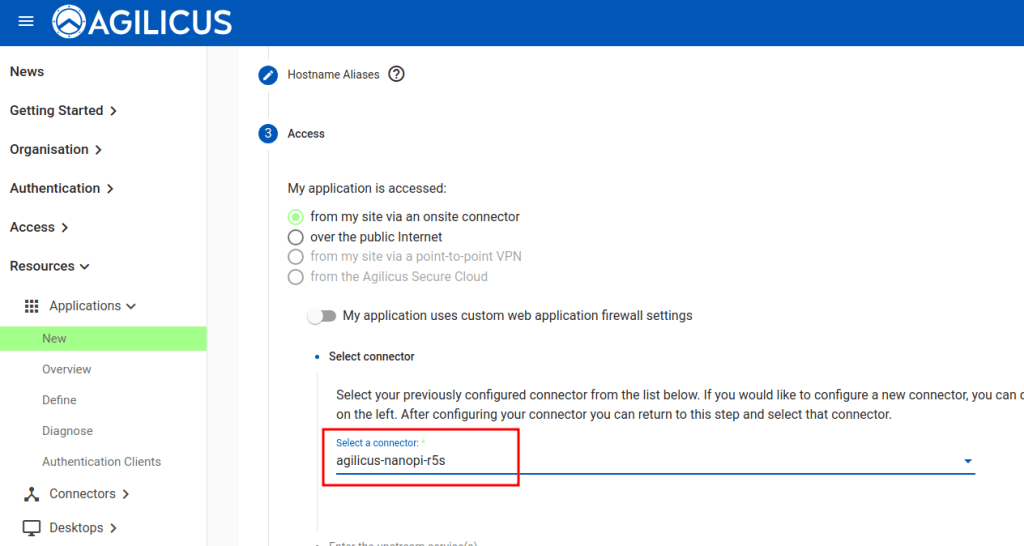
Select the connector from the previous step.
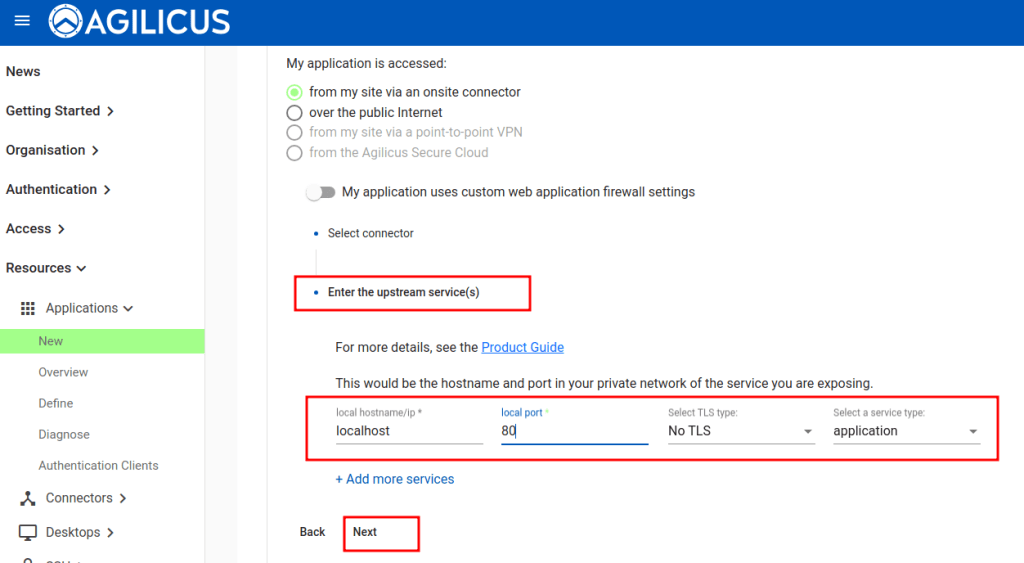
The connector has to know where to send the request (it is a proxy). The ‘upstream’ in this case is the NanoPi R5S itself, e.g. localhost port 80.
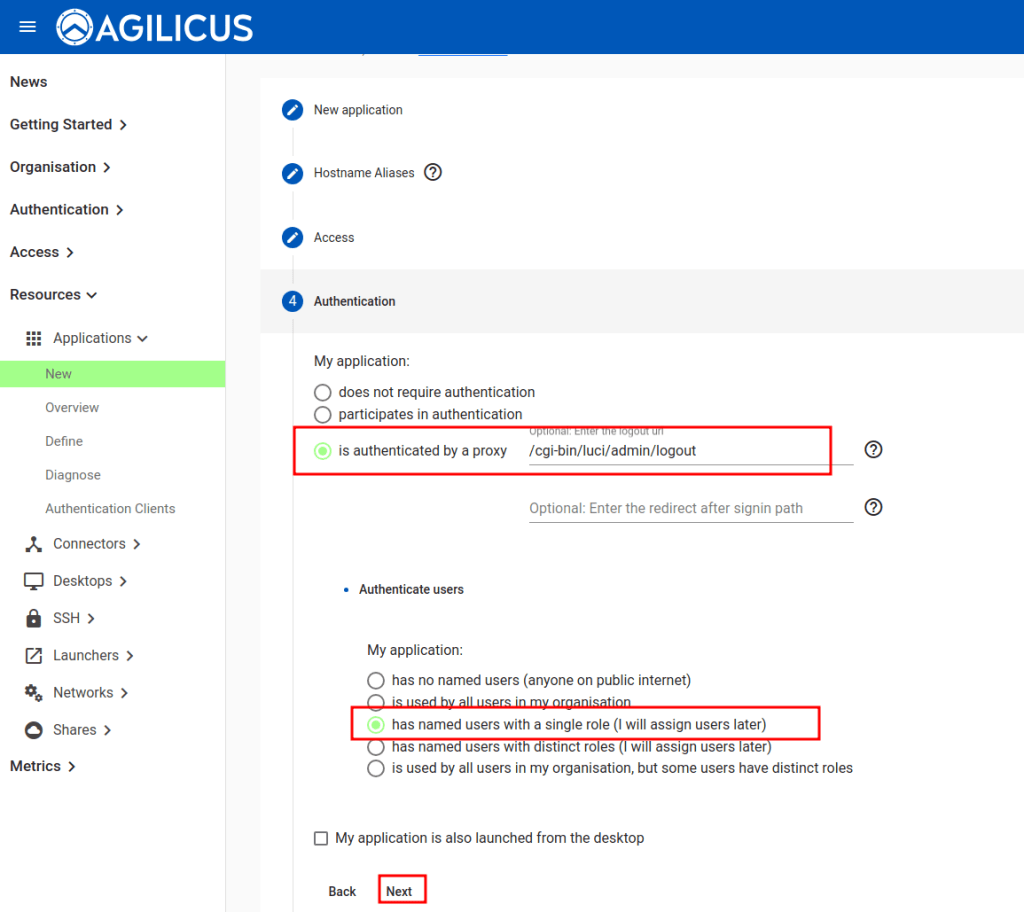
For a bit of additional security we can tie the ‘logout’ URL of the NanoPi R5S web interface to the Agilicus AnyX logout by copying in the URL of the logout. This is optional.
We also suggest that named users with a single role, configured later, for this sample. Normally you would create a group, e.g. ‘Web Admins’ and assign users to it.
At this stage we are done, select ‘Apply’.
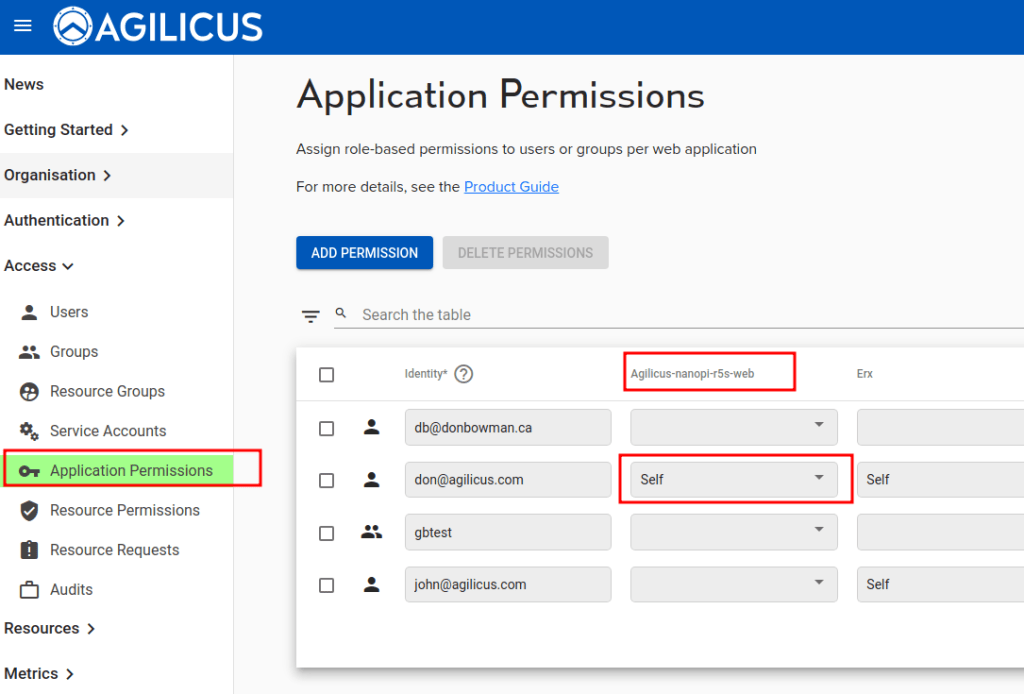
Now we will assign ourselves permission to use this new web resource.

To make the profile a bit more ‘fun’ we can now assign a logo (an icon) to the launch of this web interface. In this ‘define’ section we could also refine the Web Application Firewall rules etc.
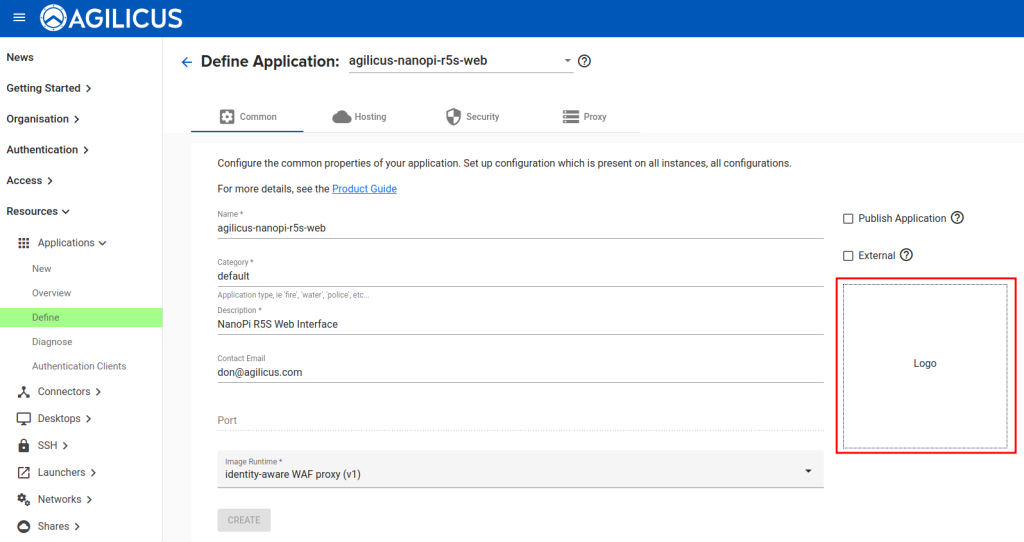
Any image file (we suggest about 512×512) is suitable for a logo.
At this stage we are done. We have:
- created and installed a connector on this NanoPi R5S.
- created an SSH service (to the NanoPi itself)
- created a Web resource (to the NanoPi itself)
We can now test our work. Open https://profile.__MYDOMAIN__/
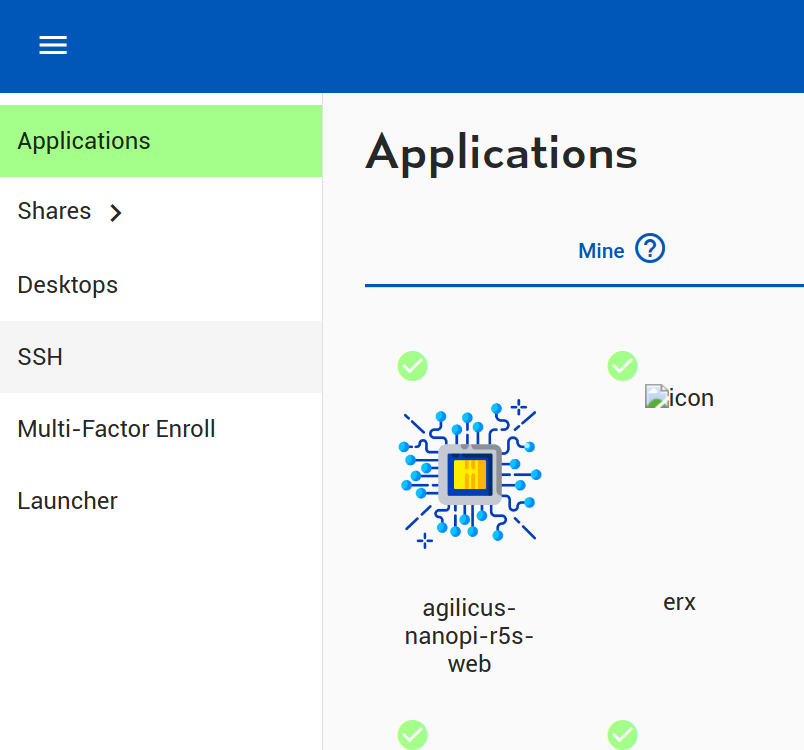
Once you have signed in, you will see an icon for the new web resource, if you click it, a new browser tab will open. Observe the URL (https://NAME.DOMAIN). You can use this directly without profile if you wish. If you sign in, you will see the NanoPi R5S web interface directly. Now try it from a different network (e.g. your mobile phone, disable WiFi). Observe you can still connect. Now try with an unprivileged user (e.g. a different Gmail account), observe you cannot sign in.
The ‘profile’ interface acts as a launch pad for the end-user. It will act as a Progressive Web Application (e.g. ‘add to homescreen’ on your mobile), giving you a single launch icon.
You may also use the resources it points to directly: it is your choice.
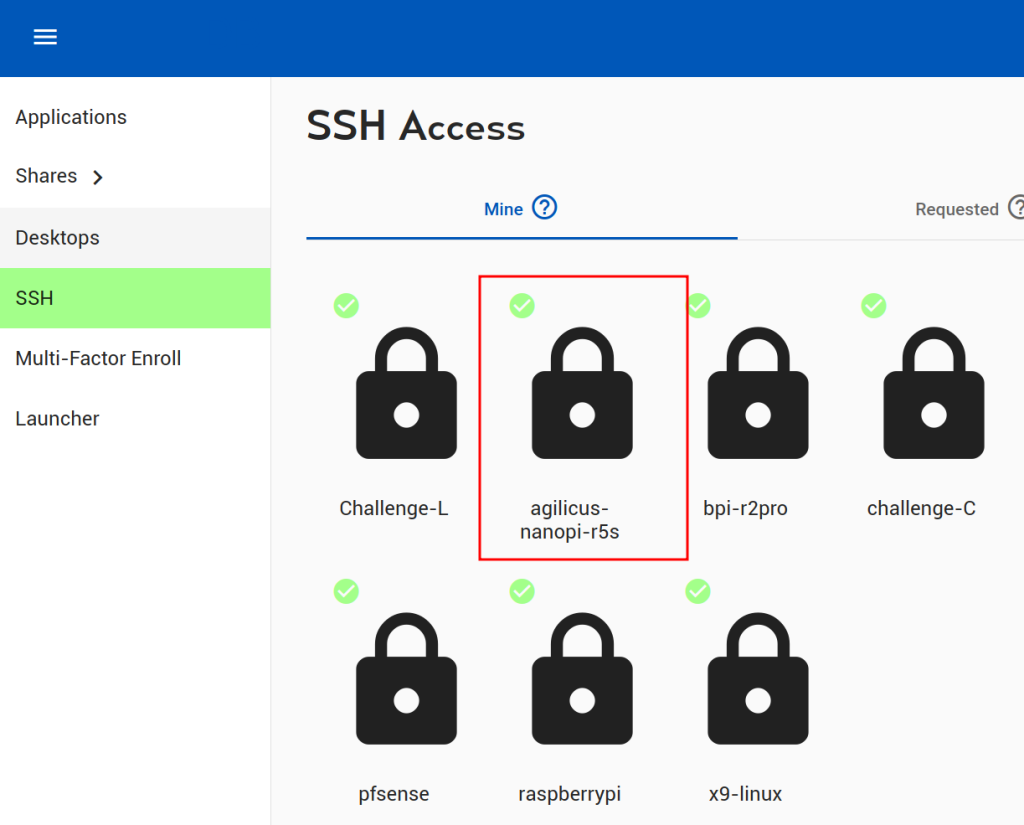
We can test the SSH access. From profile, select the resource we created earlier.
We will see a ‘login’ dialog appear, enter the username (root) and password to the NanoPi R5S.
At this stage, we should see an SSH terminal.
From here, consider using the ‘Launcher’ install feature of profile, add the Browser Extension. You will now see an entry on your start menu for this SSH, opening the native client (e.g. if you have Putty or OpenSSH installed).
Similarly to the Web Resource, only users with permission are able to sign in. You may also choose to enable multi-factor authentication on your user and observe how this functions with both Web and SSH resources.
Recovery
If you are unsure of the state of your Nanopi R5S, you can recover it using (amongst other ways) an micro-sdcard.
- Download the image from above.
- Uncompress it.
- Image it to a micro-sdcard.
- Insert this into the slot on the side of the nano pi
- Plug an Ethernet cable into the port-1 (closest to the USB-C)
- Set the IP address of your PC to 192.168.2.2
- Turn the system on.
- It should now be accessible via the web interface (http://192.168.2.1/)
At this stage we can copy the sysupgrade image to the emmc. Using either the web terminal or the ssh interface, run:
dd if=/dev/mmcblk0 of=/dev/mmcblk1 bs=64k count=33000now power down, remove the sdcard, and reboot.
Explanation: the command ‘dd’ will copy from the sdcard (/dev/mmcblk0) to the (/dev/mmcblk1), in blocks of 64K size, 33000 blocks (about 2G).
