The acSELerator QUICKSET Software by Schweitzer Engineering Laboratories (SEL) is a tool for engineers and technicians to quickly and easily configure, commission, and manage devices for power system protection, control, metering, and monitoring.
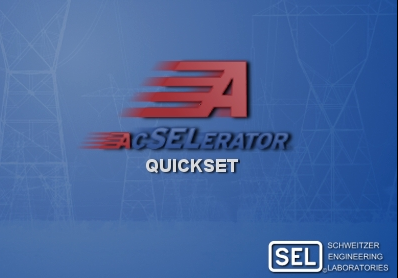
Under normal operation, the software supports network communication via Telnet and SSH.
By creating a launcher configuration in the Agilicus Any X platform, it becomes a secure, and capable client able to perform remote operations across a private and resilient TLS connection with Zero Trust. This will maintain an ideal Security Posture even with its default Telnet (TCP Port 23) communication configuration setting, while not exposing any other network resources on the local network.
In order to do so we will first configure the list of endpoints we wish to manage and add them as individual network resources where we will explicitely list the individual IP addresses and the TCP port 23, we wish to make accessible by the local connector. While we will use the default TCP port 23 for Telnet operation, the Quickset communications settings allow for any TCP port to be used, and this should be mirrored in the Agilicus network resources definition to match the host and the TCP port.
At its most basic, let’s assume we have an available device at IP address 192.168.10.220 , to which we wish to connect with the Telnet protocol over TCP port 23. The Quickset communication configuration dialog will look something like this:
Getting Quickset configuration
Creating a Network Resource
We can then access the Agilicux AnyX Administration interface to create a Network Resource bearing the same network details, and ensure traffic to the destination device is achieved via the appropriate Connector located at the remote facility.

Here we have created a target device named ‘quickset-gw1’ located a the IP address and TCP port we wish to reach, via the site Connector ‘Nanopi-r5s’. No other advanced options are required.
Optionally, if we wish to have multiple resources that mirror the entire set of device list, we can create individual Network Resources and then associated them into a Resource Group to be treated as a single group of resources.
Configuration of the Launcher
Here we will configure a launcher for the Quickset executable and define which Network Resource it can access on the Agilicus AnyX platform.
The launcher configuration requires a few advanced settings, but first, let’s look at one such launcher entry:

Let’s look at the individual elements of the launcher configuration and then we can review the advanced settings.
Name: Here we have the name of the Launcher as configured. This should be unique and will be the label of the Icon when installed in the Agilicus folder on the workstation. We choose the logical name “Quickset”
Command Path: This is the full path to, and including, the executable. The default installation path is used here:
C:\Program Files (x86)\SEL\AcSELerator\QuickSet\bin\QuickSet.exe
Command Arguments: If we wish to specify any command arguments, we can fill them here. By default the program launches without them.
Resource Members: Here we MUST associate a network resource that the launcher is allowed to reach. This will be the Network Resource of our end device, or the Resource Group which contains an extensive lists of resources.
Diagnostic Mode: The launcher can output valuable troubleshooting information to a local log file. Enable this to create a verbose diagnostic log file.
Start Directory: This is the working path of the program. You can get this path via the Properties of the local executable on the workstation where the software is installed. Here it is:
C:\Program Files (x86)\SEL\AcSELerator\QuickSet\bin
Requires Interceptor: Also known as “DNS (Name Service) Interception” in the creation wizard. It enables network data interception in the launcher to capture the traffic directly from the application. We will enable this.
Hide Console: By default, the Launcher runs a muted console side by side with the application. We can hide it by enabling this feature.
Advanced Options
Once the launcher is configured, we need to create a set of advanced options by first clicking on “Add Process”
Explanation:
The SEL Quickset executable does not handle network connectivity by itself. It in fact uses another small executable: SELCommunications.exe
When run by itself SEL Communications allow basic connectivity to the end device and has a minimalistic UI:
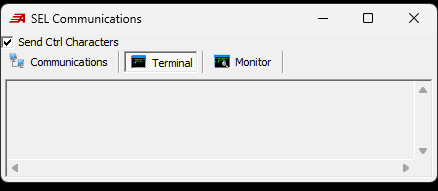
When QuickSet requires network communication to a device, it launches SELCommunications.exe in the background with a command line argument “-Embedding” which minimizes the software, and removes its UI. The program is closed by Quickset when network communication is no longer required.
Because the Agilicus AnyX platform employs Zero Trust, any additional process that should be granted access to the remote network resource must be explicitely defined. This maintains the principle of least privilege (PoLP) of our Zero Trust platform.

After clicking “Add Process” we can start adding the details of the extra processes which should be granted access to the AnyX platform while the launcher is running.
Program Name: here we specify the SELCommunications executable path. The default installation path is used here.
C:\Program Files (x86)\SEL\AcSELerator\QuickSet\bin\Common\Comms\SELCommunications.exe
Command Arguments: We must use the same command arguments used by the QuickSet to invoke the process.
-Embedding
Name is Regex: The program name here is not a Regular Expression string pattern, so we do not use this feature.
Start if not running: We want the launcher to start the SELCommunications.exe process at startup so that Quickset can use it
Exit when ending: Once we exit Quickset, we want the launcher to terminate the SELCommunications.exe process it started ,
Attach if already running: It’s possible that an existing copy of SELCommunications.exe is already running since it can be started on its own. This feature will allow the launcher to quickly find if this process is running and transparently allow it to start communicating through the AnyX platform
Fork Then Attach: We do not require to fork this process.
Wait for exit: We will not force the launcher to wait until the process has completely exited before quitting.
Assigning Resource Permission
Once the Launcher and its network resources are created, we must still assign permissions to individual identities or groups in order to allow them to run the client software.
This is achieved through the Access menu, and Resource Permissions
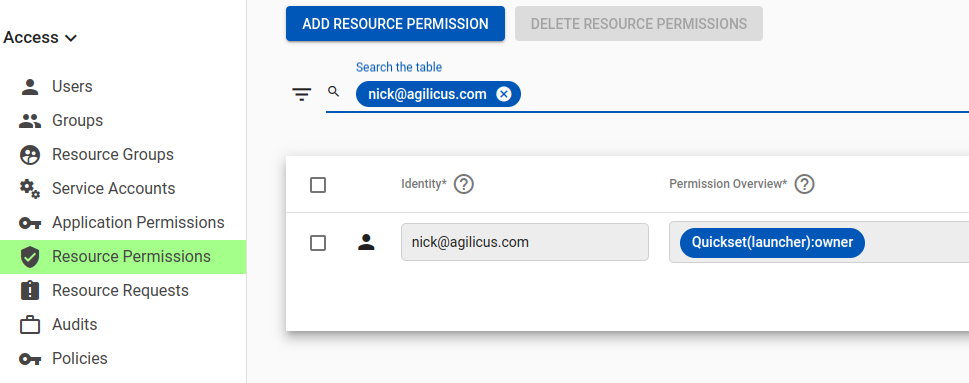
As we can see in this example, it is not necessary to grant Network Resource permission directly to the Identity as it is inherited via the Launcher configuration “Resource Members”
Once the permission is assigned, the Launcher will become available in the user Profile page, and via the Agilicus folder in the Start Menu
