You can add one (or more) Azure Active Directory systems as Upstream Identity Providers. Doing this will allow your team to sign in with their Active Directory username/password. If you work with more than one corporation, you may add multiple Upstream Identity Providers.
Agilicus Front-End Create Upstream Issuer
The setup is very simple and takes less than 2 minutes to acomplish. There is a ‘stepper’ that walks you through the tasks.
First, open the admin user interface (https://admin.__MYDOMAIN__). Login as your (initial) administrative user. Nagivate to ‘Organisation’/’Authentication Issuer’. From here you may select ‘Add Provider’, adding a new identity provider.
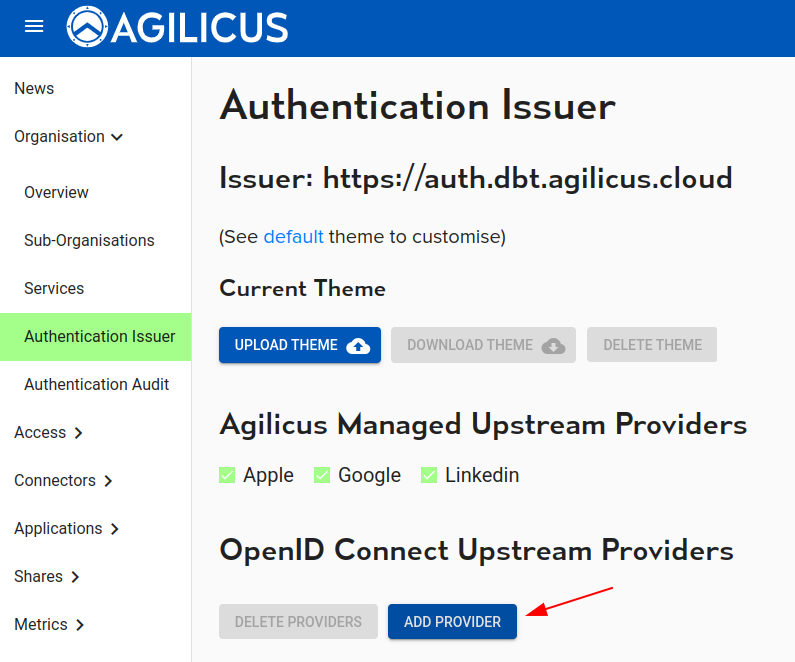
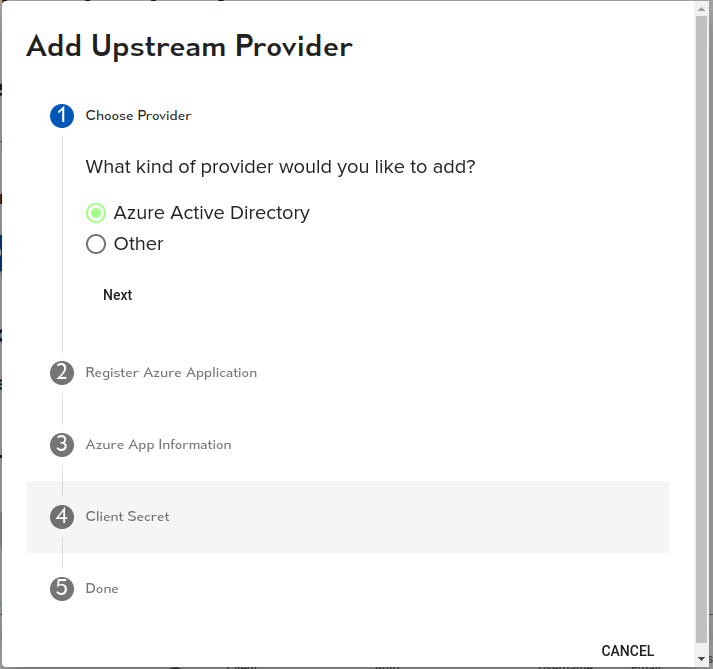
At this stage, you will enter a Stepper which will walk you through the steps graphically. First select Azure Active Directory as the type:
Azure Application Registration
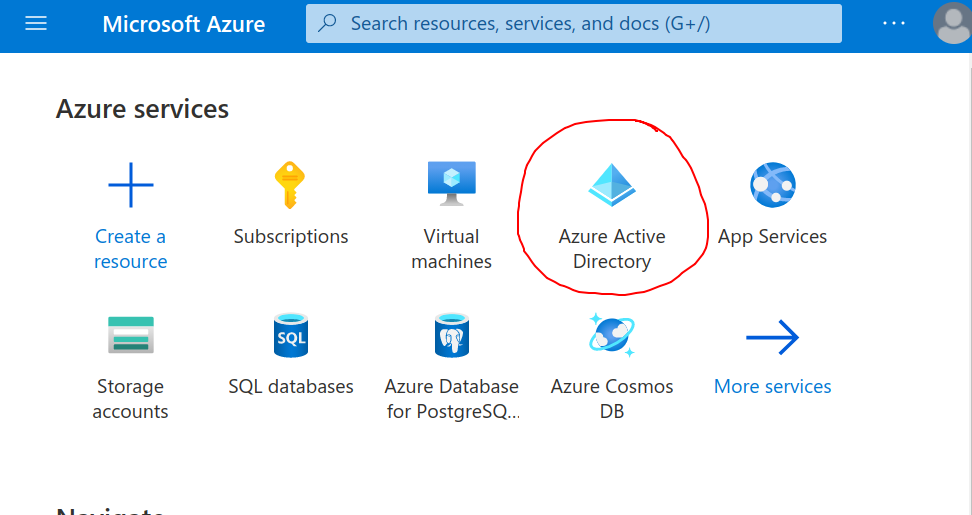
The Stepper will show screen shots of how to configure Azure, they are also here. First, select ‘Azure Active Directory’ in your Azure console:
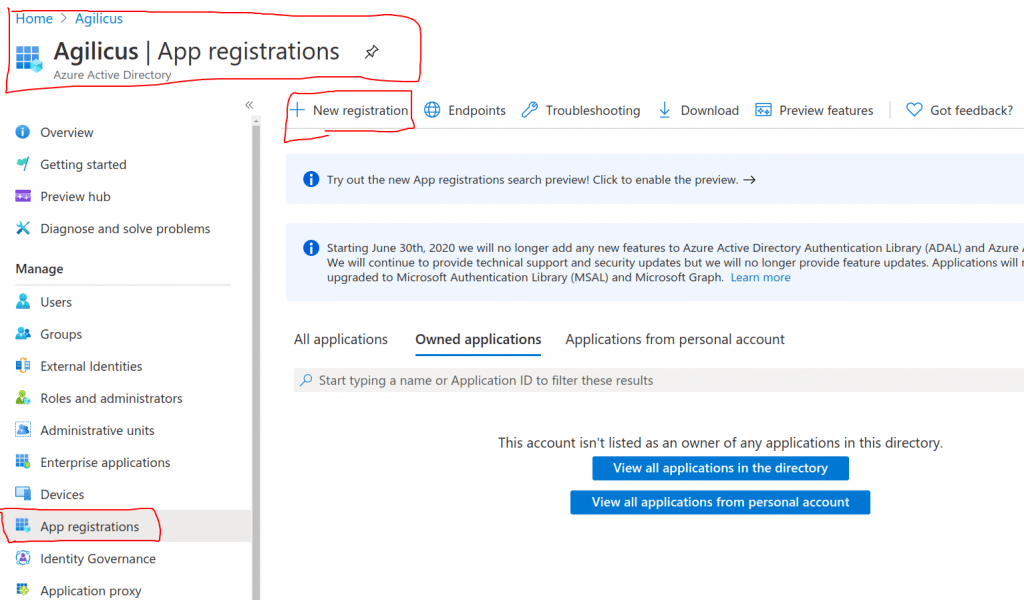
Now create a new Application. This will be for all logins to the Agilicus platform.
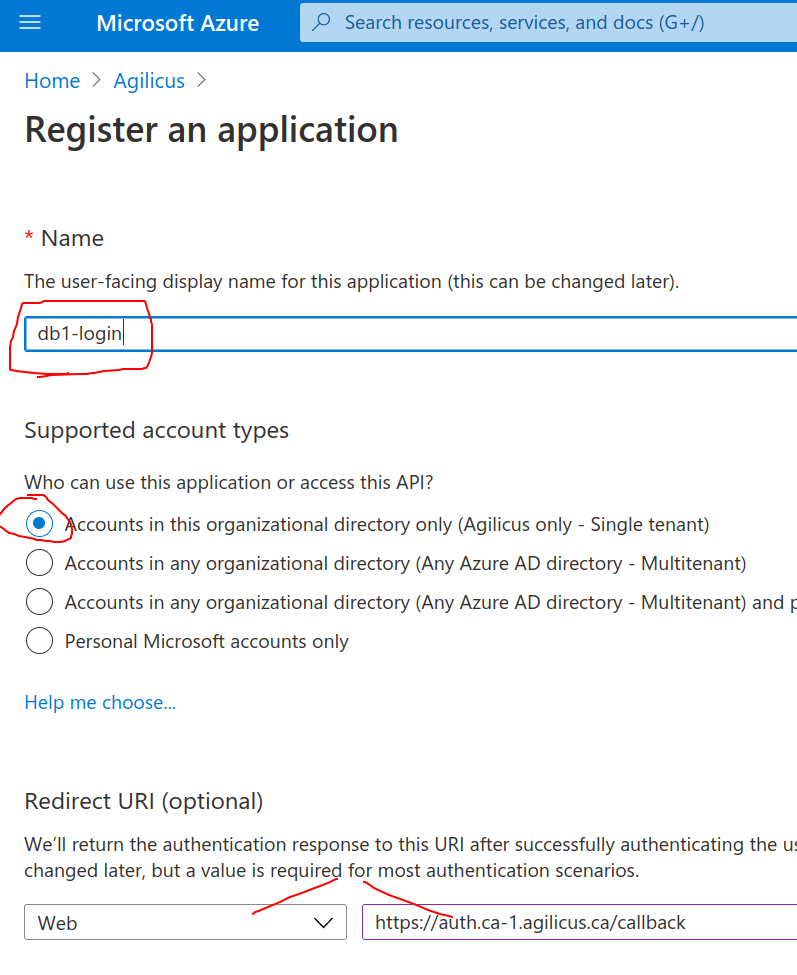
Select a name. This will be shown to the user on the Login select page, we recommend making it related to your organisation. E.g. “My Company Active Directory”. In the Application stepper you are given a “Redirect URI”, paste it here.
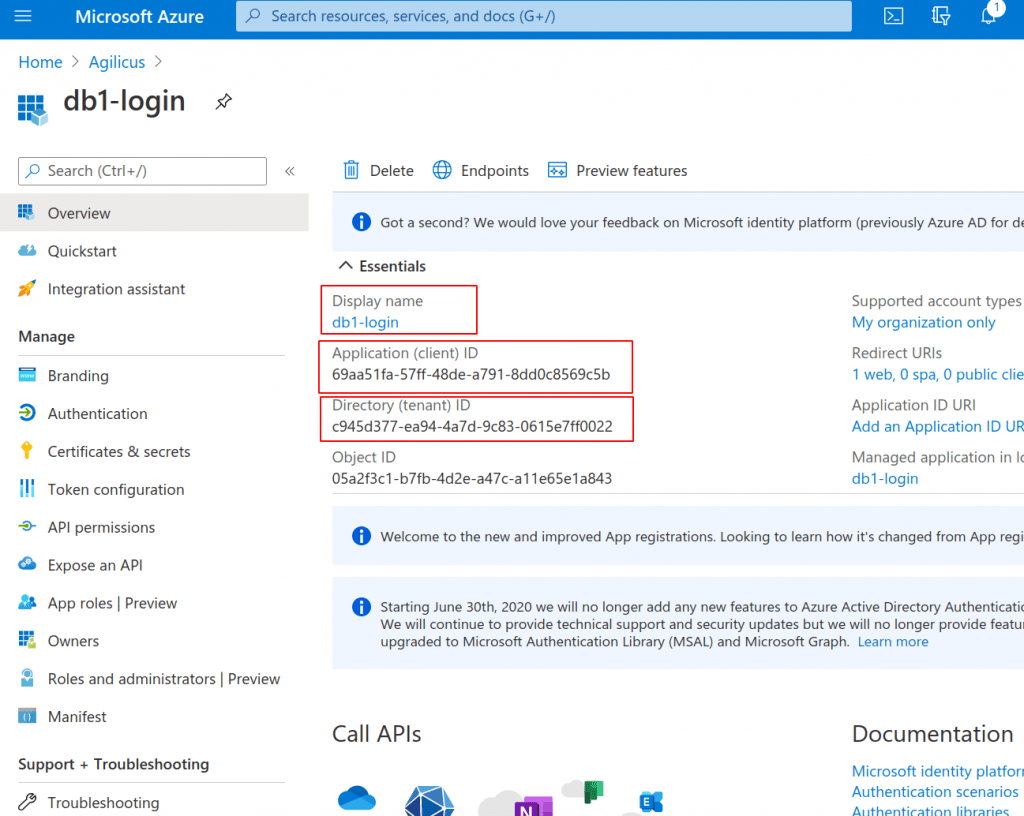
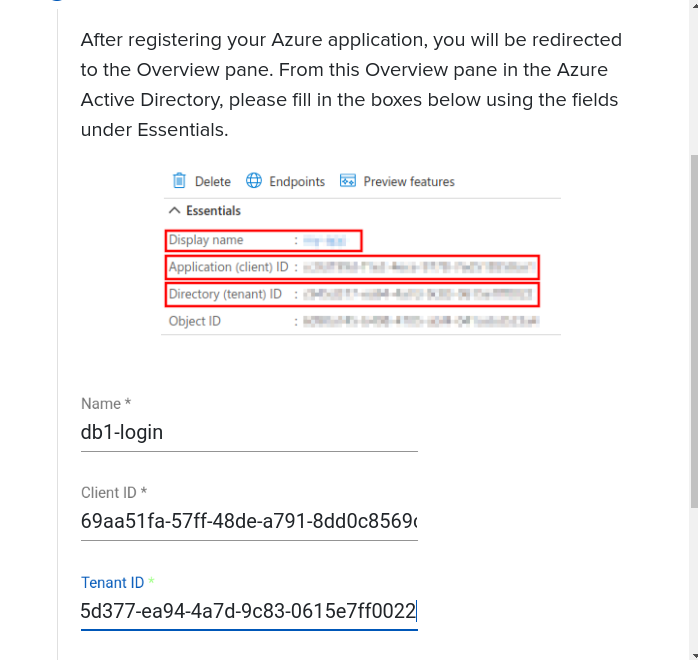
You will now be given 3 pieces of information. A ‘Display Name’, an ‘Application (Client) ID’, and a ‘Directory (Tenant) ID’. Enter these in the appropriate spots in the Stepper.
Here you can see where this information is placed in the Agilicus Admin Stepper, from the Azure screen we have:
On the Agilicus Stepper we have:
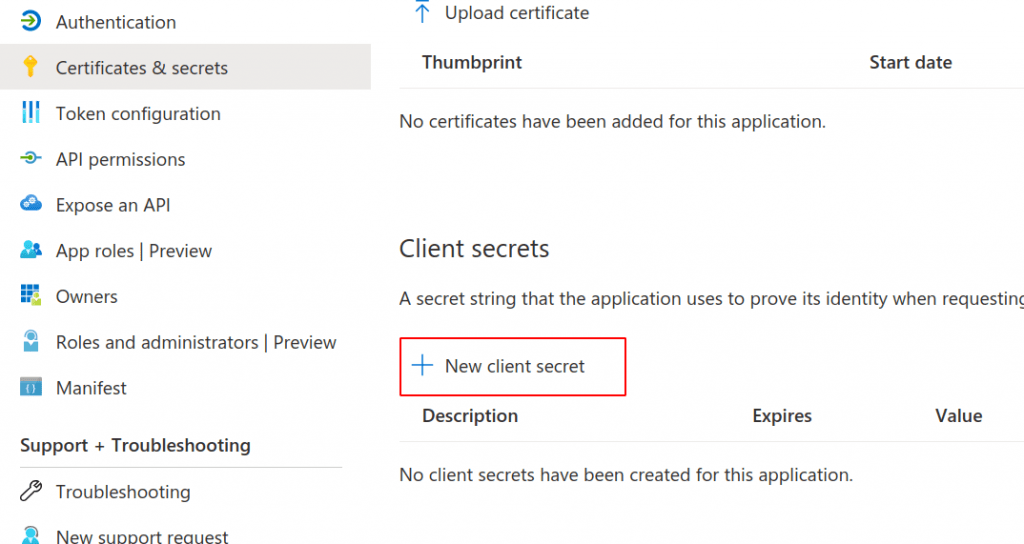
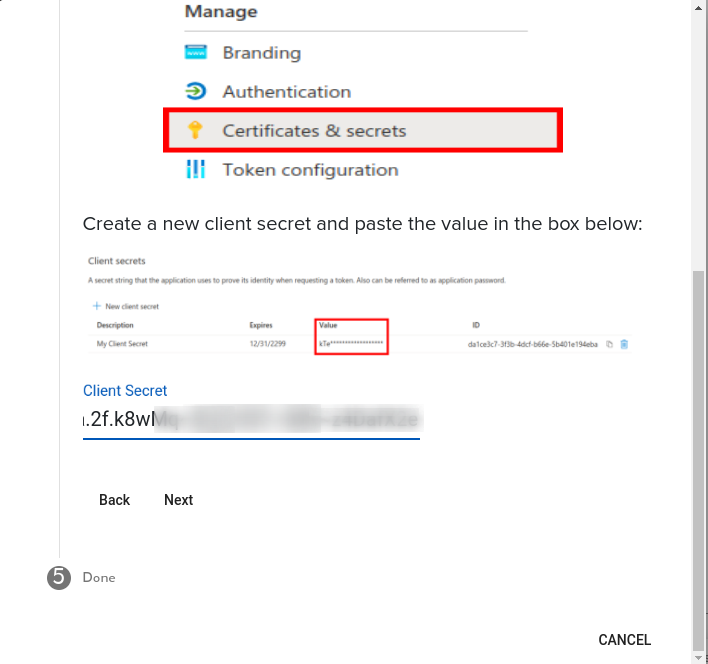
Now we create a ‘Client Secret’. This is a shared secret between the two systems. Create this in the Azure Portal:
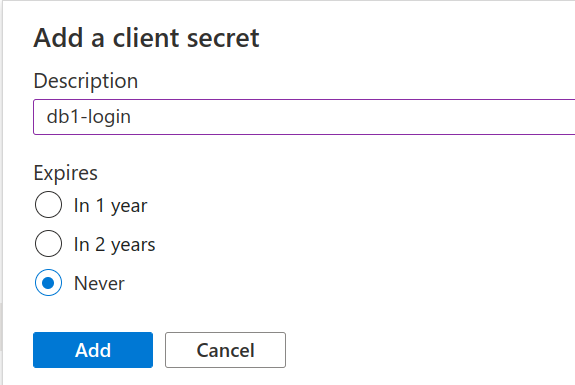
As a description we recommend using the same name as for the Application. If you select an Expiry (e.g. something other than Never) you must remember to update the Admin user interface at a later date.
In the Admin stepper paste the secret you received. You are now done!
NOTE: Multiple Azure tenant with same email address
If your Active Directory login name is the same as the email address you provided through your Apple ID / Google ID / LinkedIn ID, you may have an issue. Please contact Agilicus (info @ agilicus.com) and we can join these accounts for you. E.g. if your Apple ID email is foo@mycompany, and your Active DIrectory is foo@mycompany, let us know and we can join these two together.
Azure Claims
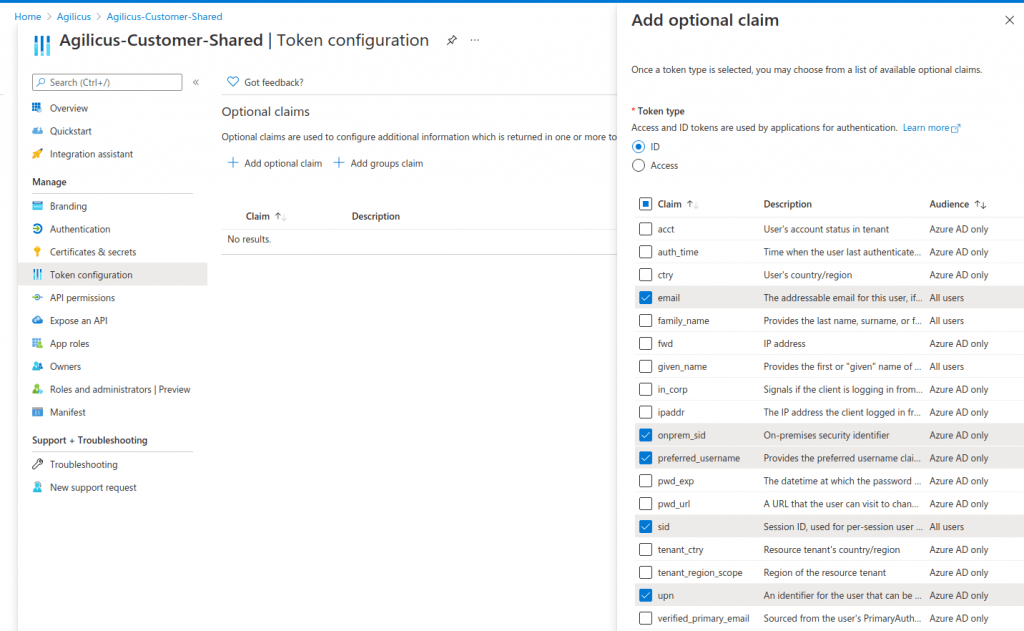
This section is optional. If you wish to synchronise groups, or use UPN as welll as email, you should configure a set of additional claims. Agilicus recommends:
- email — this gives access to the user ’email’ which may differ from the UPN
- onprem_sid — this is used if you will do passthrough authentication (e.g. using SAML with Citrix)
- upn — this gives access to the user principal name
- sid — this can be used to allow per session sign-out
- preferred_username — this controls how the user might interact with the system as a name
(Optional) Azure Groups
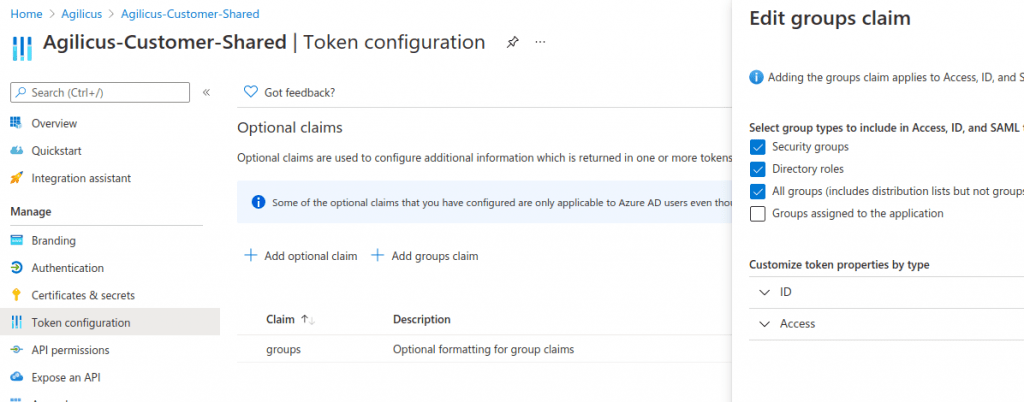
You may wish to directly import your Azure groups into Agilicus for role-based access control. To do so, enable the groups claim in Azure.
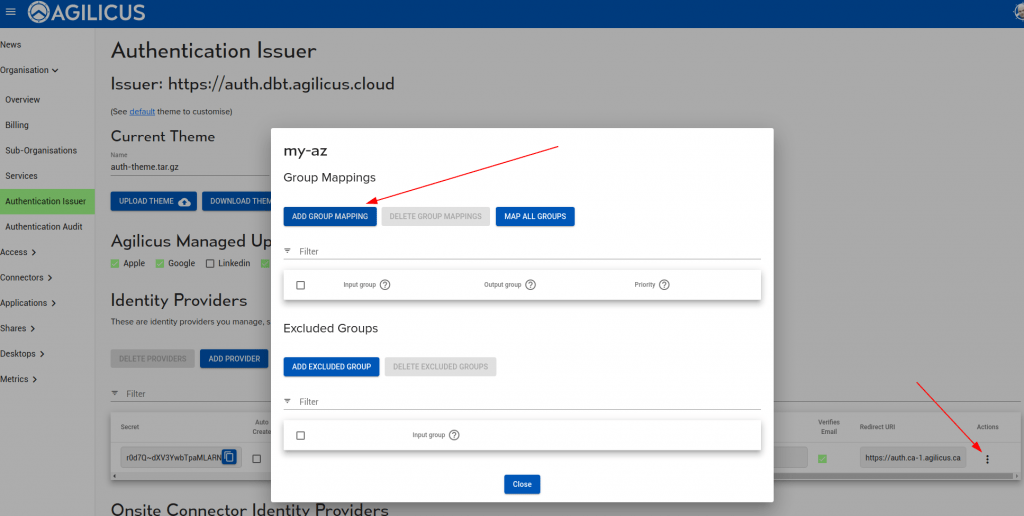
On your Azure Upstream Identity Issuer, enable the group mapping as below. You may need to use the GUUID and map to names.
Testing and Application Consent
At this stage you may try a login. You can keep the Admin portal logged in and use https://profile.MYDOMAIN to try. You should see a new Sign-In option, which is named as you have above.
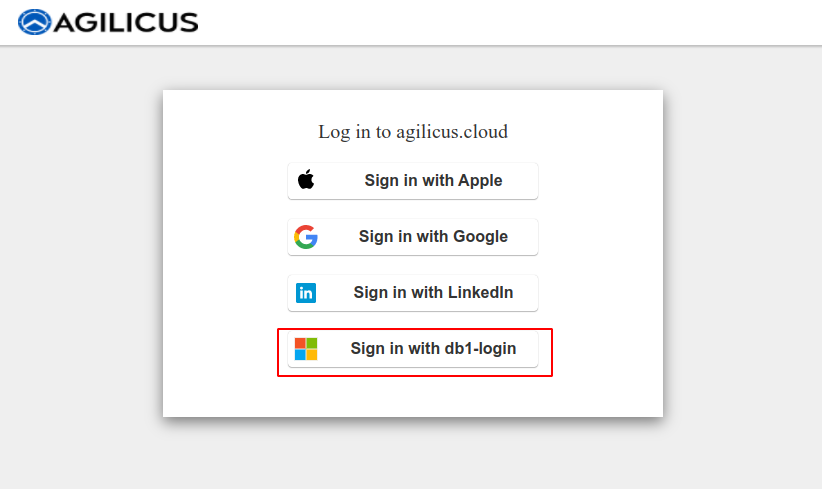
The first (and only) time you select this new Sign in option, you will be presented with a question as to whether you consent to the information shared. The Information shared is your Name, and your Email. No permission is being granted to access any Azure or Office 365 information.
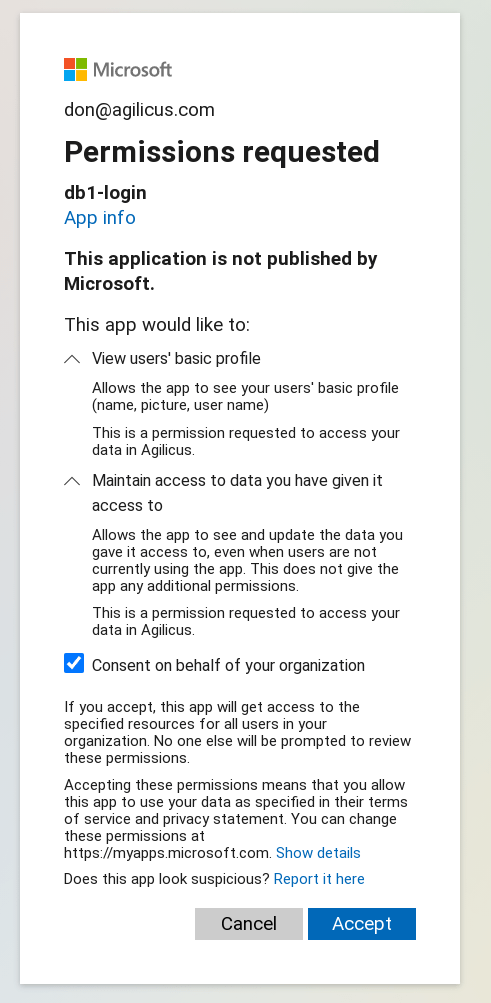
You are now complete. All users can now Sign in with their corporate login, no additional passwords to remember.
Advanced Grant Workflow
NOTE: If you use advanced grant workflow
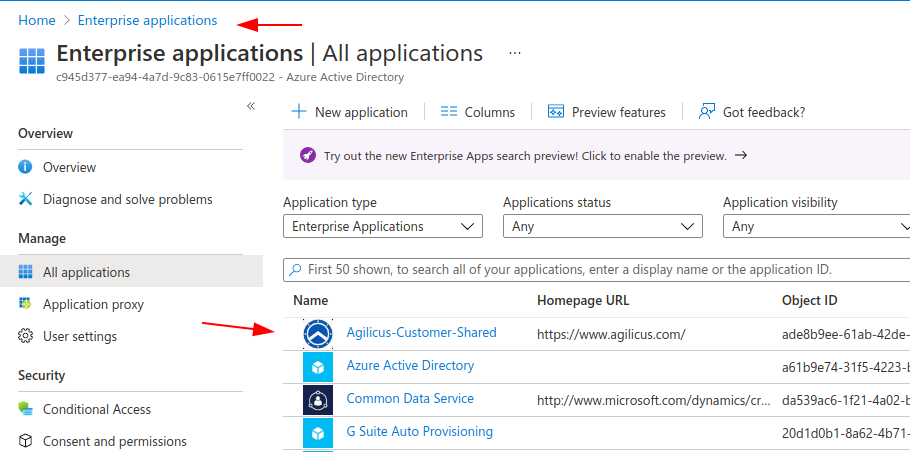
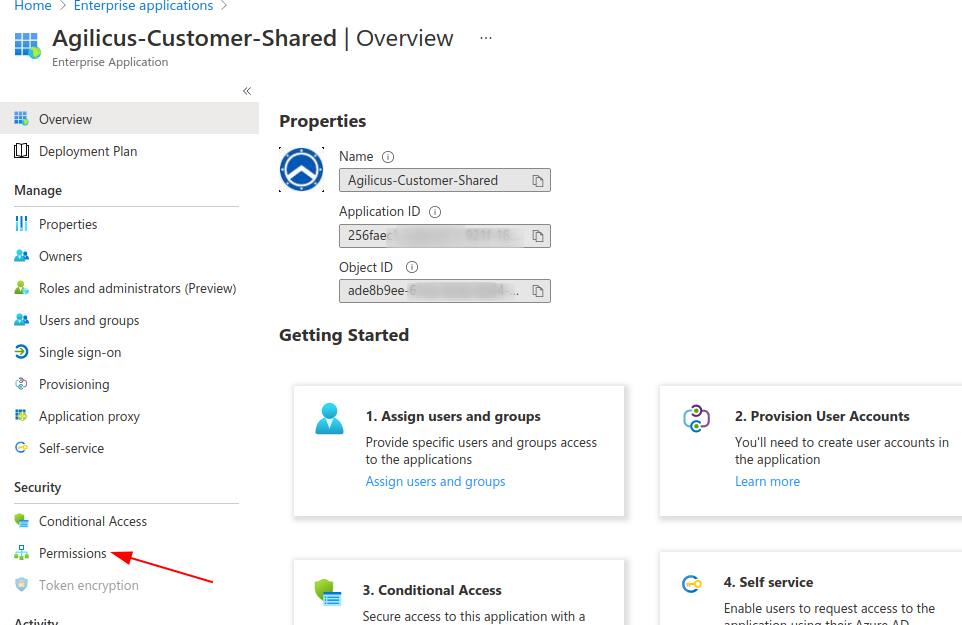
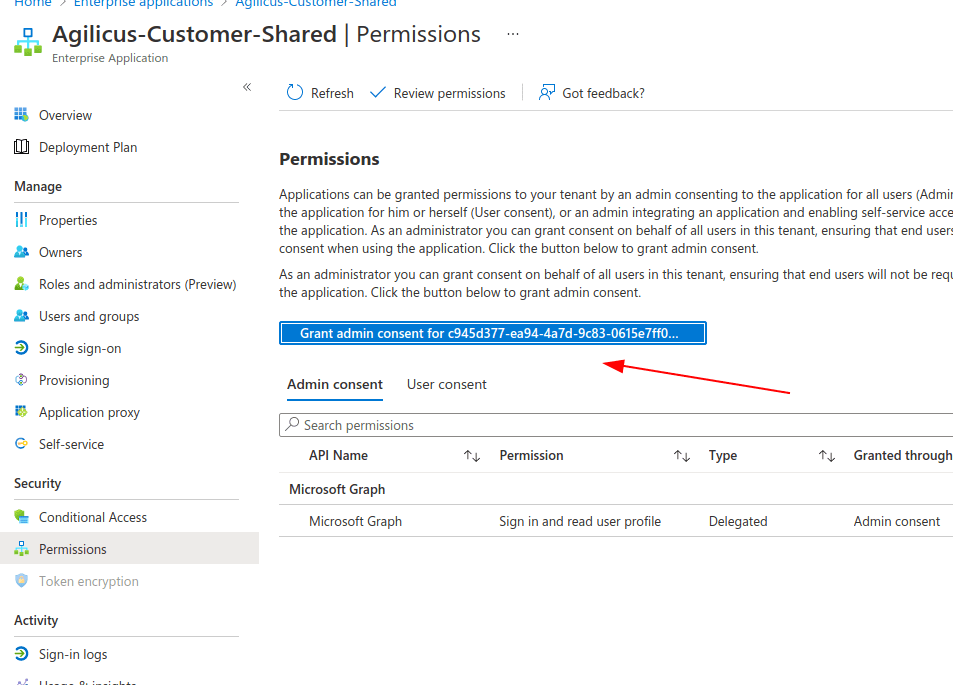
If you use a per-application or per-user grant workflow, we recommend granting access to this new ‘App Registration’ under the ‘Enterprise Applications’ section of Azure Active Directory. You may navigate to the specific application (as below), and then ‘Permissions’, and then ‘Grant admin consent’.
If you do not do this, you may find that users who use the ‘offline_access’ workflow (also known as the refresh token) may be confused by constantly being requested to grant access
