Overview
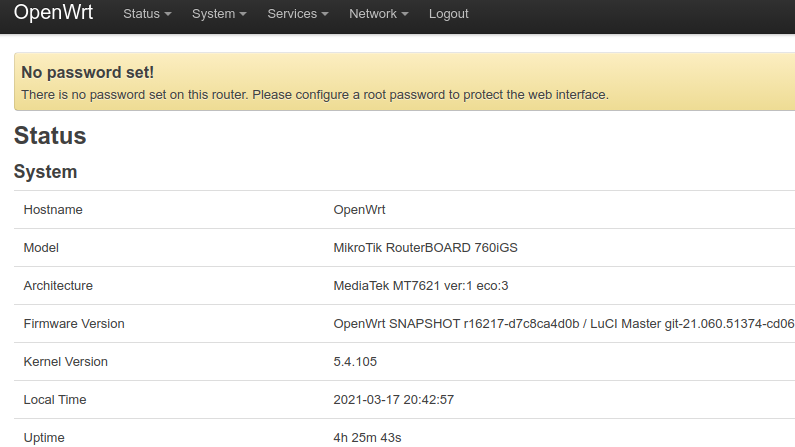
The Agilicus Connector can install on an embedded router product such as OpenWRT. The devices (usually) have either an MIPS or an Arm processor. The instructions are the same for each, but the link is different. The instructions below are for a OpenWRT Router but will be similar on other devices. Select the proper processor (ARM/MIPSBE/MIPSLE) according to your hardware.
See NanoPi R5S for a specific device and instructions.
Your OpenWRT device will need at least 128MiB of flash memory, and at least 256MiB of DRAM. Not all devices do, we recommend checking first.
No changes are needed to your firewall. No VPN is needed. You can administer users via their Active Directory or Apple, Google, Linkedin accounts.
The high level steps are:
- Enable SSH on your Router (or, use the web-based terminal from LUCI)
- Create a Connector (Agilicus admin interface)
- SSH to the Router
- Paste the given command line
after this, the Agilicus Connector will be entirely automatic, and controlled via the Agilicus admin interface. You may uninstall it at any time with
agilicus-agent client --uninstallCreate Connector
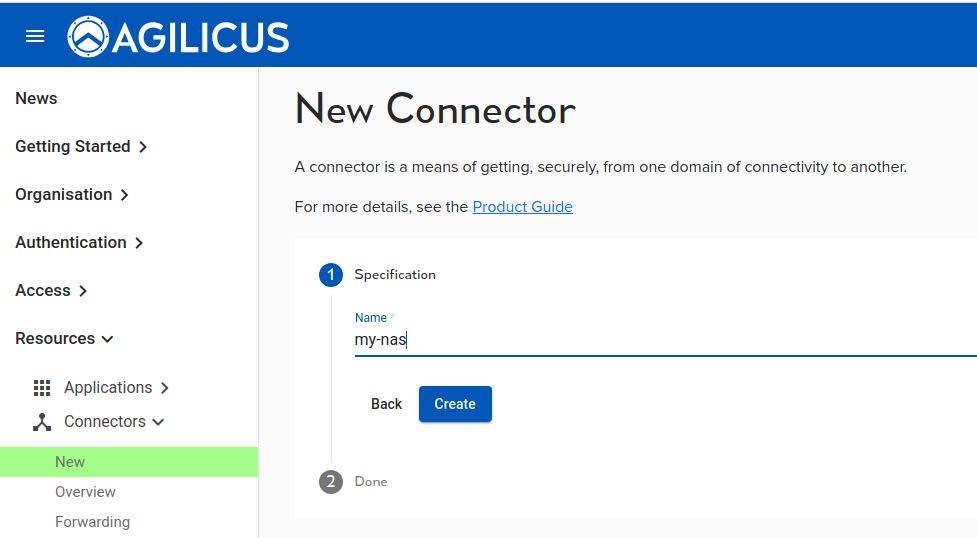
First we will create a Connector. This logical endpoint allows reverse inbound connectors to safely occur.

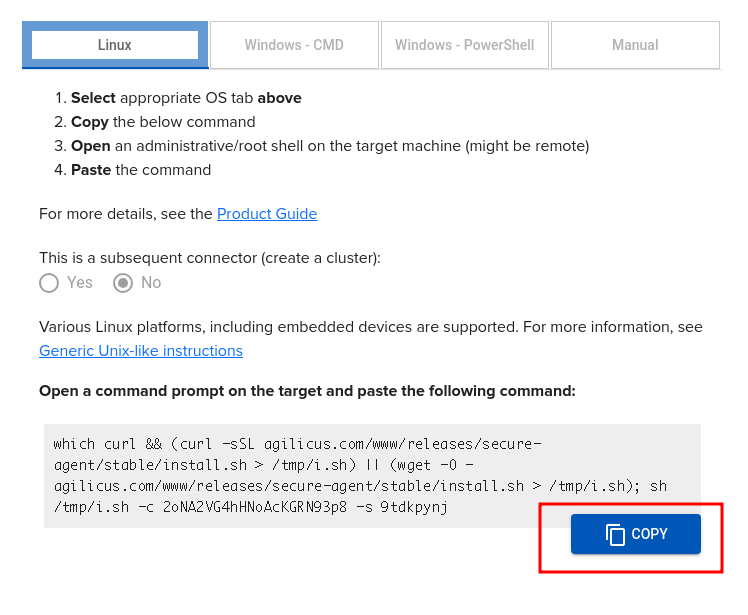
We give the connector a name. This is used for statistics and diagnostics purposes. Select the Linux instructions, and select Copy.

Now, SSH to your Router and paste the given command line:
# which curl && (curl -sSL agilicus.com/www/releases/secure-agent/stable/install.sh > /tmp/i.sh) || (wget -O - agilicus.com/www/releases/secure-agent/stable/install.sh > /tmp/i.sh); sh /tmp/i.sh -c JhtPxw9GVXXXXXX -s yw6XXXX
/bin/curl
OS: <Linux>, Machine: <aarch64>, END: <le>
Fetching https://www.agilicus.com/www/releases/secure-agent/stable/agilicus-agent-arm64 into /tmp/agilicus-agent-arm64
-rwxr-xr-x 1 root root 46268416 Jul  8 11:37 /tmp/agilicus-agent-arm64
+ /tmp/agilicus-agent-arm64 client --install --challenge-id JhtPxw9GXXXXX --challenge-code ywXXXX
INFO[2023-07-08T11:37:53-05:00] Starting connector - version v0.211.3
INFO[2023-07-08T11:38:08-05:00] Check if the agilicus connector is already running as a service. If so stop it
INFO[2023-07-08T11:38:08-05:00] Create file /usr/bin/agilicus-agent-wrapper.sh
INFO[2023-07-08T11:38:08-05:00] Create file /etc/systemd/system/agilicus-agent.service
INFO[2023-07-08T11:38:08-05:00] Will install to /agilicus-agent-wrapper.sh -> {/usr/bin/agilicus-agent-wrapper.sh -rwxr-xr-x <nil>}
INFO[2023-07-08T11:38:08-05:00] Will install to /agilicus-agent.service -> {/etc/systemd/system/agilicus-agent.service -r--r--r-- 0xd97540}
INFO[2023-07-08T11:38:08-05:00] Create a directory at /opt/agilicus/agent/tufmetadata/latest
INFO[2023-07-08T11:38:08-05:00] Create a directory at /opt/agilicus/agent/tufmetadata/stable
INFO[2023-07-08T11:38:18-05:00] Create a user and group named Agilicus to run the agilicus-agent service
INFO[2023-07-08T11:38:18-05:00] Copy executable to /opt/agilicus/agent
INFO[2023-07-08T11:38:18-05:00] Set permissions to Agilicus on /opt/agilicus/agent
INFO[2023-07-08T11:38:18-05:00] Create symlink from /usr/bin/agilicus-agent to /opt/agilicus/agent/agilicus-agent-arm64
INFO[2023-07-08T11:38:18-05:00] creating connector instance
INFO[2023-07-08T11:38:19-05:00] Join a connector cluster
INFO[2023-07-08T11:38:19-05:00] Start agilicus-agent service
INFO[2023-07-08T11:38:21-05:00]
INFO[2023-07-08T11:38:21-05:00] Installation Complete
INFO[2023-07-08T11:38:21-05:00]
At this stage you are complete, you will see the Connector go online in the web interface in a minute or so.
