PLCnext Engineer
The Phoenix Contact PLCnext Engineer is a software engineering tool designed for developing automation applications. By combining the software with Agilicus AnyX Zero-Trust secure remote access, secure programming from anywhere is possible
Configuring PLCnext Engineer as a Launcher
The Phoenix Contact PLCnext Engineer is a software engineering tool designed for developing automation applications. It is part of the PLCnext Technology ecosystem, which aims to provide a flexible and open automation platform. It is a versatile and powerful tool for developing modern automation solutions, offering flexibility, openness, and advanced features to meet the needs of various industrial applications.
When combined with the Agilicus AnyX platform, the software suite can access remote Industrial Control System automated applications via a reliable Zero Trust architecture.
Furthermore, when also deploying the Agilicus Connector at remote sites on the supported family of PLCnext AXC F (1152, 2152, 3152) high performance controllers , the end-to-end secure remote access components can entirely deployed within the Phoenix Contact family of products, making it an easily deployable and managed solution for both engineers and site planners.
For the purposes of this article, the version of PLCnext Engineer used is 2024.0.3
Creating Network Resources
Let’s first create a sample remote controller network resource to allow the Engineer software to access.
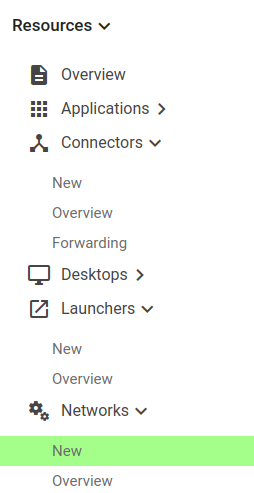
Navigate the Admin interface to Resources -> Networks -> New
In Step 1, select the appropriate connector where the remote controller is deployed. In this example, we are selecting a connector installed on a PLCnext AXC F controller at a remote site.

For Step 2, assign a relevant internal hostname for the remote network

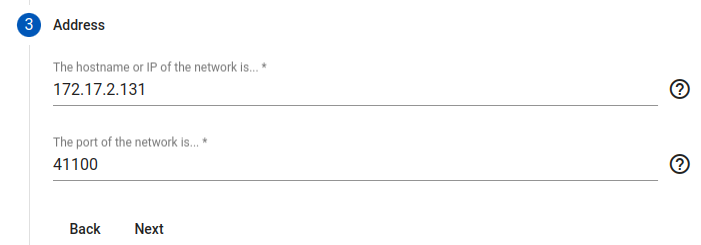
In the following step 3, configure the valid local IP address and TCP port of the remote controller.
Eg: address of 172.17.2.131 , TCP port of 41100
In Step 4, Select Optional parameters to specify additional options. In this step, we will add “source port override” settings at the bottom of the menu. Keep the standard TCP port of 41100 .
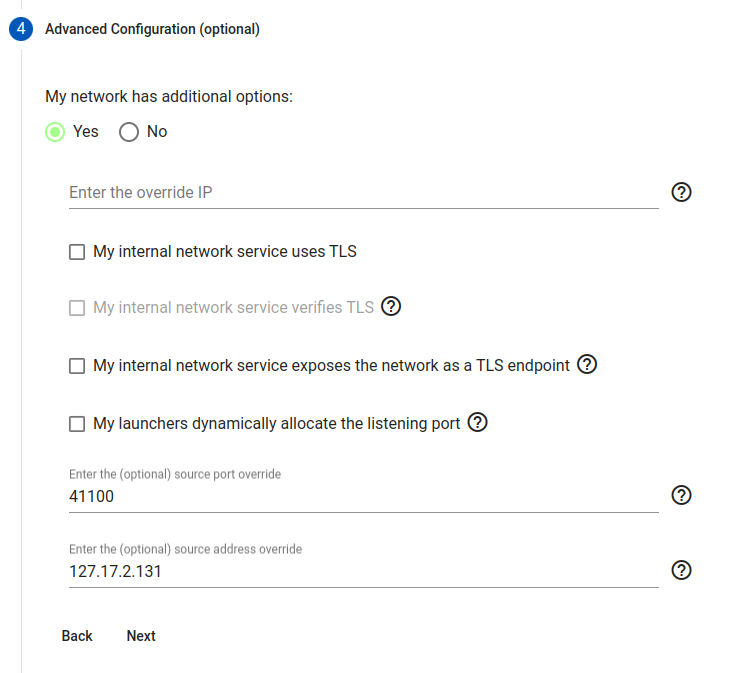
Add a new and unique system address in the 127.x.x.x IPv4 local loopback network aka LocalNet space.
This optional parameter will be used for the Engineer software client to connect through the Agilicus platform via a temporary ‘Ad-hoc’ connection assigned to this unique local IP address that will be created on the workstation where the client software is installed and launched. One such unique address inside the Loopback network will be required for each remote controller, and should not be previously used on the workstation.
In this example, and for sake of addressing clarity and recall, we are using the same last 3 tuples of the controller remote IP address to form a loopback address.
So the remote controller network IP address of 172.17.2.131 is assigned through this option dialog to a local override IP address of 127.17.2.131 for the local Engineer workstation to bind to.
Click “Apply” in step 5
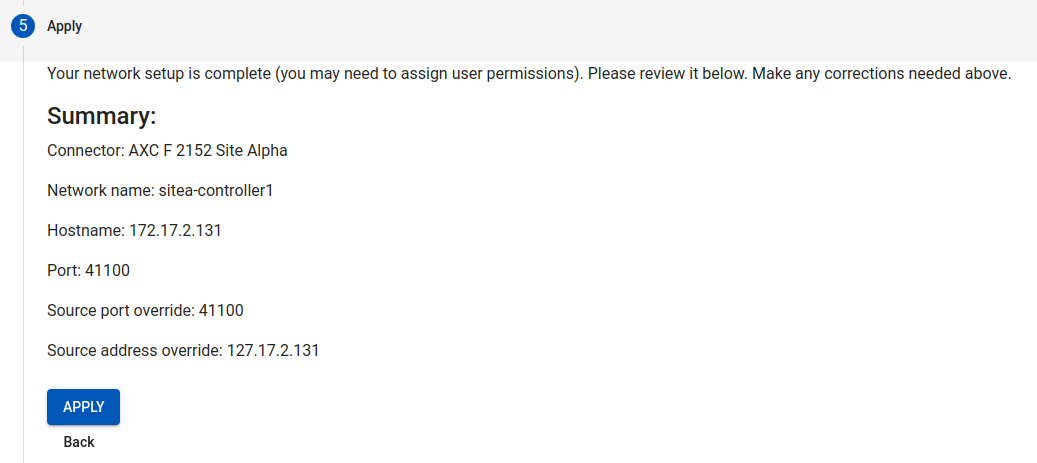
Repeat this Network Resource creation stepper for each remote network controller that requires access by the Engineer software. Ensure each “Source address override” in the loopback network remains unique .
Configuring PLCnext Engineer as an Agilicus Launcher
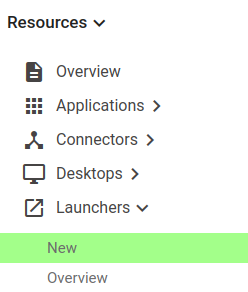
In the Agilicus Admin panel, first create a launcher for the Engineer software by navigating to the Resources -> Launcher -> New menu
Assign a name to the launcher, e.g.: PLCnextEngineer2024 and specify the valid path to the actual executable (not the shortcut). The default installation path will be:
C:\Program Files\PHOENIX CONTACT\PLCnext Engineer 2024.0\PLCNENG64.EXE
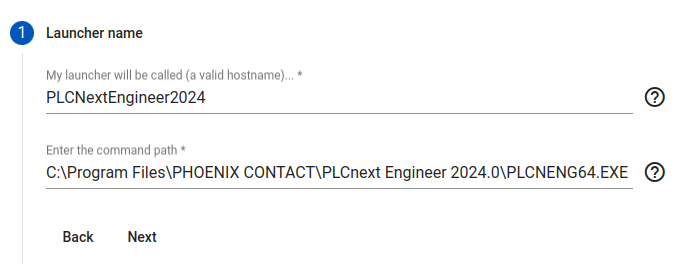
Note that the version string is present in the path and may need to be changed when a software update is done at a later time.
In Step 2, we will assign all the resource members previously configured so that the Engineer software can access them. In this case, the previously configured sitea-controller1 network is assigned.

In the third step, we will select NO for any advanced settings.
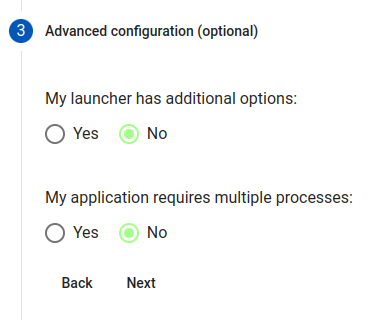
In the final configuration step, we can review the New Launcher settings and select Apply to confirm the configuration.

As part for of the Agilicus AnyX permission and resource assignments, we can use step 5 to assign the newly created Launcher to a set of Resource Groups , or assign the resource directly to a set of user identity or user groups.
If this step is skipped, authorization to this newly created Launcher resource can be assigned via the Access -> Resource Permissions admin menu
Launching the PLCnext Engineer application
After running the Agilicus “Refresh” desktop shortcut, any user workstation with Agilicus Desktop Integration will have a visible PLCnext Engineer launcher created in the Agilicus start menu.
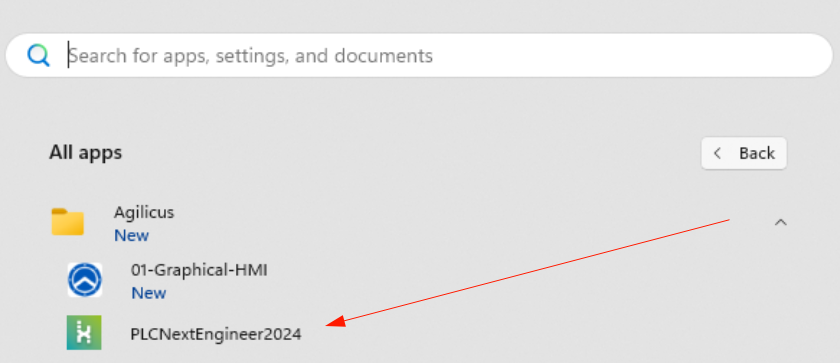
Clicking on this launcher will run the Engineer software and also perform the necessary authentication and authorisation phase for the Agilicus AnyX platform.
The Engineer software will launch as usual, and an existing Project can be opened.
In order to access the remote controller via the Agilicus platform, select the controller and navigate to the Cockpit tab, and then select the ‘Ad-hoc IP address’ menu. To configure the IP address to connect via Agilicus, first “Enable” the setting, and then specify the IP address previously configured as the “source address override”. In this example, we will use 127.17.2.131 . Navigate away from the dialog in order to make sure the setting is saved. Saving the project will also preserve the assigned IP address.
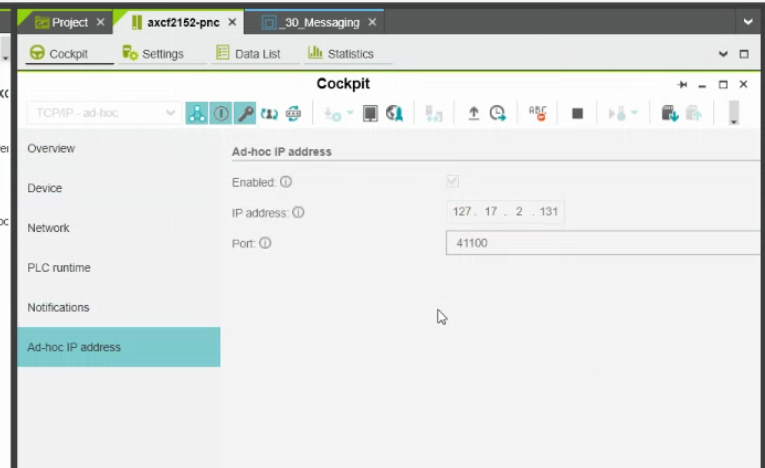
With this configuration set, enabling ‘Ad-Hoc address’ will allow the Engineer software to connect to the remote controller via the Agilicus platform. Disabling ‘Ad-hoc address’ will set the Engineer software to connect via the configured IP address via the local network and interface selected in the general configuration parameters.
Note that the specified “Ad-Hoc address” will only be reachable when Engineer is started as an Agilicus Launcher and will otherwise not be active when run natively.
Connect to the remote controller with Ad-Hoc address enabled:

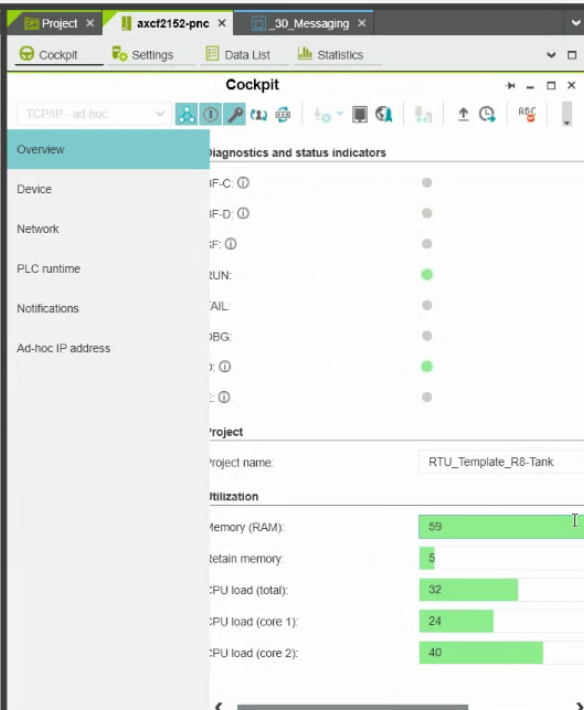
Verify connectivity via the Overview panel.
