Applications
An Application is a HTTP-based (browser or REST/SOAP API) resource. This could be e.g. a wiki, a Human Machine Interface (HMI).
Agilicus AnyX can handle all the authentication (user sees single-sign-on, no change to your existing web application).
The Agilicus AnyX firewall can handle fine-grained authorisation (per path, per user, body, URL).
Background
Each application will be provisioned with a URL of https://<appname>.<domainname>, and, be available to any user from any browser. A valid certificate will be automatically created (and rotated approximately every 50 days).
Application can have various methods of authentication (sign-in):
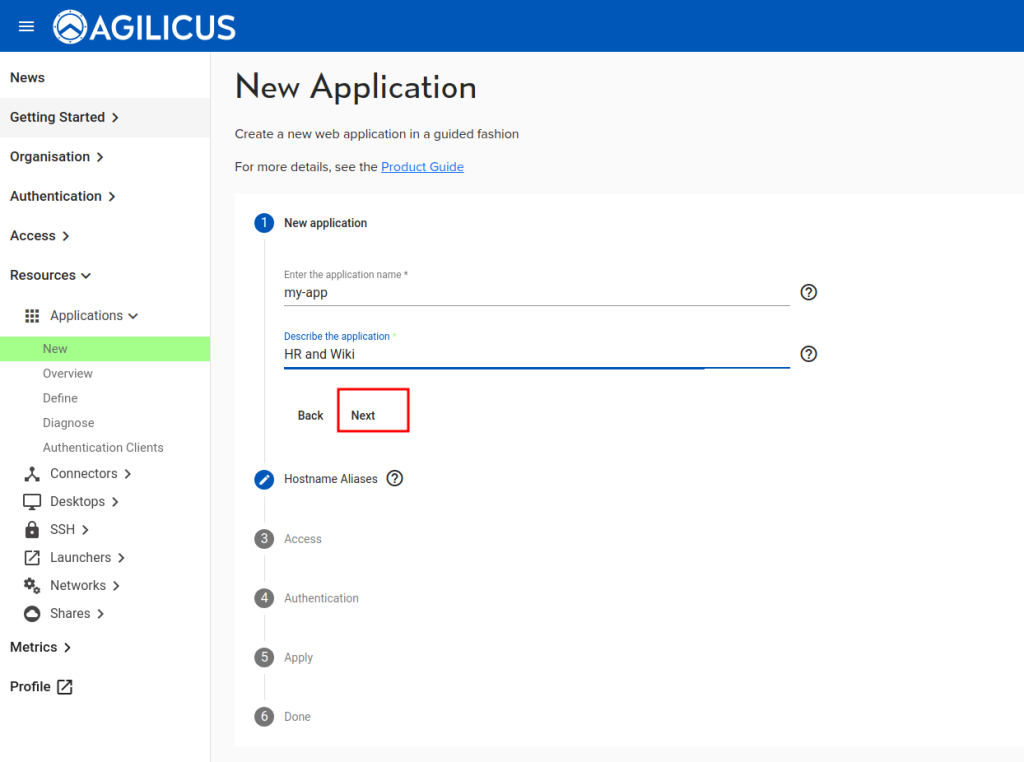
To create a new application, select Resources/Applications/New. This will start a guided setup (a ‘stepper’).
In this first step, you will provide two items:
- application name. This must be a valid hostname (a-z, 0-9 and -). Please use all lower-case. Underscores and spaces are not allowed. This will become the URL (https://appname.domain).
- A general description. This is free form, it will show to the end users.
Throughout the steps you will normally see a ‘Next’ or an item in light-grey to open for the next configuration.
- None. Open to anyone on the public Internet. This can be suitable for cases where the application has its own internal user management which is sufficiently strong.
- Participating. The web application has built in support for OpenID Connect (or SAML), and, initiates the sign-in flow. This is suitable for cases where the application needs valid users that are distinct.
- By proxy. The Agilicus AnyX platform becomes an Identity-Aware-Proxy, forcing users to sign-in prior to any access. In this model, no traffic arrives at the web application unless the user is authenticated and has permission. This is a very strong security model.
New Application (Create/Setup)
Step 1: Name
Step 2: Hostname (or Alias)
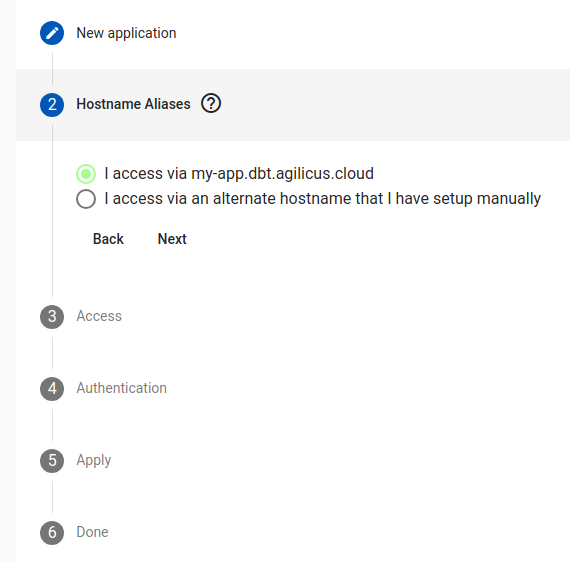
In this step we decide how to reach this application. In some cases there is a specific, well-defined, already setup name (which DNS points to this cluster).
Most users will select the first option, in which case there is no additional config.
If you wish to have a manual hostname, set your DNS server up and point it to the same location as the CNAME you did during the initial system setup.
Step 3: Data Plane Network Access
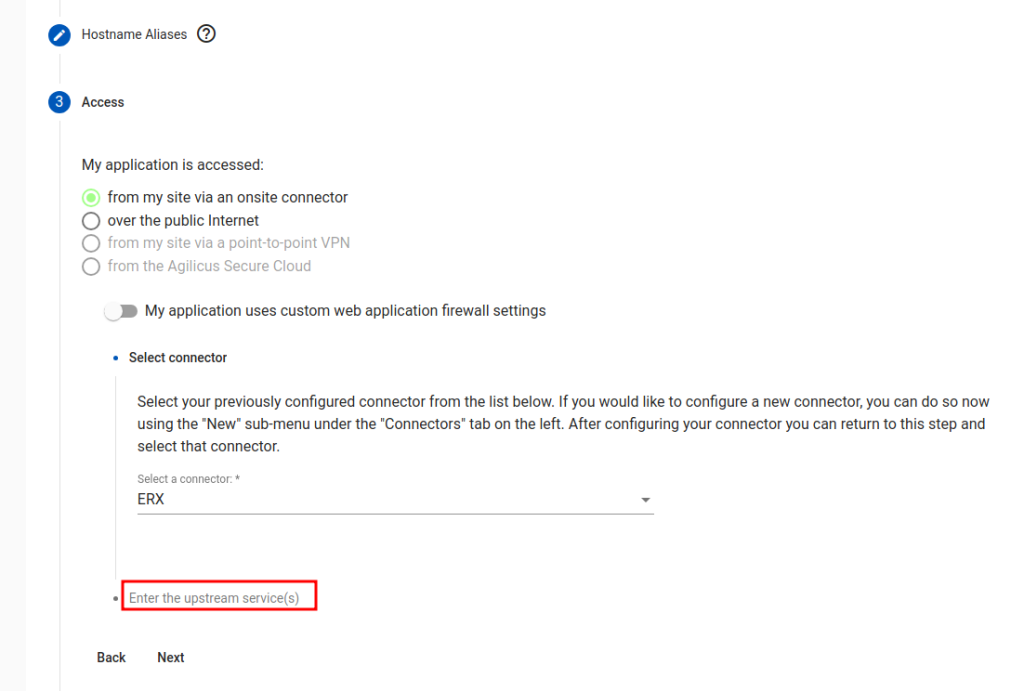
“My application is accessed…”. This governs the data path of how the users reach the application. Most users will select ‘from my site via an onsite connector’, meaning there application is in some private network.
In some cases, when the application participates with the authentication, you may wish to entirely manage the data network and certificates manually, select ‘over the public Internet’.
There is now an ‘advanced configuration’ option, “My application uses custom web application firewall settings”. In most cases this is not needed. These options are described below.
Step 4: Upstream (internal host) Data Plane Network Access
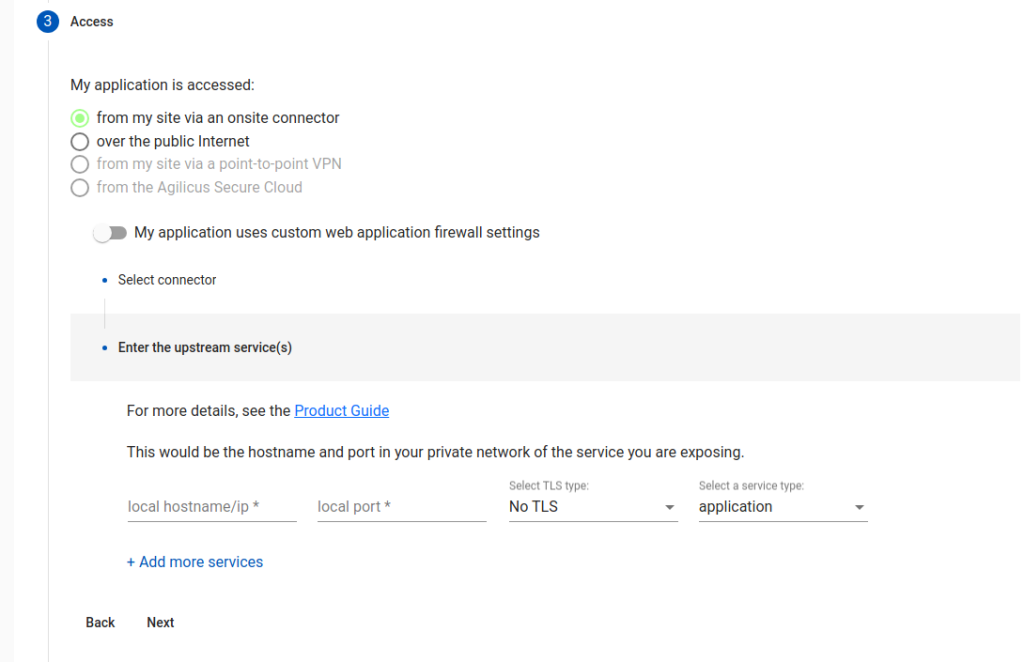
In this step, we configure the internal (in your network) coordinates of the web application. We refer to these as ‘upstream services’.
“Local hostname/ip”. From the machine running the connector, what would you enter in a browser to reach the internal web site? This could be ‘localhost’ if the connector were running on the web server.
“Local port”. What port is your web server running on? (typically 80 or 443, could be 8080, 8088).
“TLS Type”. Is your internal web server setup with SSL/TLS? If so, you might select ‘accessed via TLS”. If it is, and, the certificate is publicly trusted (e.g. issued via Let’s Encrypt or another public certificate provider), select ‘via TLS and verify”.
In rare cases, an application has multiple components on multiple ports, select ‘add more services’
Step 5: Authentication
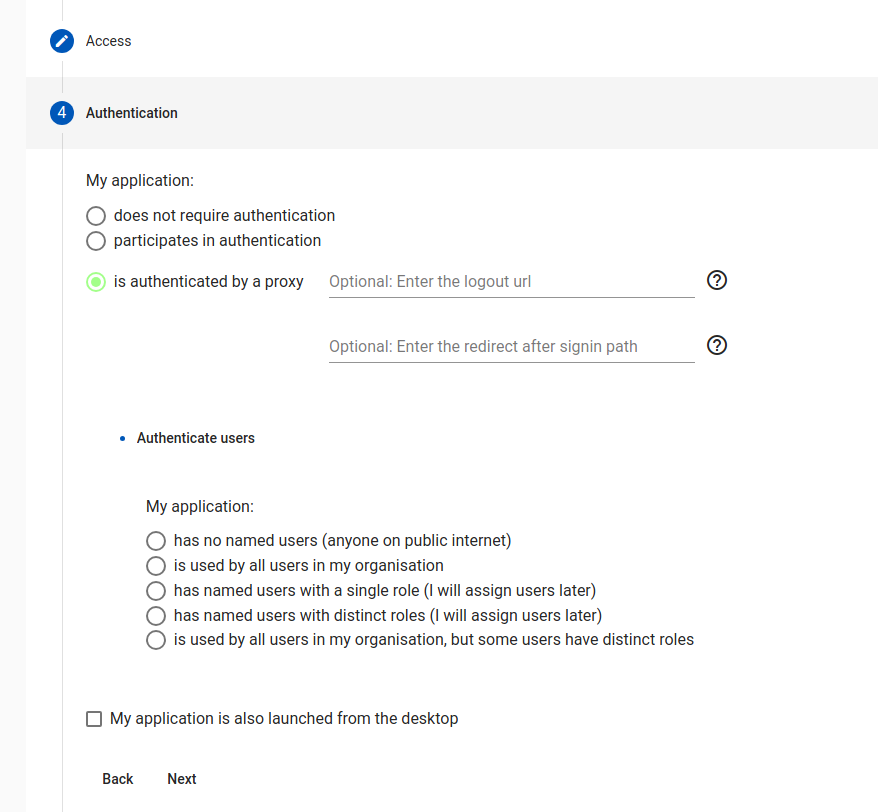
Applications fall into three classes:
- No authentication (rare), no user checking is done
- Participates. Application supports OpenID Connect or SAML and is configured to work with Agilicus AnyX specifically.
- Authenticated by Proxy. This is the typical case.
For “Authenticated by Proxy”, we can optionally set a ‘redirect after signin’, this is used to give the user an initial subpath (e.g. /Profile).
For the proxy authentication, we now have a initial preset (we can configure later in Define or Access), of how users will use this.
- No named users. (any valid random user)
- All users in my org. The ‘All-users’ group is given permission.
- Named users, single role (this is the most common). A group is created which has access.
- Named users, distinct roles. In this mode, there are distinct classes of user (e.g. Editor, Viewer, Manager).
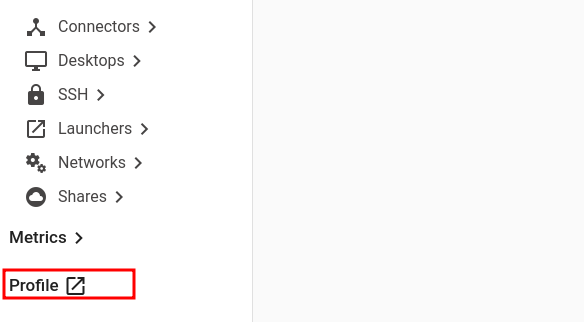
At this stage, you can ‘Apply’. The application will start to configure, this takes 30-45 seconds. You may now need to assign permissions (see Access/Application Permissions). Otherwise, open Profile (see left menu, bottom), hit refresh, and you will see a link to the URL.
(Optional) Custom Web Application Firewall Settings
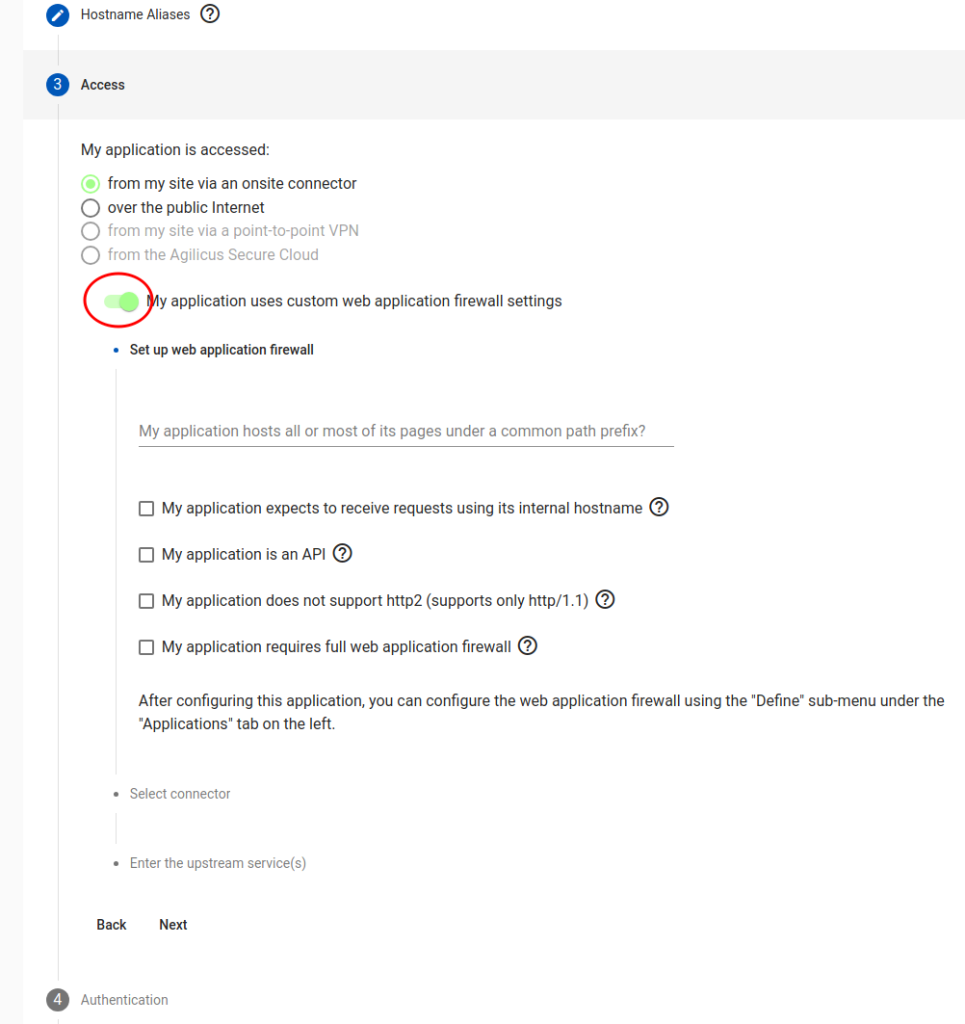
In some cases manual overrides are needed to parts of the web application firewall. These may be performed during the setup, or, later, tuned with the Define step. The options listed are:
“common path prefix”. If your application is internally served on a shared web server with other web apps, (e.g. intranet/HR, intranet/Wiki), then you may wish to use the prefix option, rehoming it to root. (e.g. /HR here will mean the user will see http://HR/, and automatically sign in).
“Is an API”. If the HTTP endpoint is normally used via external web applications, this will setup CORS automatically. You may also fine tune this in the Define.
“Does not support http/2”. Some applications break when presented with HTTP/2, which is otherwise supported by the Agilicus AnyX proxy. Setting this option will prevent advertising HTTP/2 support.
“Requires full web application firewall”. This is rarely used, we recommend discussing with Agilicus first. This causes a 2-hop encryption path to be used, with an intervening filter.
Application hosted on subpath of domain (e.g. https://host/path)
You may have an application hosted under a subfolder/path on your web server, possibly because it is better than having another server for it. For example: localhost:port/subpath, localhost:port/support etc.
To enable the subpath hosting for your application,
1. Go to Resources > Applications > Define and select the application from the drop down at the top of the page
2. Then in Security (tab) > Firewall Rules > HTTP Rules, change the / entry under path to your custom subpath (For example, /subpath)
3. Under Proxy (tab) > HTTP Rewrites, inside the Common Path Prefix field, enter your custom subpath again (For example, /subpath)