Rockwell Automation PanelView VNC
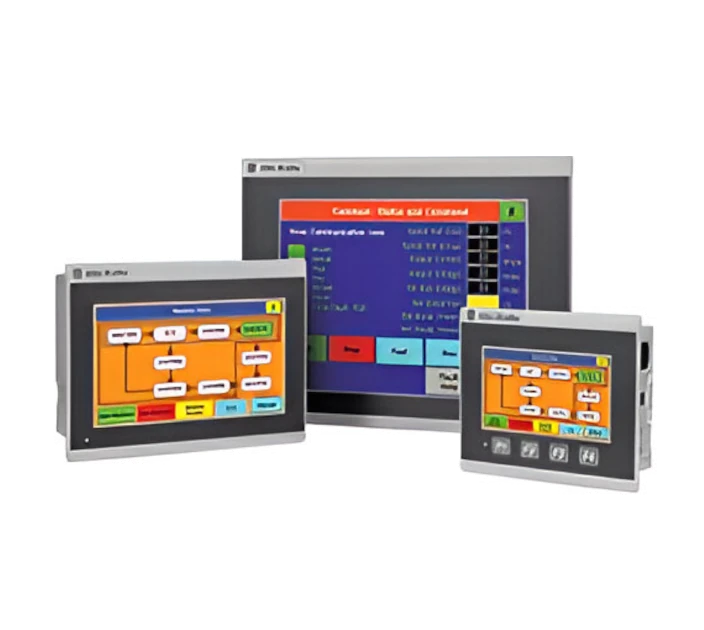
Rockwell Automation’s Allen-Bradley PanelView Graphic Terminals provide rugged Human Machine Interface (HMI) in an industrial setting. These terminals support VNC for remote access.
Learn how to making VNC remotely available, simply, securely, without port-forwards, VPNs, or complex firewalls using Agilicus AnyX.
Rockwell Automation PanelView VNC Overview
Rockwell Automation PanelView devices offer industrial-hardened Human Machine Interfaces (HMI). These may be used for viewing process status & alarms, or for input/control.
A common requirement is to have remote operations view (or interact) with the HMI. The PanelView devices support VNC, meaning its possible, but the network security of VNC is very poor. Absent a product like Agilicus AnyX, plants often use port-forward, DMZ, VPN access, putting themselves at risk.
In this example using Agilicus AnyX, we will show how to safely, securely, simply use Rockwell Automation PanelView devices from a remote network, assigning permissions to individual users with single-sign-on, optional with multi-factor authentication, without modifying the local firewall config. Agilicus AnyX can perform password stuffing in VNC, meaning there is no need to share the password with the individual operators.
Installation Instructions
Overview
If you have not already, sign up for Agilicus AnyX. In the below instructions, we will refer to _ _MYDOMAIN_ _, this is the domain you chose during the Agilicus AnyX sign up process. If you have navigated to this page from the Agilicus admin console (https://admin.__MYDOMAIN__), this will be filled in automatically.
Once setup, the data flow will be as shown to the right. The user will have either web-based access, or, desktop client access to each HMI. They will sign in with their natural corporate credentials (regardless of whether directly employed by the Plant or being a 3rd-party contractor providing remote operations). The will see the HMI directly, no client software is required, no changes are needed on the firewall.
Concepts
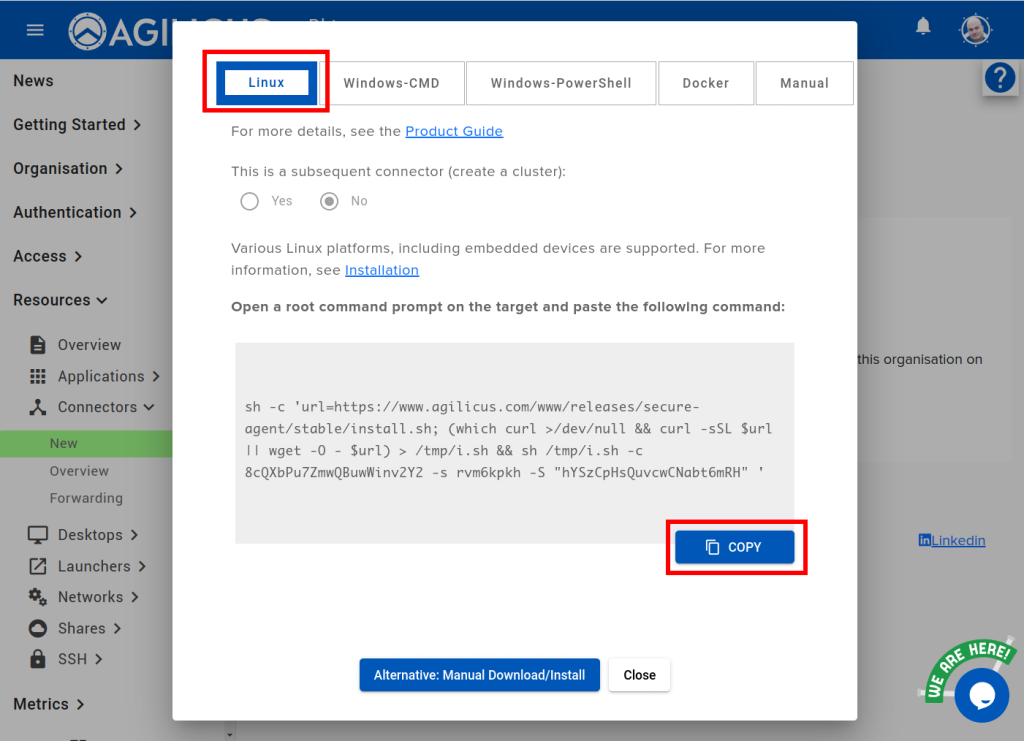
Agilicus Connector: this software installs as a service on some device in your network. It can support multiple operating systems. Each connector can support an arbitrary number of resources (web applications, shares, VNC, RDP, etc.). In general you need one connector per site.
Authentication: attesting you are who you say you are. Agilicus AnyX uses OpenID Connect, and supports zero-config of Microsoft, Google, Yahoo, Linkedin, or, you can configure your own such as Okta.
Identity: who you are. This is external to the Agilicus AnyX system.
Resource: an individually accessible and permissionable endpoint. In this example, VNC
Permission: assigning a role and access rules per person<->resource pair.
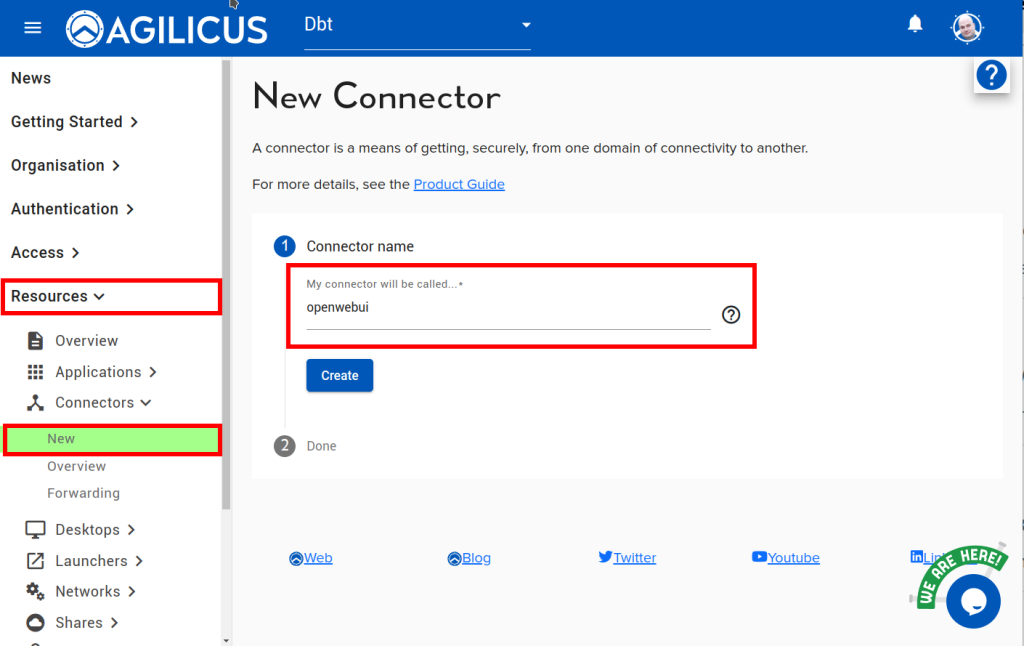
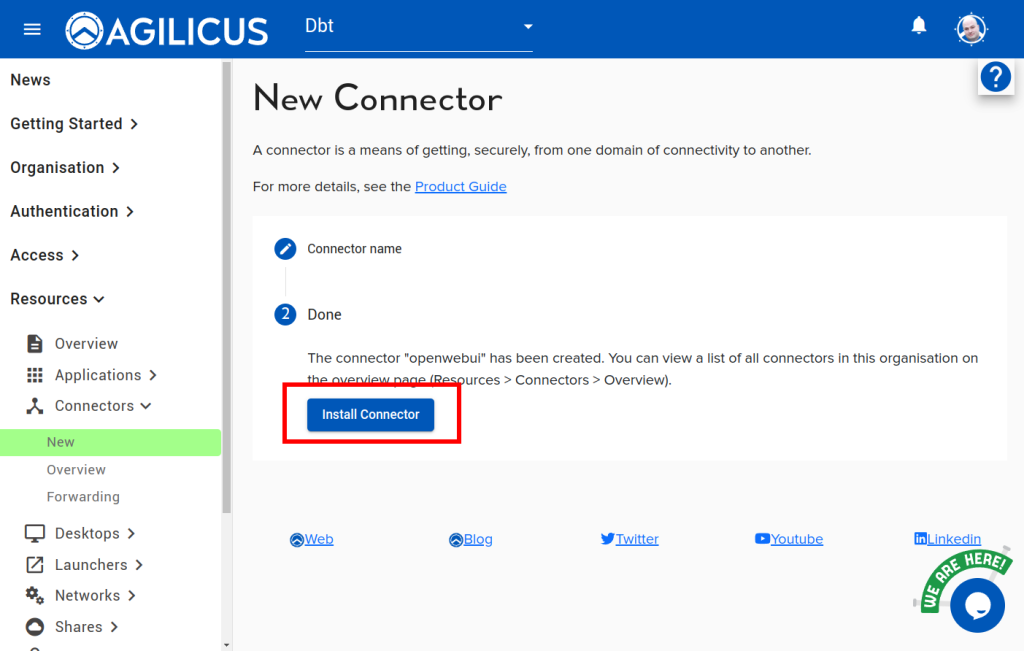
1. Install Connector
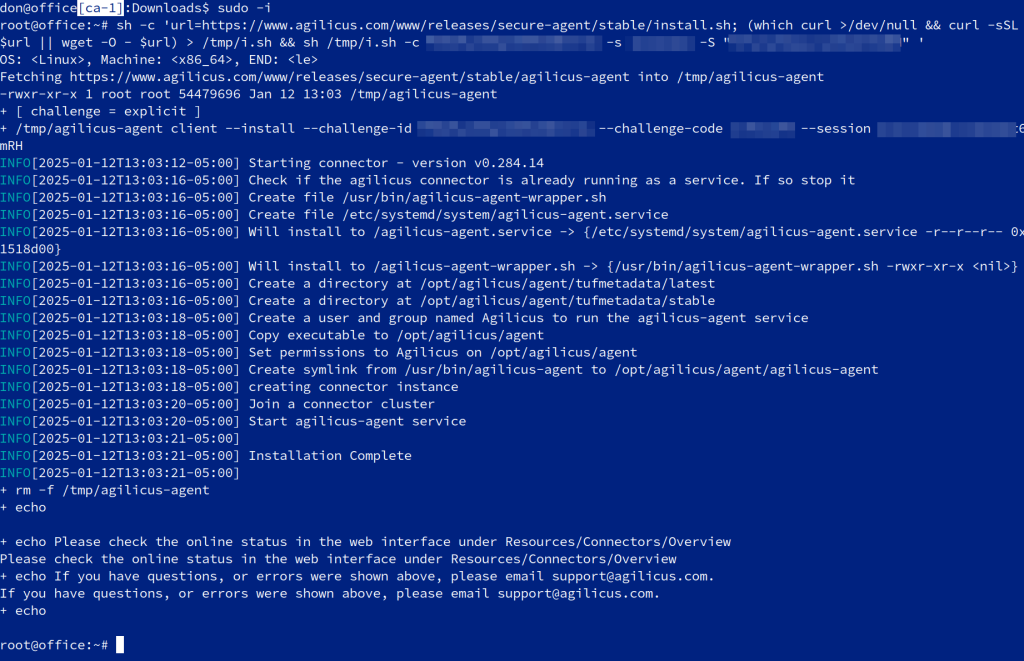
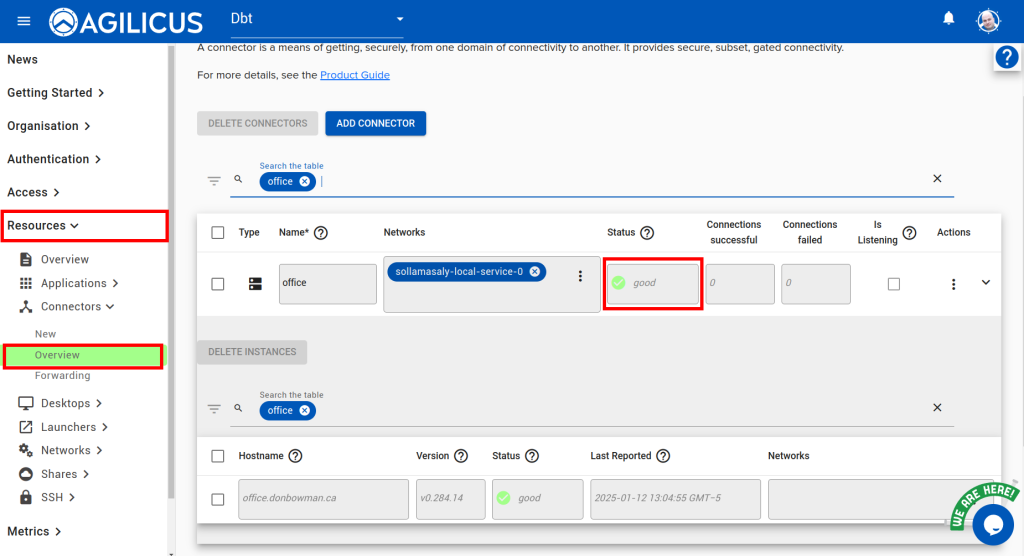
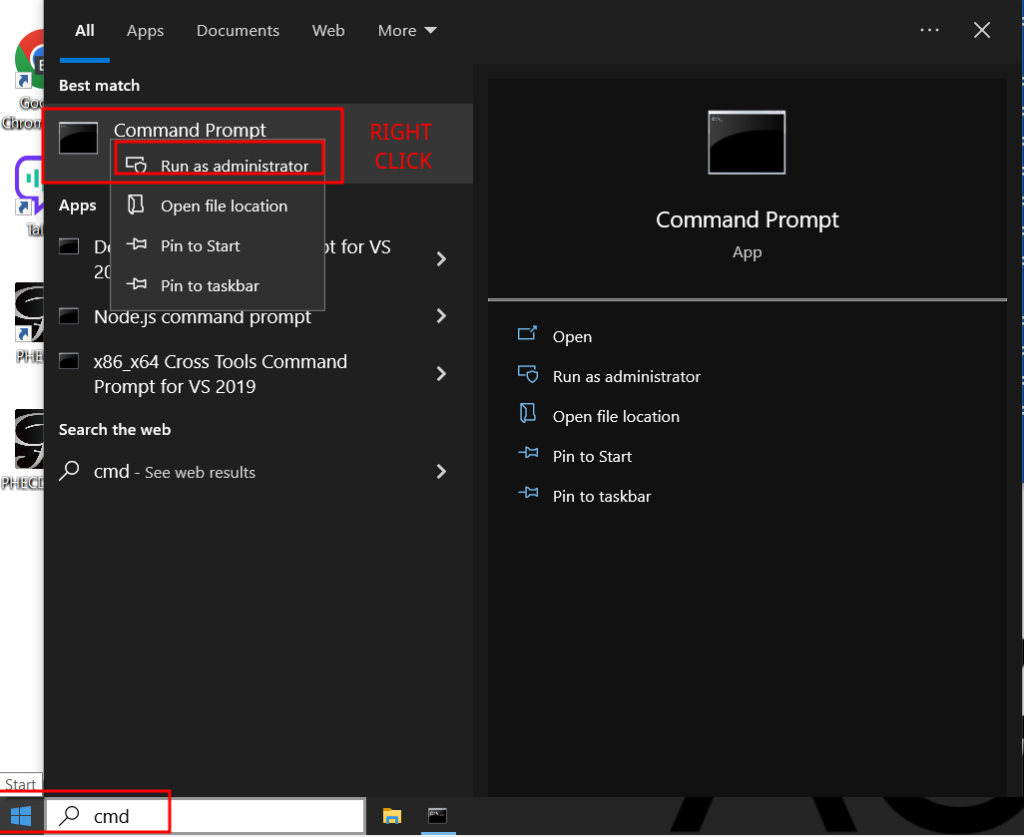
For details see Agilicus Connector.
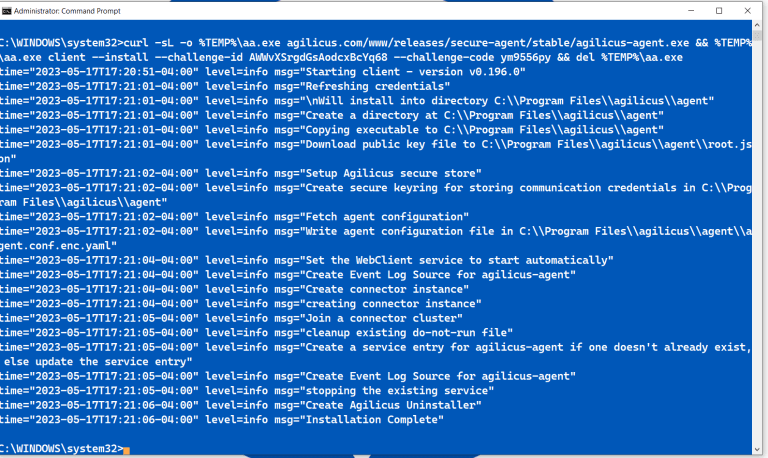
In this example, we are assuming you will install the Connector on a machine on the same network as the PanelView HMI. It needs to have access to port 5900 on the HMI.
Select the appropriate tab for your Operating System.
2. Create PanelView VNC Resource
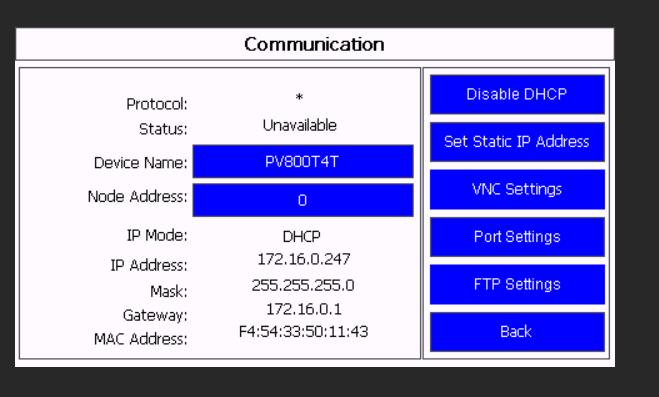
In this example we assume you already have the PanelView device running and VNC enabled on it with either a ‘View Only’ or a ‘Control’ password.
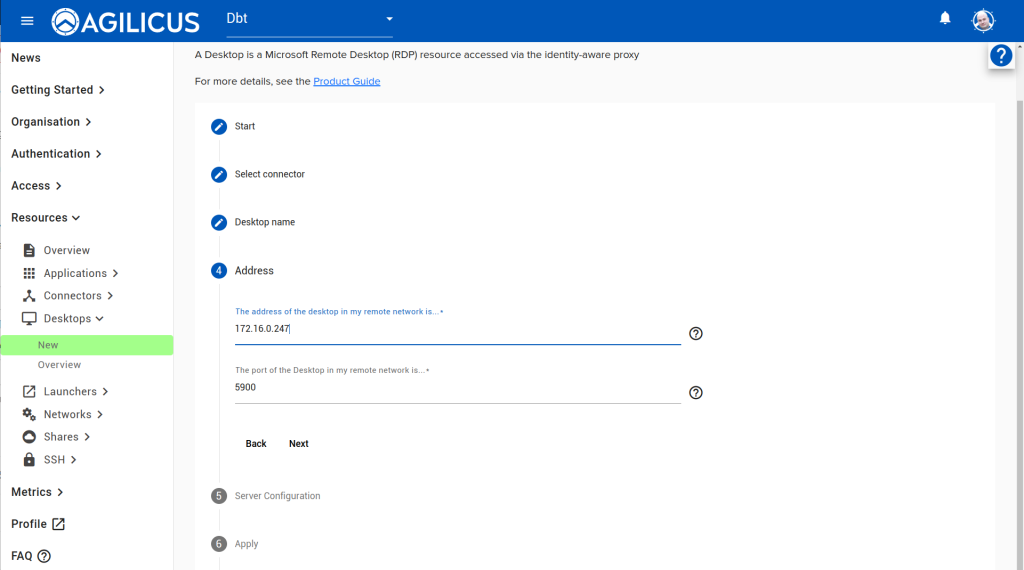
In our sample network, the HMI is called ‘PV800T4T’ and has an IP of 172.16.0.247 (please either use a name and ensure your DNS resolves it, or, disable DHCP on the HMI and use a static IP.
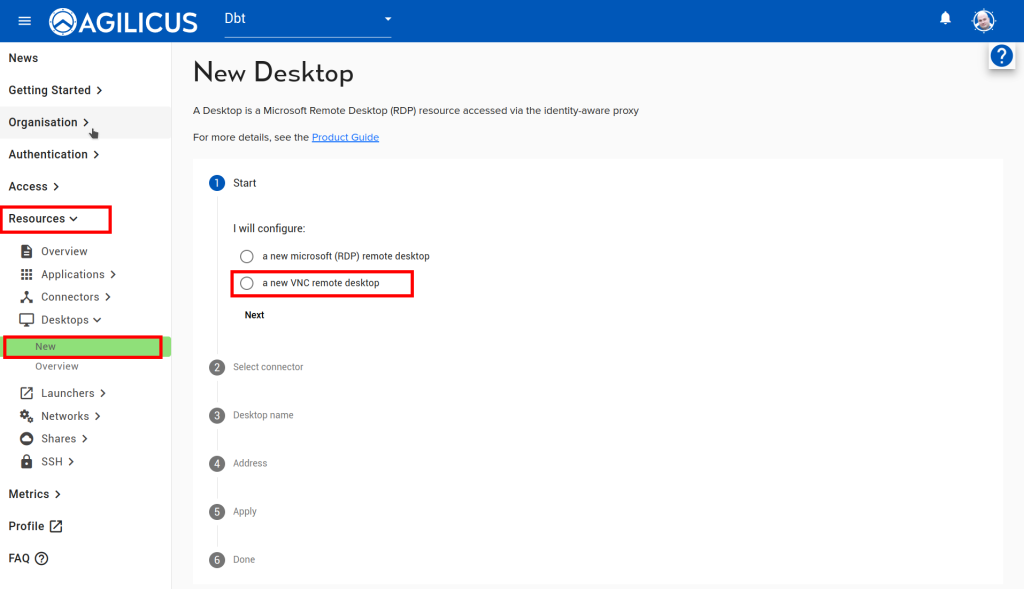
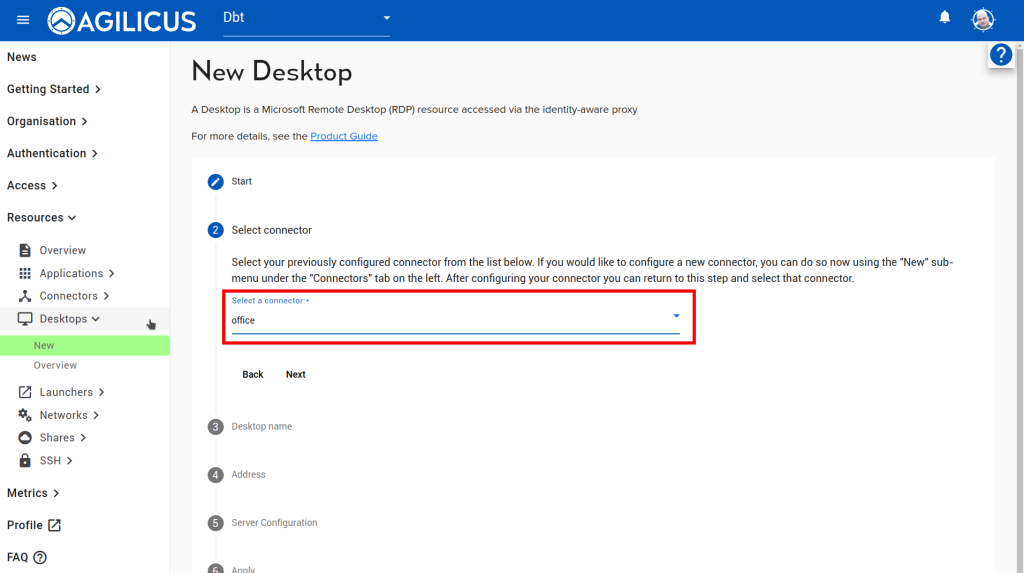
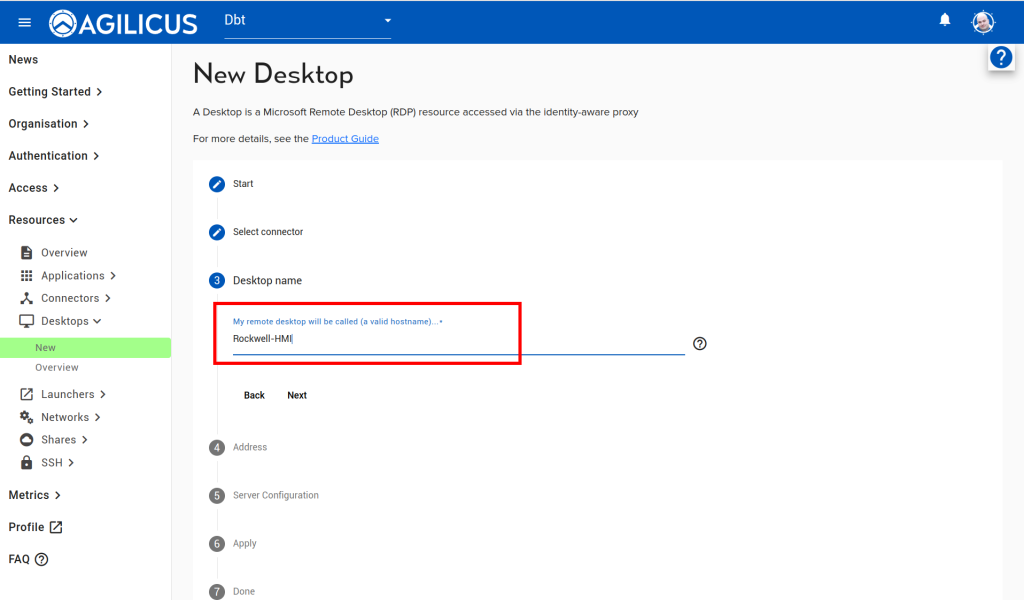
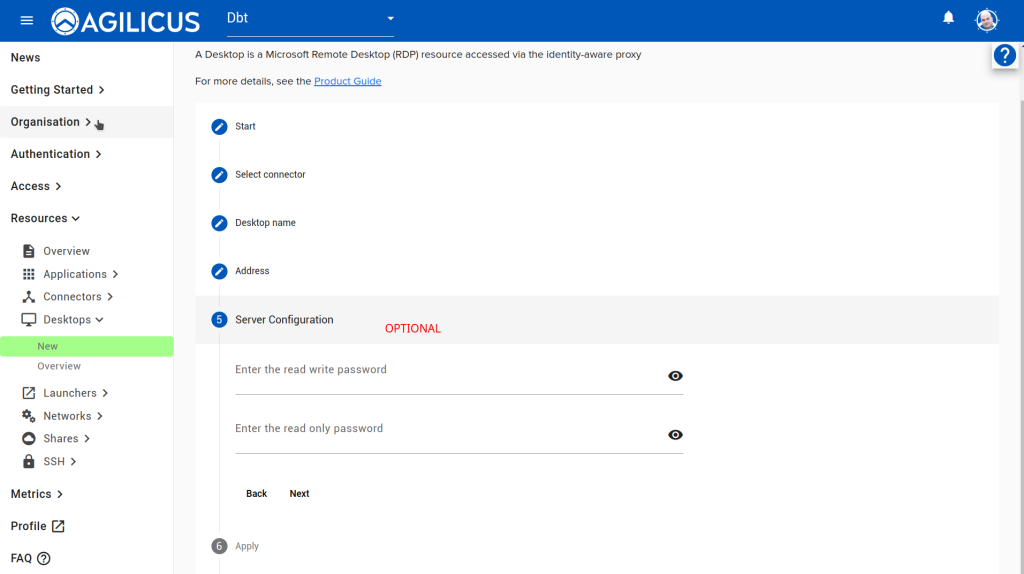
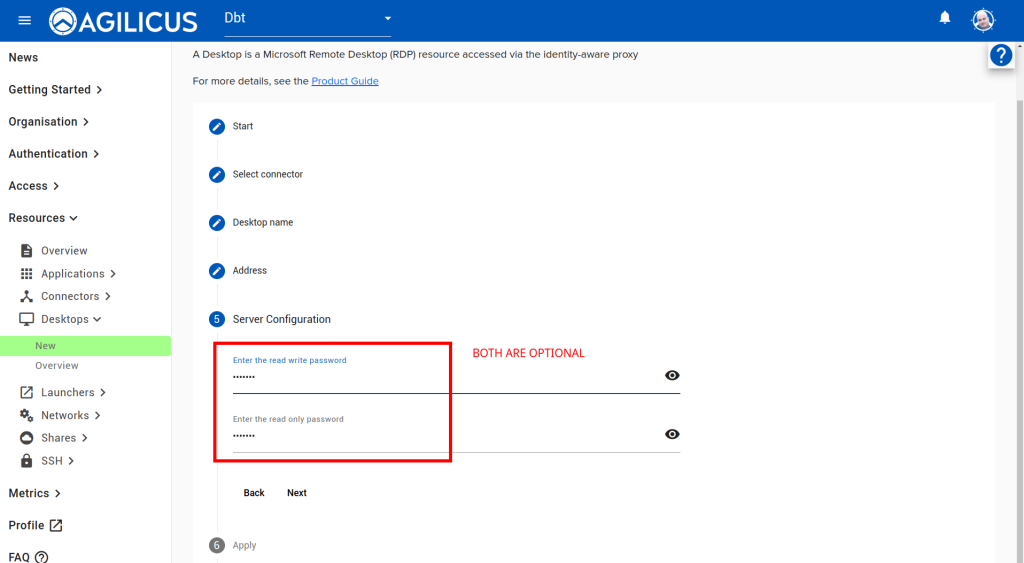
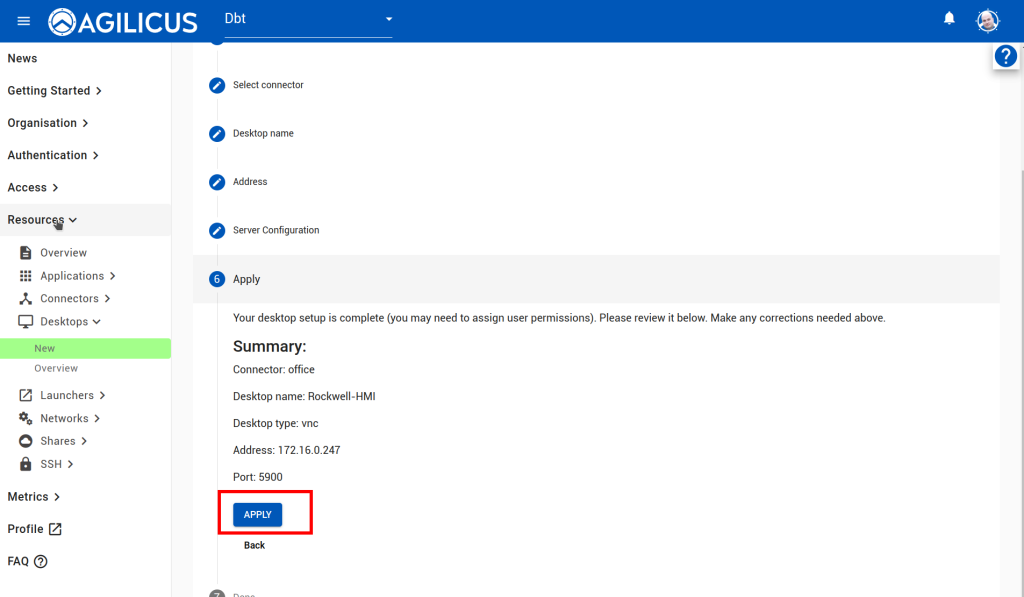
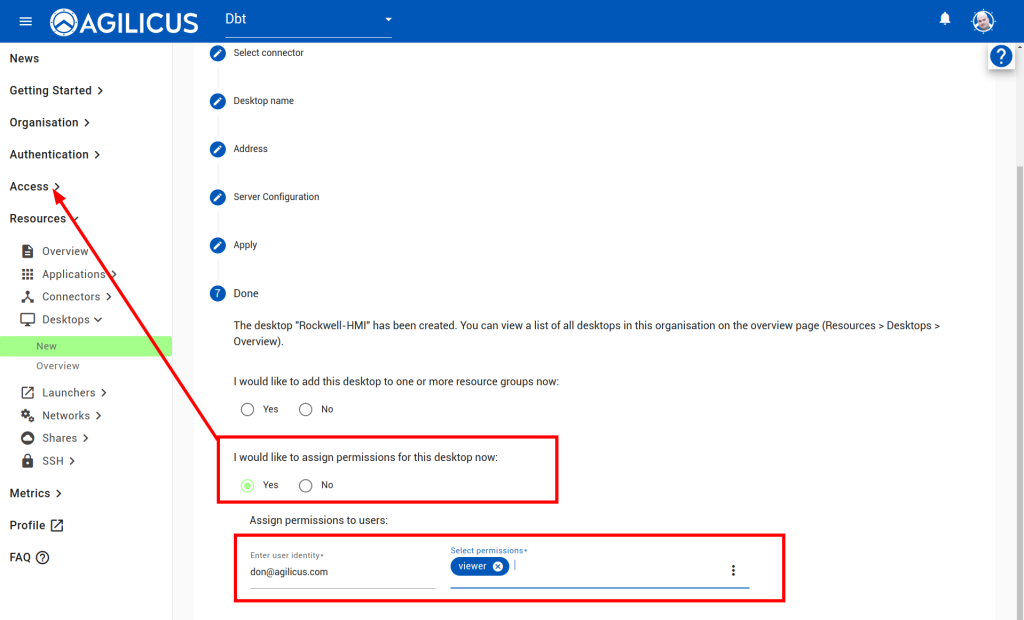
Follow the images below, ‘Resources/Desktops/New’, create a new desktop, give it a name. For the optional component about password stuffing, you can ignore in which case the user must enter a 2nd VNC password each time. Or, you can enter the View Only and/or Control password. If you do this, the end user will not be aware of the password.
Assign permissions to yourself to test.
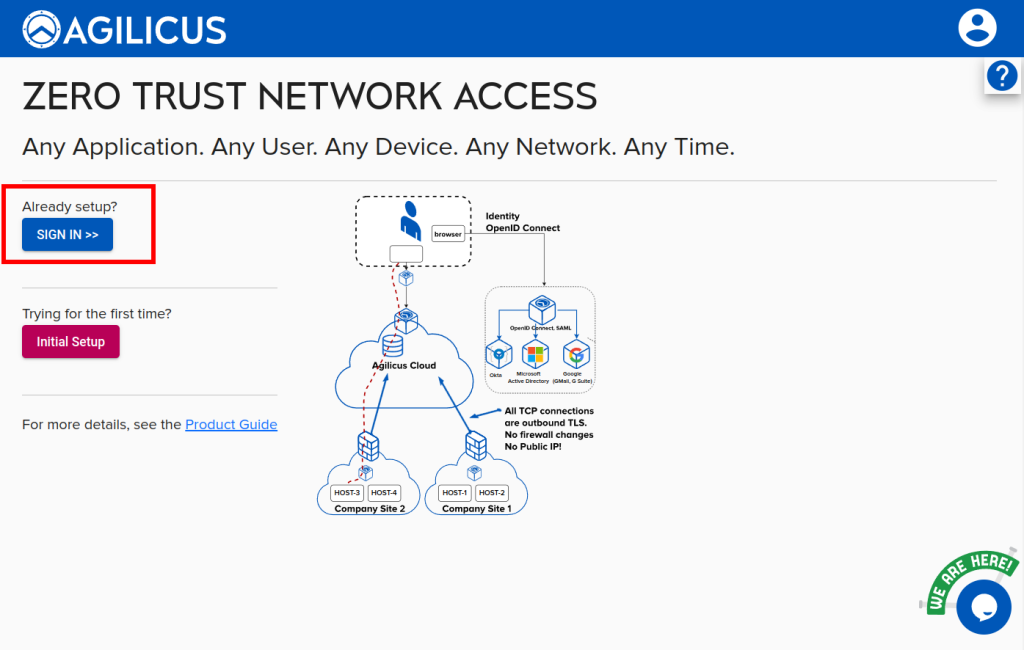
Once configured, navigate to https://profile.__MYDOMAIN__, you may need to hit refresh, but you should now see an icon for the new VNC. You can open this directly in the browser, or, if you choose, install the desktop integration and click it to open the native client.

3. Add a second user (optional)
We can now add a second user to share. Enter their email address (this must match that given by the Identity Provider, e.g. user@gmail, user@outlook.com, user@google-workspace-domain, user@office365-domain etc.
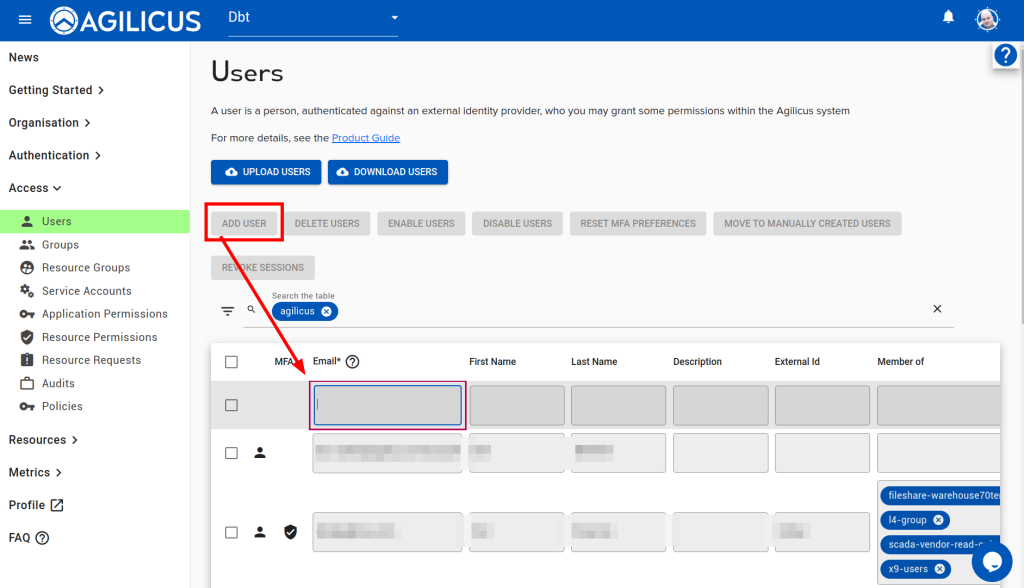
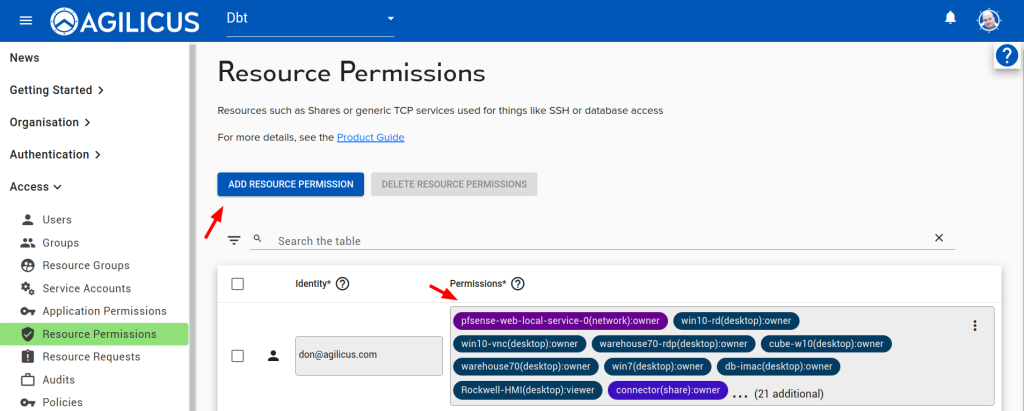
Now, add permissions to the user. If you have a lot of applications or a lot of users, consider using Groups.
