CREATE A WIKI
Sample Application Demonstration
Demonstrate a simple web application and creating access, rules, roles.
Overview
In this demonstration we will use the Agilicus Connector to securely expose an internal web server, using a clientless zero-trust secure connector.
Install Sample Web Server
Download the sample web server (the source code and compiling instructions are on github). Unzip the package and run the appropriate one for your platform, open a browser to http://localhost:8080/. This does not modify any files on your computer: it is a single executable with a few HTML files inside it.
don@office[gke-corp]:static-web-site$ ./static-web-site
 ::1 - - [28/Jan/2021:20:50:04 -0500] "GET / HTTP/1.1" 200 0
 ::1 - - [28/Jan/2021:20:50:04 -0500] "GET /assets/vendor/bootstrap/css/bootstrap.min.css HTTP/1.1" 200 0
 ::1 - - [28/Jan/2021:20:50:04 -0500] "GET /assets/vendor/boxicons/css/boxicons.min.css HTTP/1.1" 200 0
 ::1 - - [28/Jan/2021:20:50:04 -0500] "GET /assets/vendor/icofont/icofont.min.css HTTP/1.1" 200 0
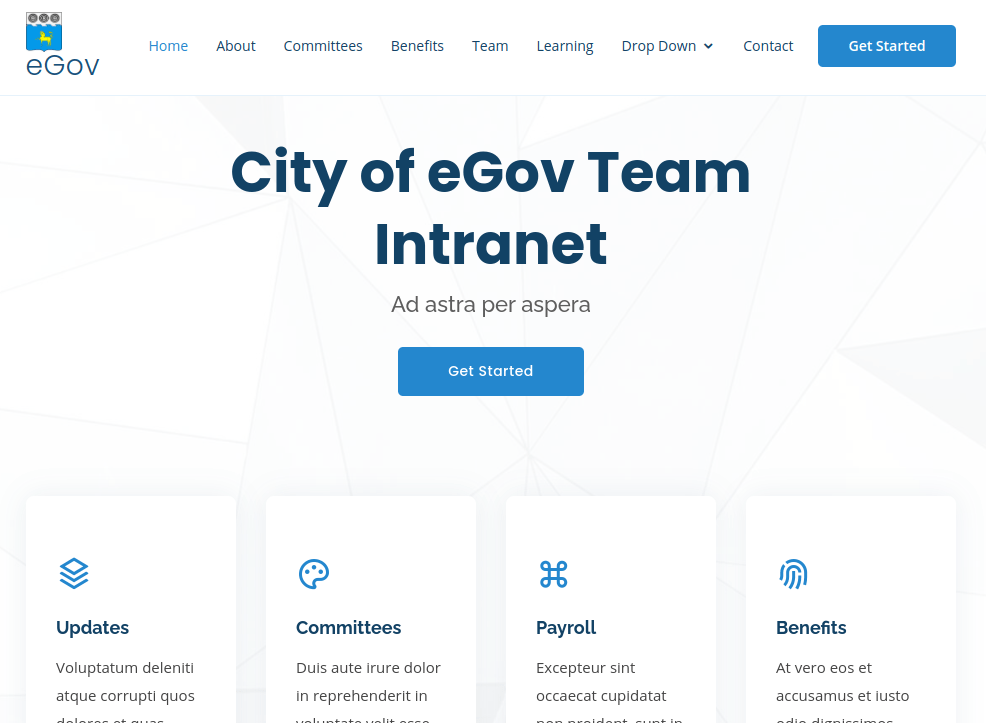
OK, now we have a sample web server running locally. The web browser should show something like below.
Setup Agilicus Connector
Refer to the Agilicus Connector configuration instructions for more details.
Setup Sample Application
Refer to the Applications configuration instructions for more details.
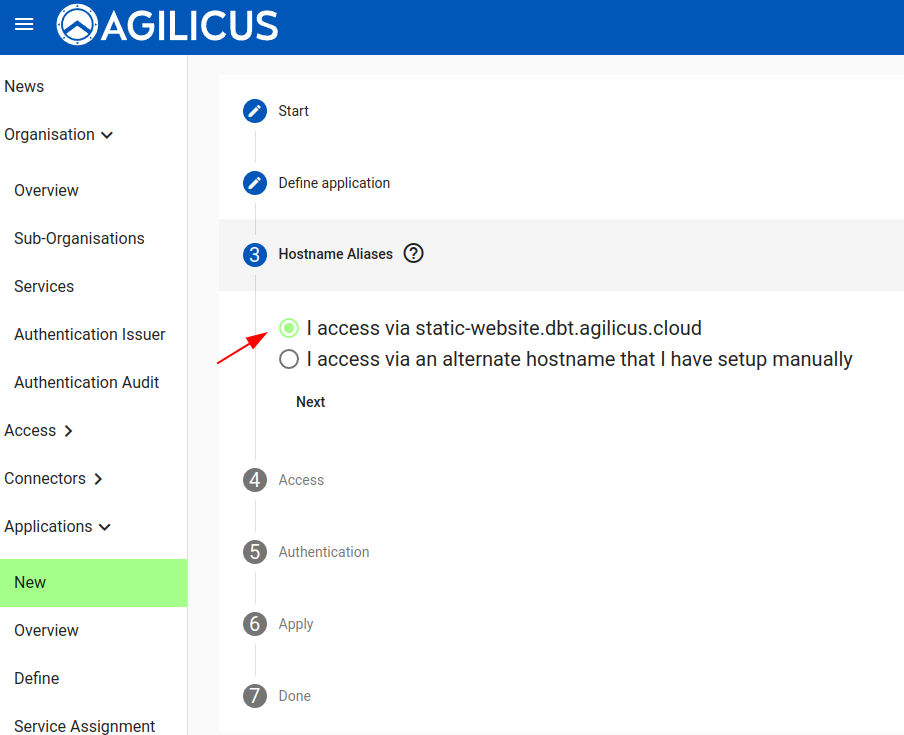
Create a new Application. Select a template (static website). You can walk through the remainder of the options, but they will be filled in correctly already (except for the Connector to use).
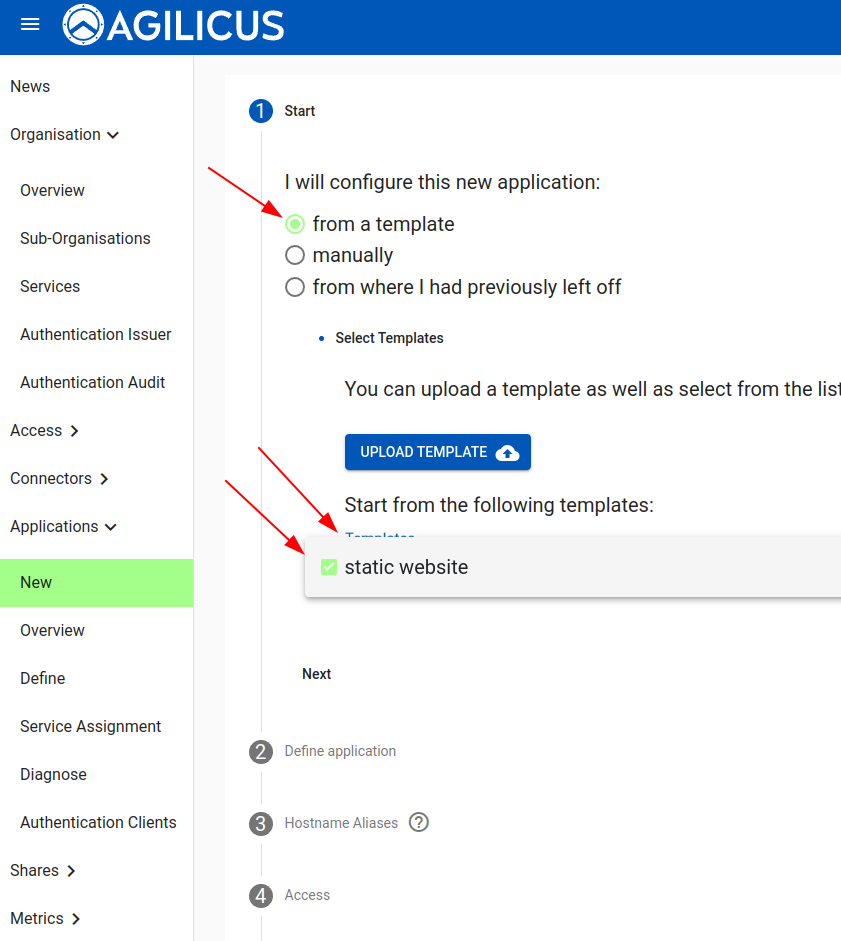
For the demonstration we will use the existing domain name choice. However, you may wish to create a CNAME and have this application available as e.g. ‘wiki.example.com‘.
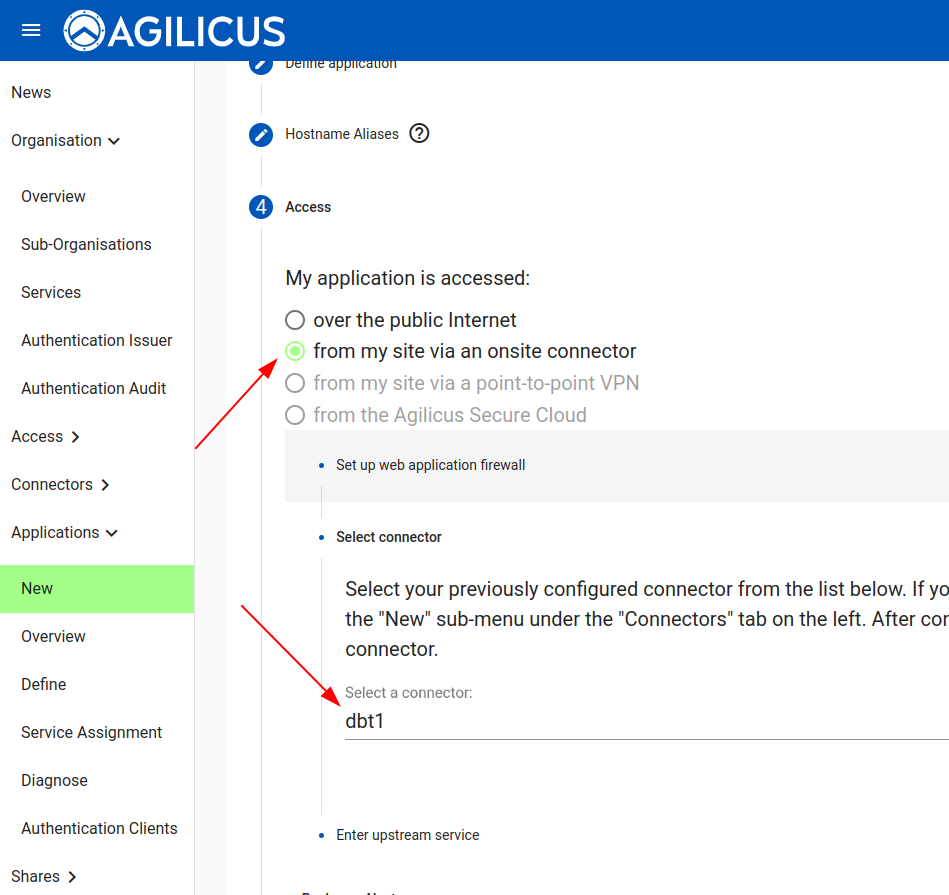
Now we will select how the application upstream connection works. We will access the simple static web site from onsite (emulating e.g. your corporate wiki or vacation planner)
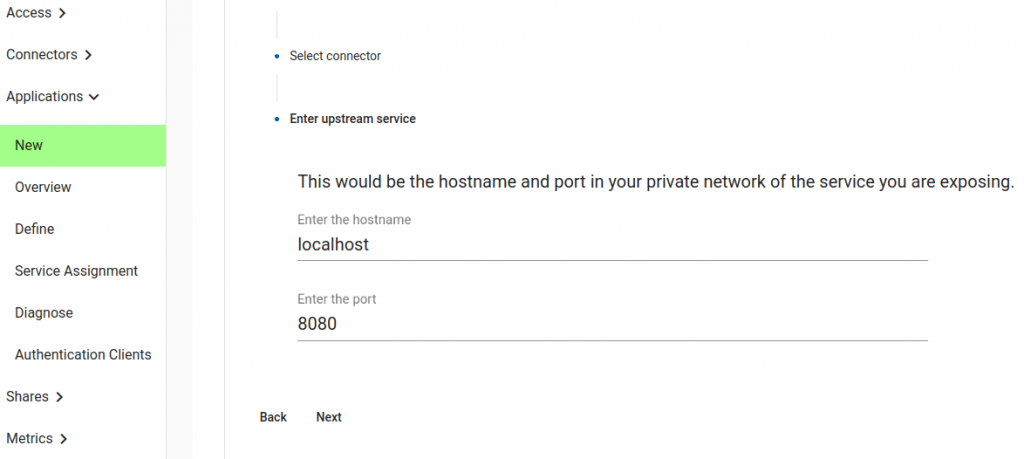
Now we will select the internal coordinates. The sample static web site runs on our localhost, and on port 8080. You might have instead used an internal hostname here (e.g. wiki.example.com) and a port like 80.
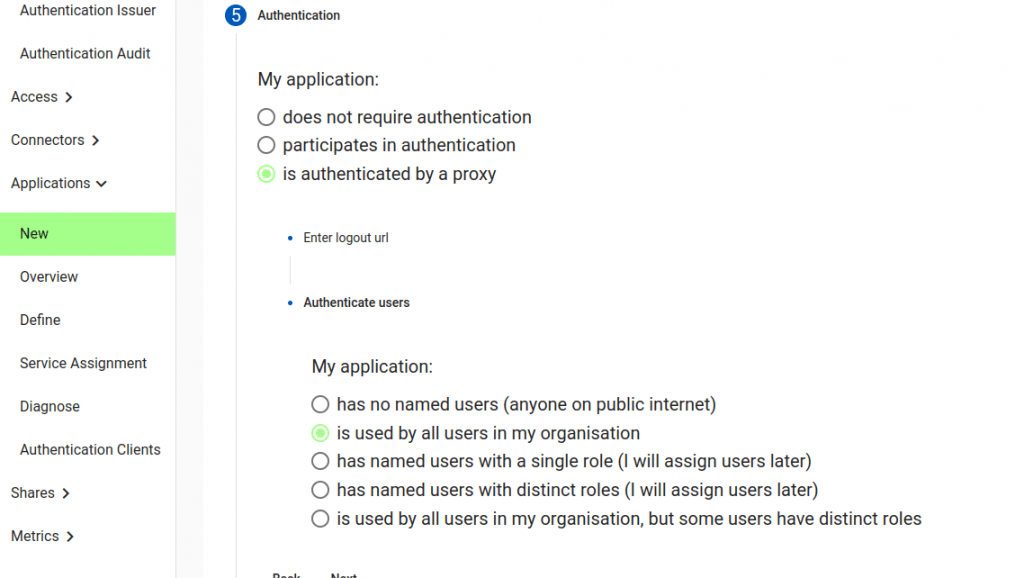
Now we will choose how users are authenticated. In some cases you may just want a completely unauthenticated site. In some cases your application has native support for OpenID Connect (in which case see Authentication Clients).
Here we will choose “Is authenticated by a proxy”. This means the Agilicus Platform will automatically handle authentication and authorisation. Your application will receive pre-defined headers with the username and user roles. No unauthenticated user traffic will arrive at your application.
We may also choose a Logout URL, in case your web site has a spot users can end their session explicitly. This is optional.
We will also choose how the users are Authenticated. This controls how groups will be pre-setup for you, and how users are assigned. If we select “Is used by all users in my organisation”, this means that any user will have a default role, automatically: no need to grant permission.
If we say “has named users with a single role”, we will have to select the users manually, and all will have the same web application firewall permission (e.g. allow/deny).
We are now complete. We are given an overview of what we have setup, and an option to download a JSON file we might later use as a template. This is optional. When we hit Apply, a set of steps are performed:
- Create new Web Application Firewall
- Create DNS name
- Create TLS certificate
- Apply Web Application Firewall Rules
- Create default group
- Assign users to group
- Create Authentication Client
- Configure Identity Aware Web Application Firewall to use Authentication Client
These steps will take approximately 3-4 minutes.
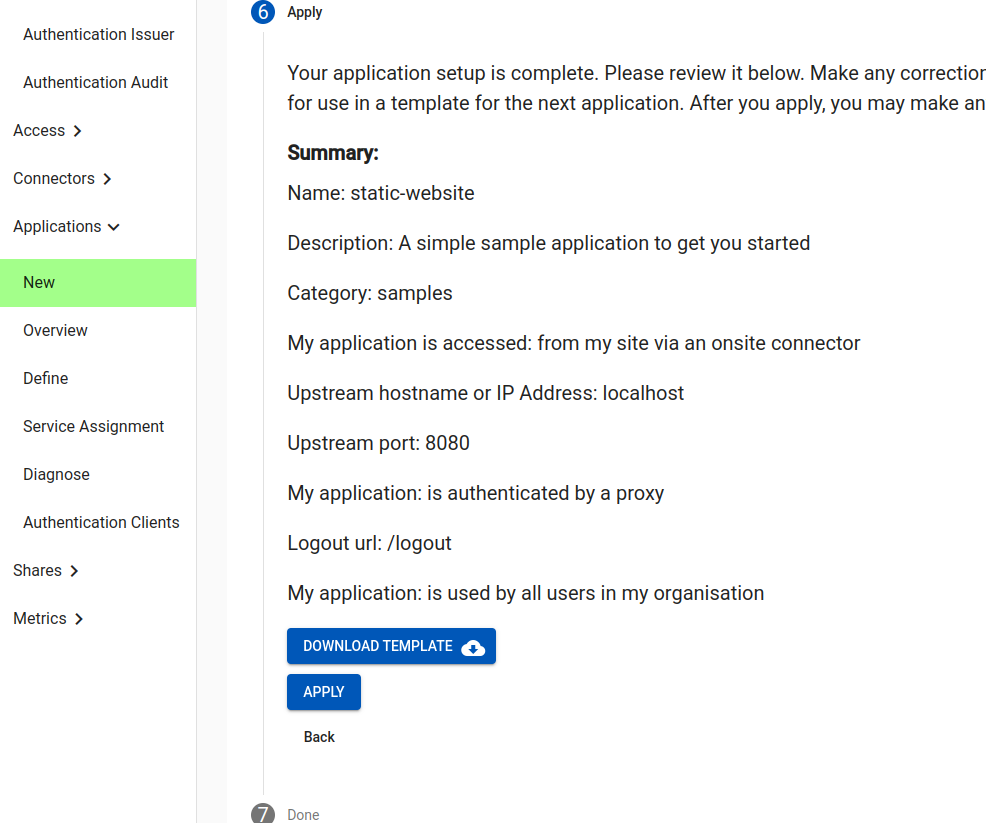
You will be given a URL to navigate to with your browser. Its pattern will be https://static-website.__MYDOMAIN__. If all has gone well, when you navigate to that you will be required to sign-in, and then it will work the same as when you use http://localhost:8080.
Note: there is a default Content-Security-Policy in the Web Application Firewall, and a default set of Web Application Firewall rules for this application. Yours may vary and may require allowing e.g. different Javascript script-src or style-src.

Congratulations! You are now complete.
Things you may wish to observe:
- the sample website outputs a line of text for each HTTP request. Note that an unauthenticated browser does not generate any traffic
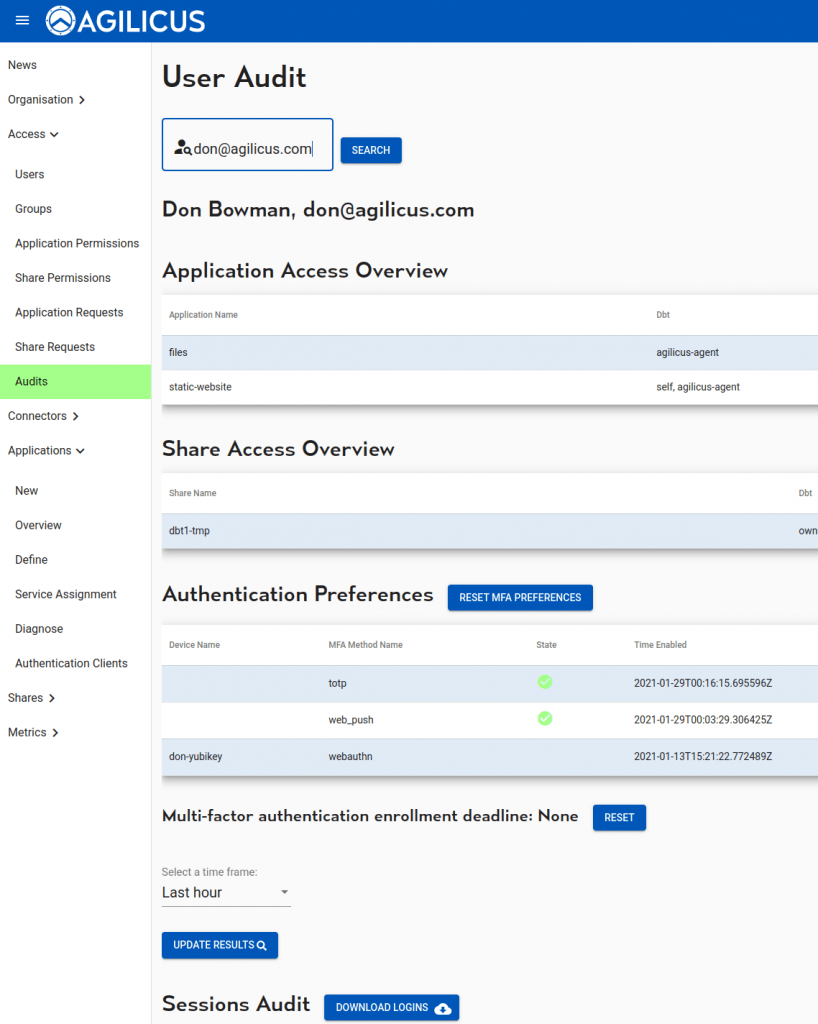
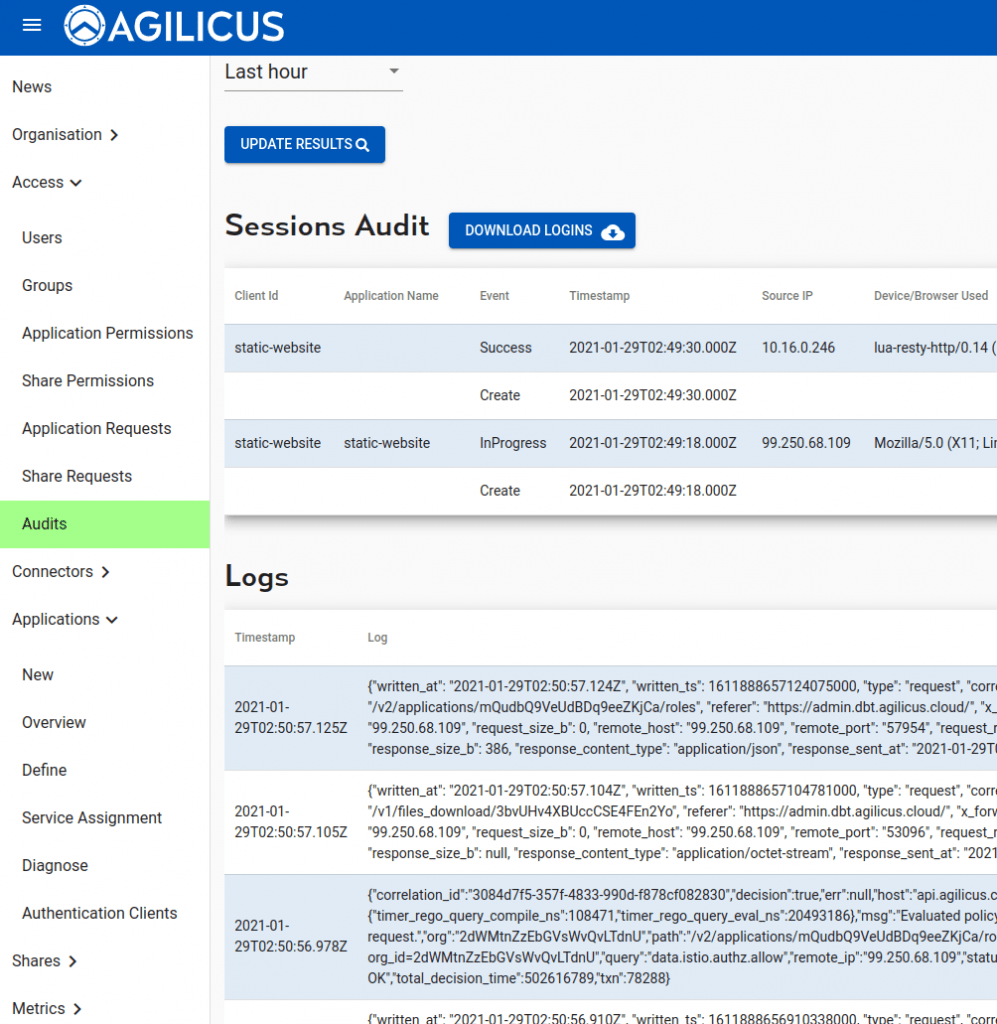
- the user audit screen will show your accesses: each session, each HTTP transaction. This is cryptographically secure, based on a JWT on each transaction: no IP/port matching.
