Overview
In this demonstration we will show compiling and hosting a simple web application. No container is needed, we can entirely host it by just dropping a ‘zip’ file of the build into a browser. In addition, we will entirely handle the authentication for the application (no changes, single-sign-on). We will protect a manifest file of secrets to prevent access by unauthenticated users.
The specific application I will demonstrate is gitlab-monitor, a tool which monitors your Gitlab pipelines. It has an unfortunate security model: it requires you to place a config file on the server, accessible by the client, which has a Gitlab Personal Access Token. This is not safe. So, lets host it safely.
Building The Application
Every application has its own build strategy. Make, npm, nuget, etc. This one uses the npm (or yarn) ecosystem.
git clone https://github.com/timoschwarzer/gitlab-monitor
cd gitlab-monitor
npm i
npm audit fix
npm run build
tar -C dist -cvf /tmp/gitlab-monitor.tar .
OK, now we have built the application. We have a file, /tmp/gitlab-monitor.tar, which is the binary ready to run. Let’s get it on the web with a domain name, a certificate, etc.
Create Application, Setup Hosting, Authentication, Permissions
Step 1. Create Application
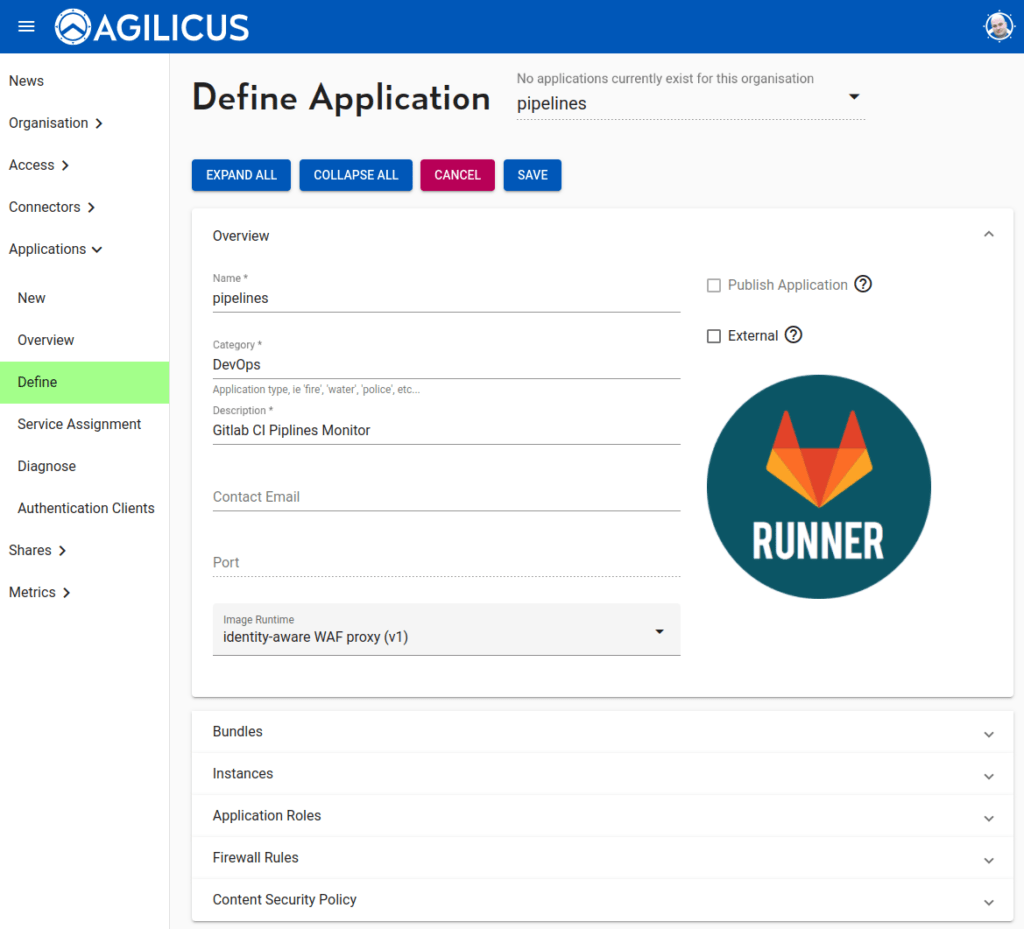
An application is a type of template, we will later make instances of it (e.g. staging, production). The application configuration will ask for a name (this will become the hostname, e.g. https://<appname>.<yourdomain>. We will add an image (which will show up in https://profile.<yourdomain> for launching).
We select the Identity Aware WAF Proxy (v1) runtime.This will, by default, force authentication of the user.
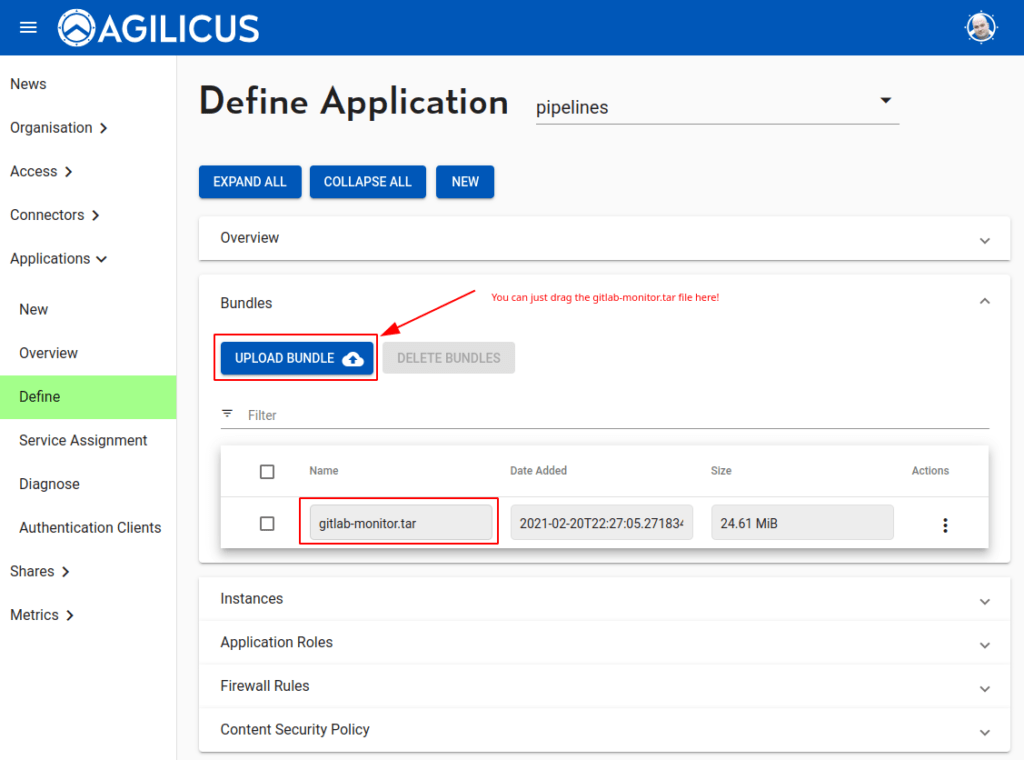
Now we will upload the application bundle we compiled above. You can just drag and drop the tar file onto the button, or, press “upload bundle” and select it. You can pick a name (e.g. gitlab-monitor-v2) or use the default one of the file name.
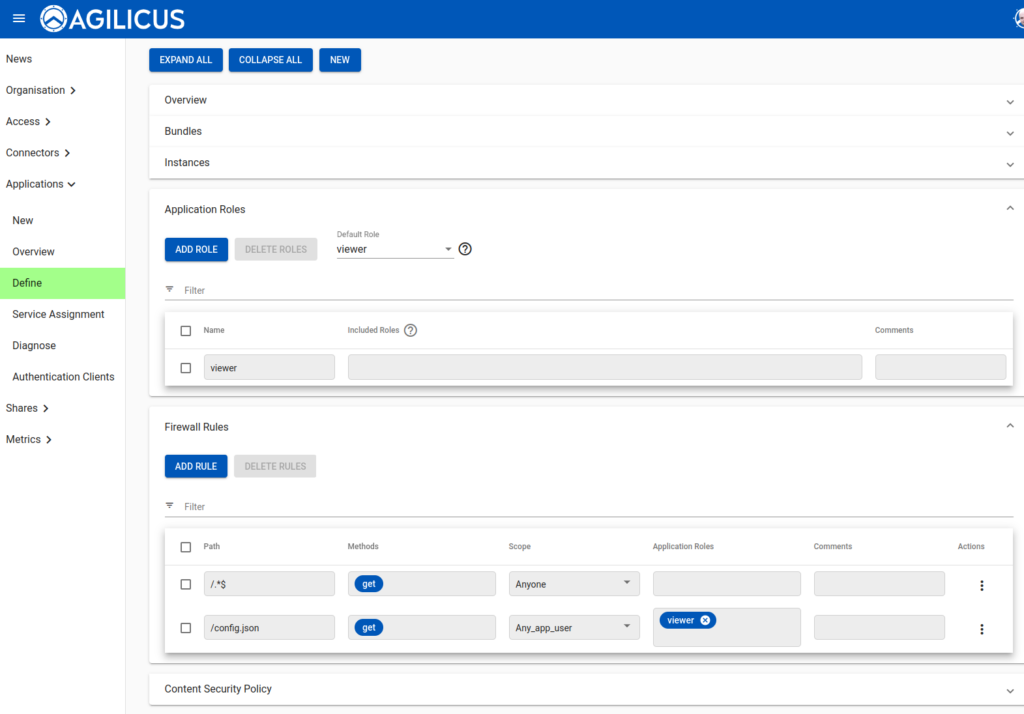
OK now we must configure the firewall rules. There are 2 firewalls in series here, the first acts on fine-grained paths, and the second acts to force authentication before allowing access. We will rely on this feature to protect our config.json (which contains the secret). Thus we must allow access to all paths first, and then deny the config file except for known users.
OK, now we have the template defined, we will create an instance. Instances can be used for e.g. “staging vs production”. They typically run in child-organisations, which is out of scope here. We will use ‘latest’ as the tag (which controls the version of the runtime). We attach the bundle from above.
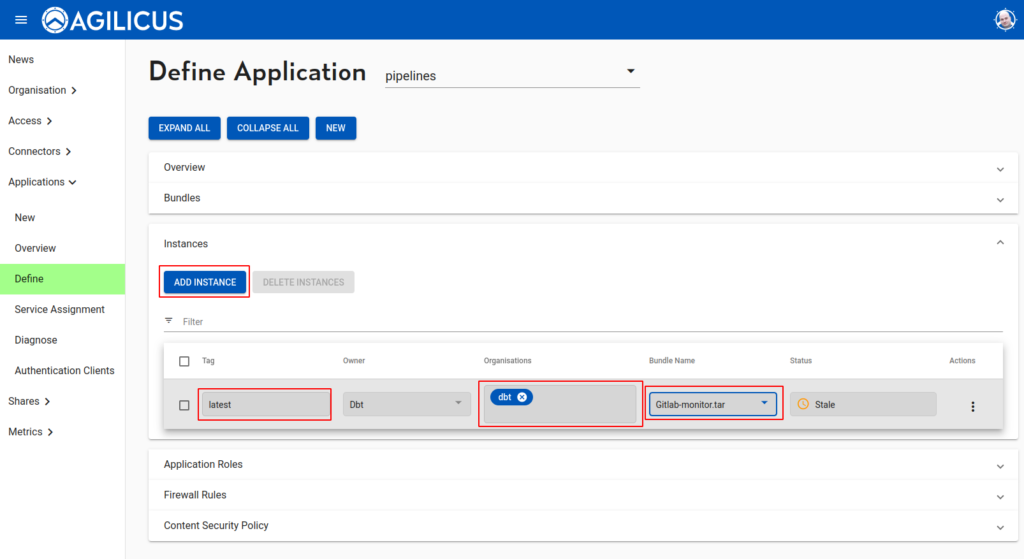
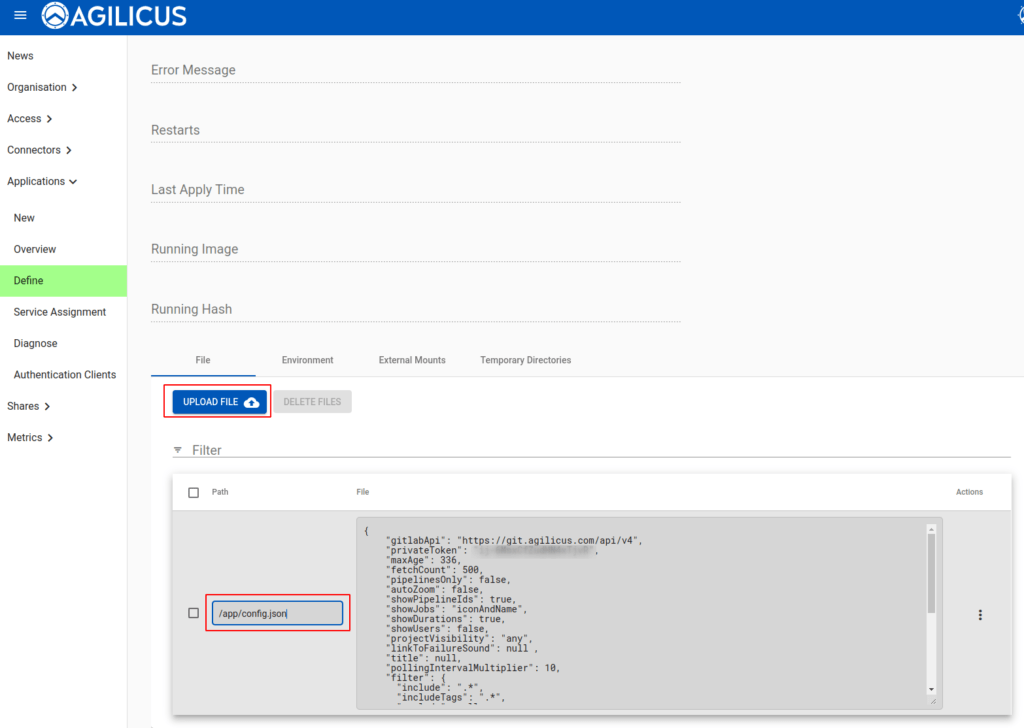
We will now mount our config file into the instance. First, configure instance:
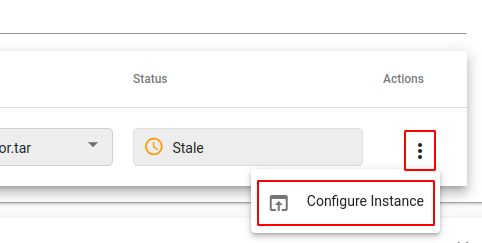
Now we can upload our config file, specify the path as /app/config.json, and we are done.
