Summary: deploy OpenWRT on a Mikrotik to achieve SpaceX Starlink + bonded DSL backup, with Zero-Trust Network Access inbound from any user, any network, any device.
A friend of mine lives far enough from the city that his only Internet choice has been DSL. 10+ years ago I helped him bond 2 DSL loops together to get a 5+ Mbps experience. It was the best achievable given no LTE, no cable. Suddenly, a wild low-earth-orbit satellite solution arrives in the form of SpaceX’s Starlink. The beta is marked as “Better than Nothing”. What have we got to lose? Let’s try!
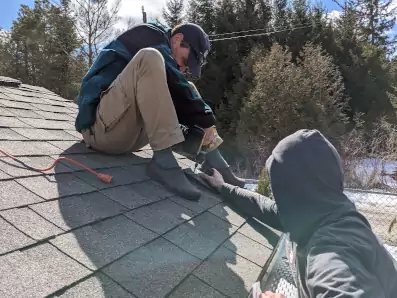
Now, the DSL lines have been reliable over the years. We don’t want to have outages, so we want to have a way to automatically fail over to them (read on for why I chose not to balance them in active/active).
One of the requirements is remote access. We want to be able to view the security cameras from remote. Currently (pre-Starlink) this is achieved with an inbound VPN. However, the Starlink system uses RFC 6598 Carrier NAT (the 100.64.0.0/10 range). This means we cannot allow inbound VPN (or any port-forwarding / DMZ-type scheme) since we do not have a public IP. So how can we achieve that? We will use the Agilicus Secure Exposed Agent, which makes an outbound-only connection. From there we can make inbound connections over HTTP, end-to-end encrypted, securely authenticated.
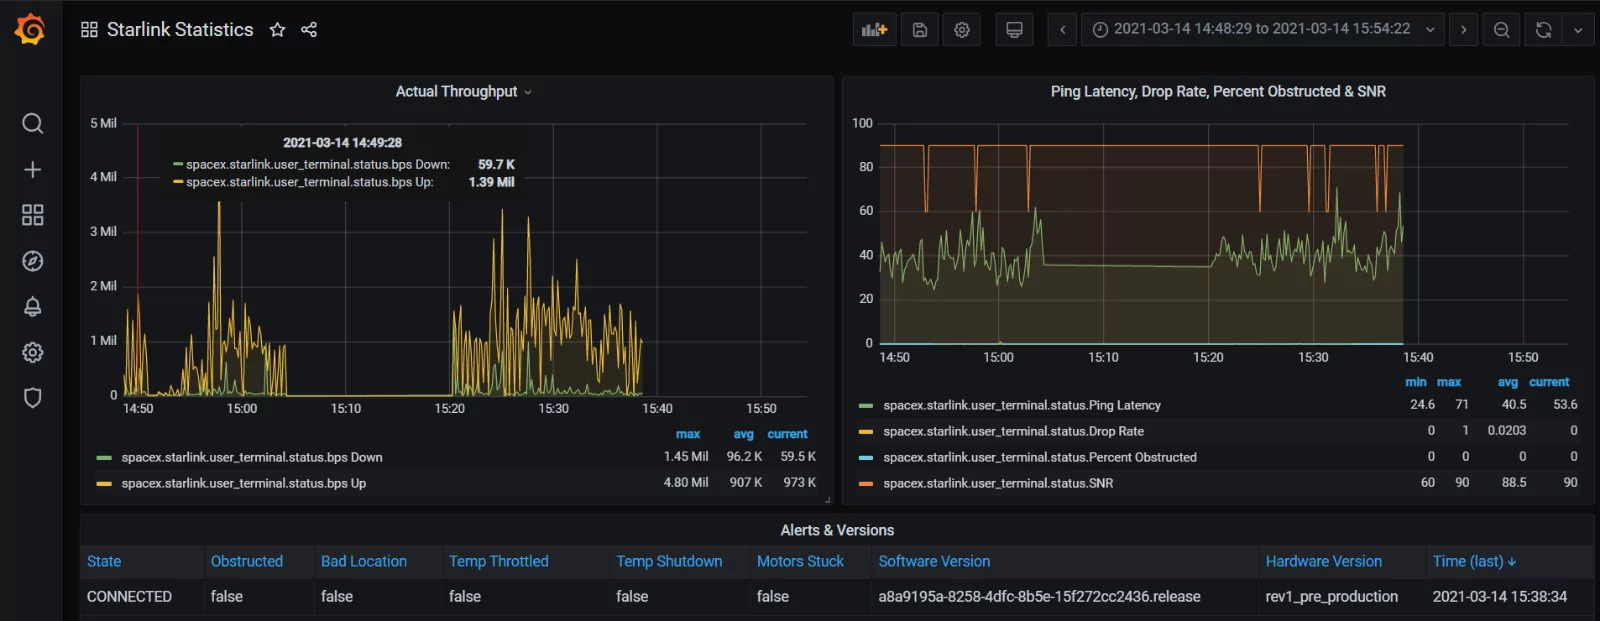
One other requirement is to be able to see the Starlink statistics. Why? Because it is interesting.
We also wanted to keep the Google WiFi as-is, as the sole WiFi. The device that comes with the Starlink has poor coverage, doesn’t handle this one building, and certainly not the outbuilding. It will only cause interference. Back in the box.
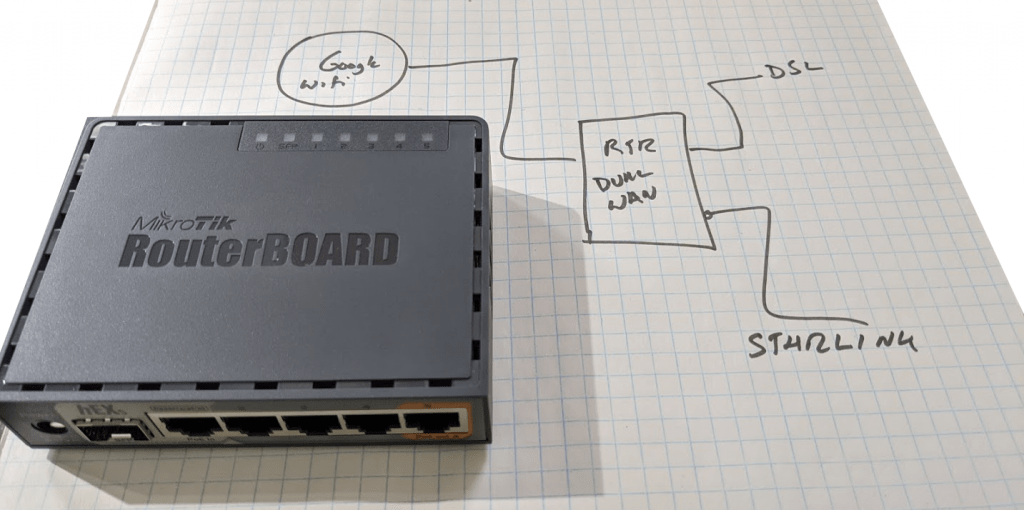
On to the project. The Starlink system comes with 3 pieces: the dish, the black box with power + 2 Ethernet, and the silver/white WiFi router. That last piece is not needed, put it back in the box. Now, we must select a suitable router. I chose a Mikrotik hEX S (RB760iGS). There are quite a few to choose from, cross-join the product-list with the OpenWRT hardware support list. The router I chose uses MIPS, the details are here, with these instructions for install. This router supports POE input power with 5 Gigabit interfaces. You might chose the hEX if you don’t care for the SFP interface.

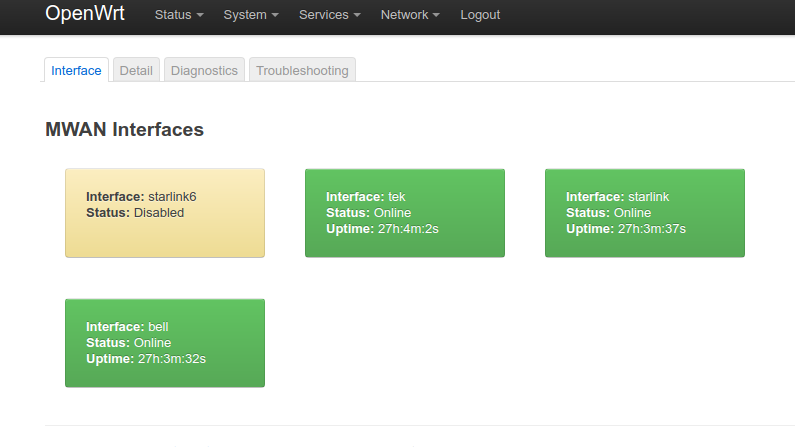
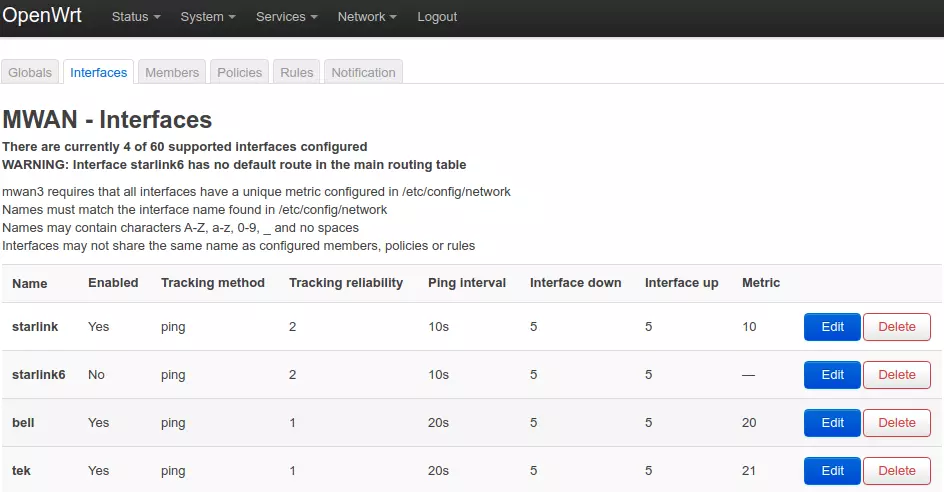
On top of the OpenWRT we will use the mwan3 package. This allows active-health-checking and load-balancing/failover of multiple WAN interfaces. We want to bond the 2 DSL lines as 1+1 active/active, and then make that group be secondary to the Starlink interface.
Now, you may wonder why I chose to not make a bonding group of 3? After all, more bandwidth is more better, right? Well, we have some differences between these types to consider. The first, the MTU. The DSL interfaces use PPPoE, which has a MTU (maximum transmission unit, e.g. the largest packet size) of 1492. However, the Starlink has 1500. I was concerned that devices would memorise the path-MTU on an IP node-pair basis, and, become confused by multiple flows with different sizes.
The 2nd is IPv6. Now, the Starlink does not seem to support IPv6 (yet? Its better than nothing after all!). But, when it does, we want to use it. IPv6 cannot (should not) be NAT’d, so it makes no sense to load balance across multiple interfaces if we cannot have a constant source IP.
The other concern I had was bandwidth. When you have a large number of devices each doing low bandwidth flows, it would make sense to bond all three interfaces with some appropriate weighting. But, here, with the DSL links individually very close to the minimum we want for a video conferencing connection, we don’t want any traffic on them unless we must. A bonded set of 4+4 is not 8Mbps, each TCP flow can only use one. We want reliable, high fidelity conferencing.
For the mwan3 setup I configured it as below. I used active health checking via ICMP.
We then setup mwan3 membership. Note that the weight of the satellite link is lower.
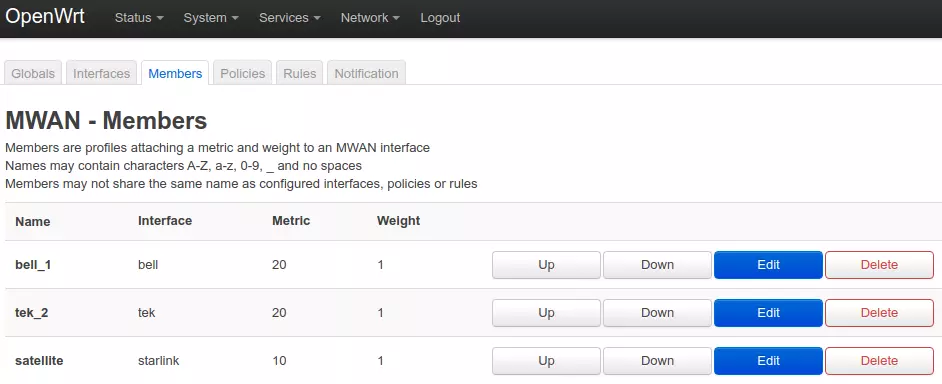
At this stage we tested. Perfect. It accurately detects the ‘upness’ of each interface. If the satellite is up, it attracts all the traffic. if down, it balances across the DSL. A couple of performance tests courtesy of fast.com and we can see that indeed the satellite delivers more bandwidth than the DSL. The latency varies between 35ms and 55ms, which is worse than the DSL (which clocks in about 20ms). But, on balance, its definitely an improvement.
Now, we want direct access to the Starlink stats. These live on 192.168.100.1. For this, we will add a static interface route to the ‘starlink’ wan port. Test, works!. For double bonus points we can add some polling into Grafana.
Now the remote access problem. The IP address we have inbound is 100.64…/10, not routeable. So the inbound VPN has to go. But how to access the security cameras? For this we use the Agilicus Secure Exposed Agent. We install it on the OpenWRT. It makes an outbound connection to the cloud. Each user gets a URL to directly access, over HTTPS, from any browser. They prove their identity using OpenID Connect (and their upstream identity provider) and boom, are directly connected. No messing around with a VPN. No worry about Dynamic DNS. No open ports, No DMZ. It uses all interfaces, preferring the satellite, just as above.

OK, this was a bit of a long post. I’ll skip the details of the config and setup. If you want to know more, feel free to email me (info@agilicus.com), or use that talk icon at the left (yes it really is a person, me, not a bot).
Shoutout to Nicolas for the encouragement when the flashing of the router was at its bleakest, and for the grafana screenshots of the stats.
And please remember to subscribe (that bell icon at the right).
