Open Source Network Video Recorder
Shinobi NVR
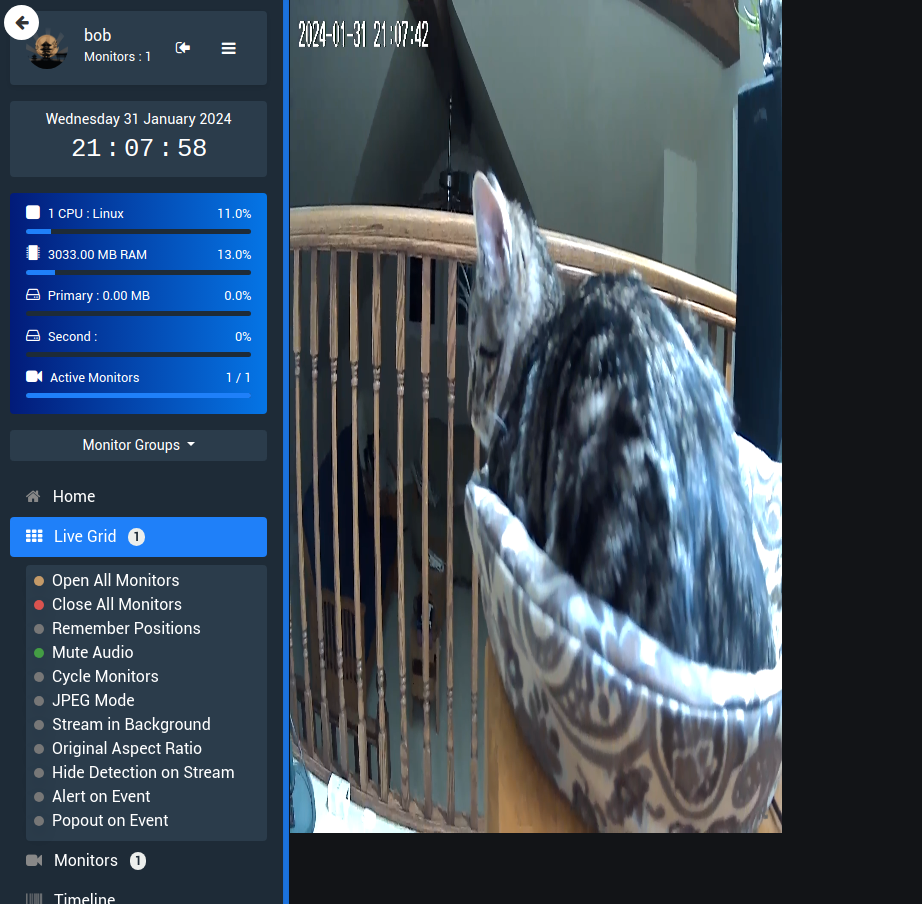
Shinobi is an Open-Source network video recorder, supporting ONVIF and other cameras.
Shinobi NVR
Shinobi pairs well with Agilicus AnyX: use Shinobi on the local site, configure it to monitor all of your cameras, then, use Agilicus AnyX to make seamless web-based access with strong authentication, anywhere, on any network. Yes, even with Starlink and CGNAT.
In this guide we show a simple set of instructions to get Shinobi going on Linux or Windows, and then an instruction to get the web interface available via Agilicus AnyX.
Installation on Linux
See https://docs.shinobi.video/installation/ninja-way. I chose ‘Non Development’ and ‘fast and touchless’ for the options.
$ sudo su -
# sh <(curl -s https://cdn.shinobi.video/installers/shinobi-install.sh)
This took about 15 minutes on my machine.
Installation on Windows
Step 1: Enable Windows Subsystem For Linux
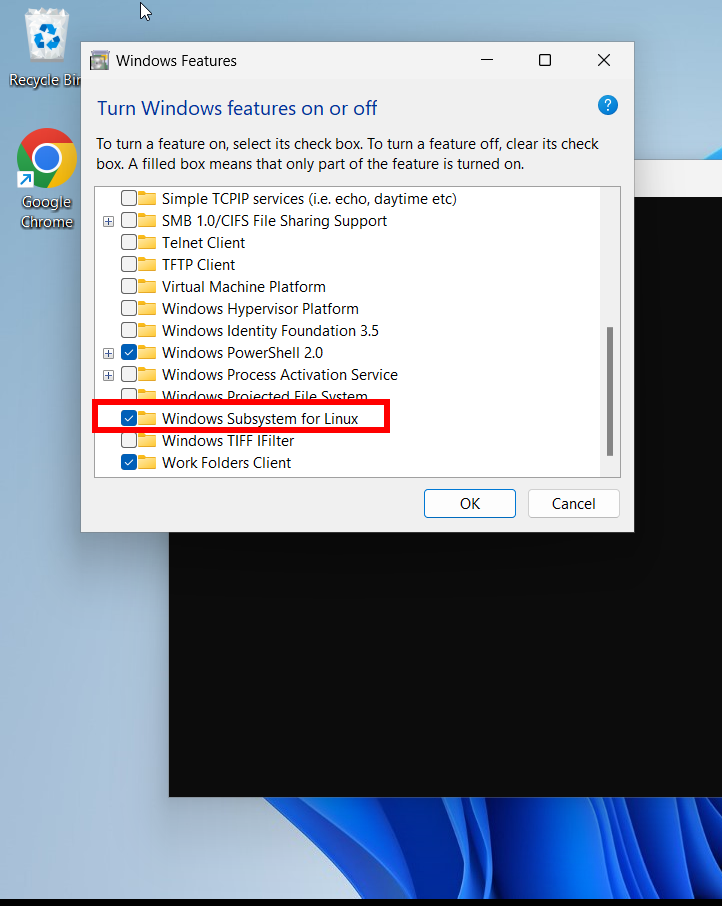
Step 2: Update Windows Subystem For Linux
Open ‘cmd’ as an adminisrative user:
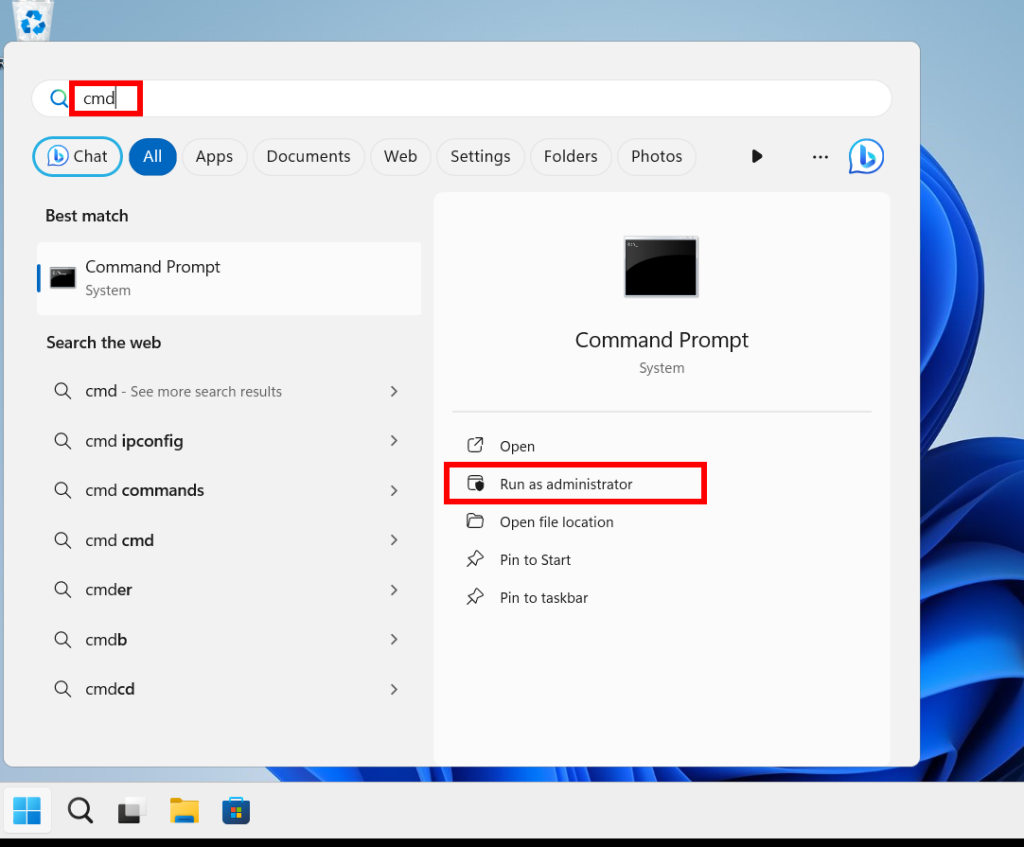

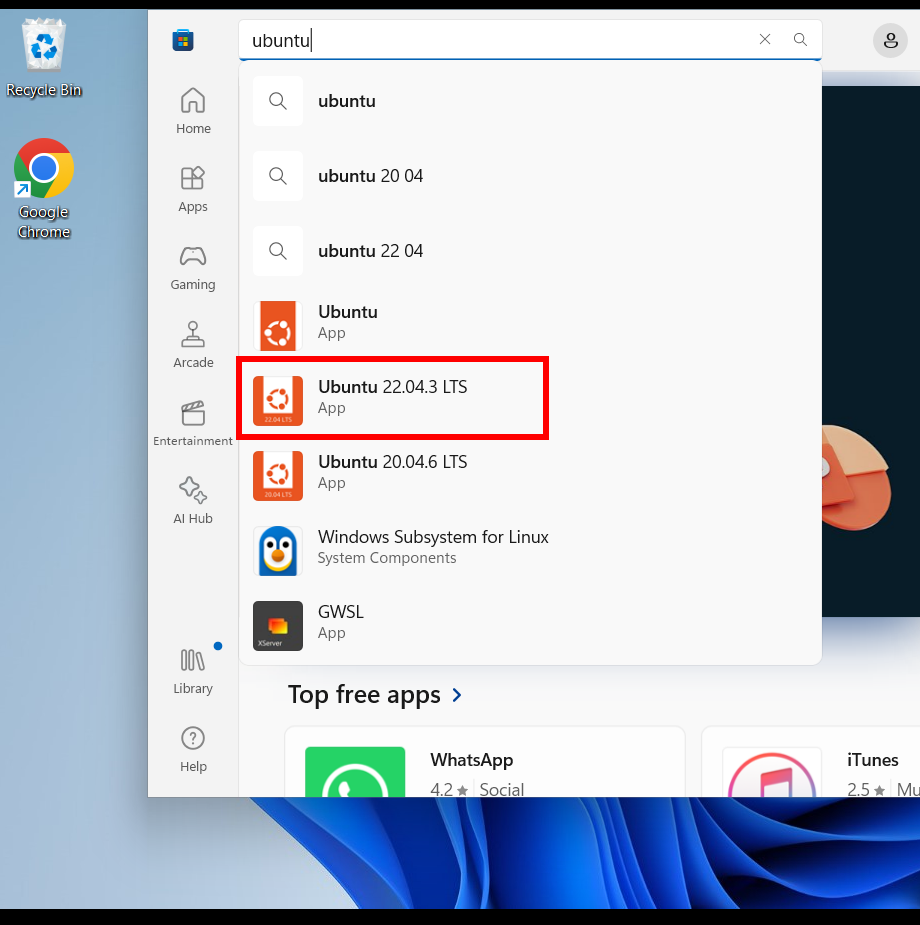
Step 3: Install Ubuntu 22.04 From Microsoft Store
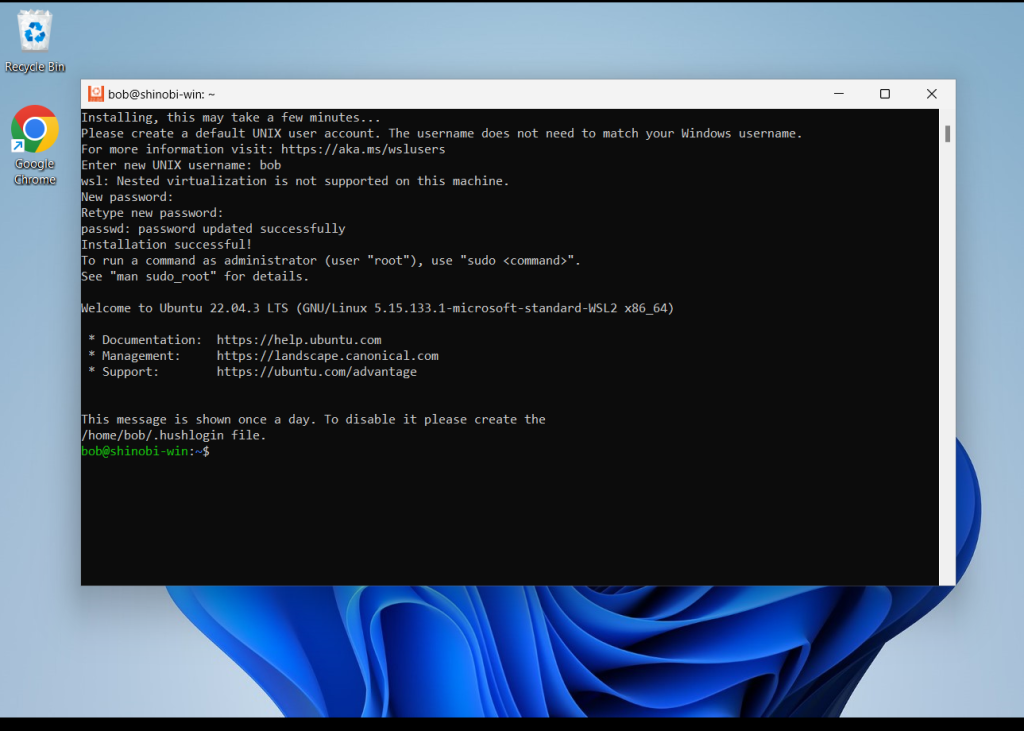
Step 4: Setup Ubuntu
Step 5: Install Shinobi
See https://docs.shinobi.video/installation/ninja-way. I chose ‘Non Development’ and ‘fast and touchless’ for the options.
$ sudo su -
# sh <(curl -s https://cdn.shinobi.video/installers/shinobi-install.sh)
This took about 15 minutes on my machine.
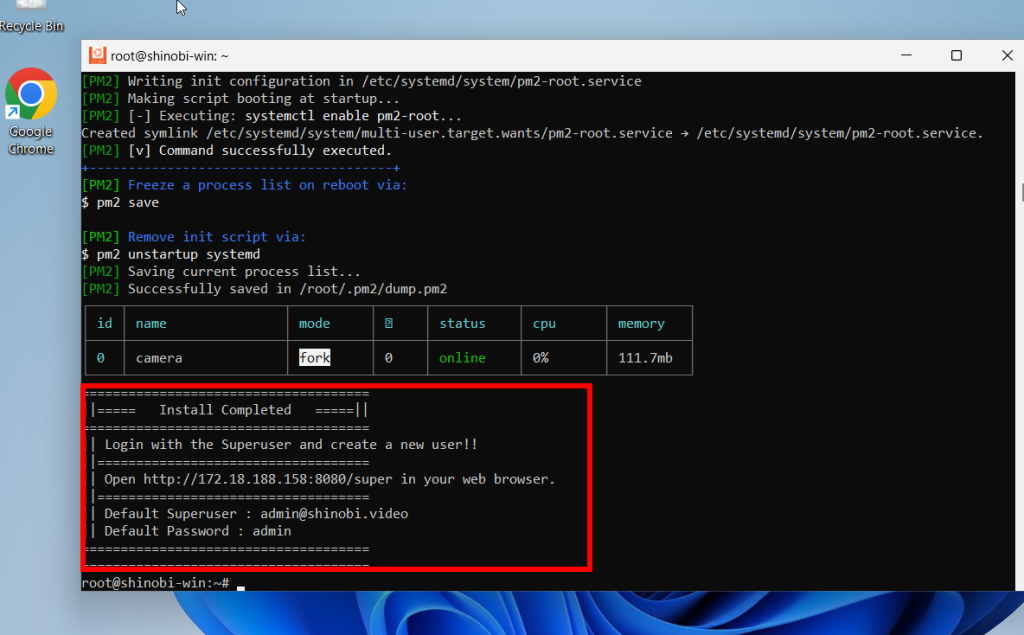
Note that the URL and IP given are only accessible locally on the device (e.g. you cannot access from a different computer).
Create a default user from the Super dashboard it gives above. Then, login as the new user you created.
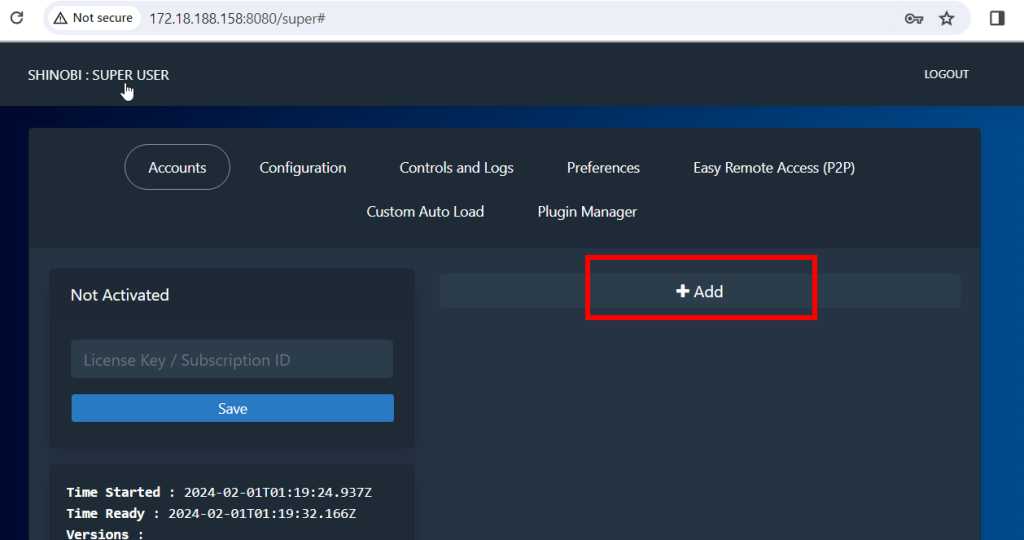
At this stage, you can sign in a the new user, use the ‘ONVIF Device Manager’ to add your camera.
Agilicus AnyX Setup
Step 1: Install Connector
Install a connector on a device having access to the Shinobi container. See product guide for more information. If you used the Windows instructions above, install the connector on the Windows host. If you have run on Linux, we suggest putting the connector on the Linux host.
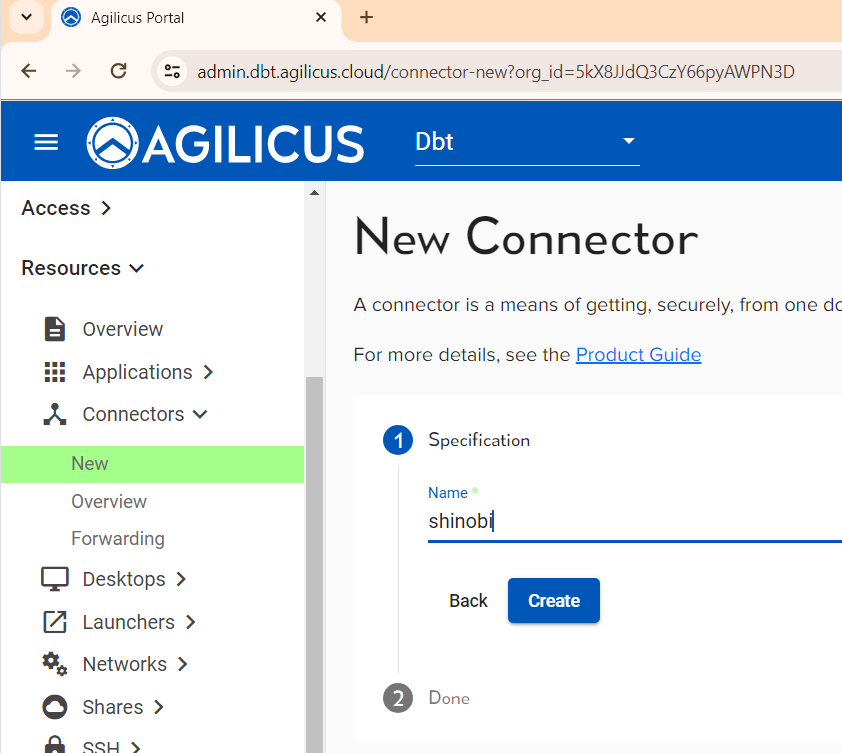
Step 2: Create Application
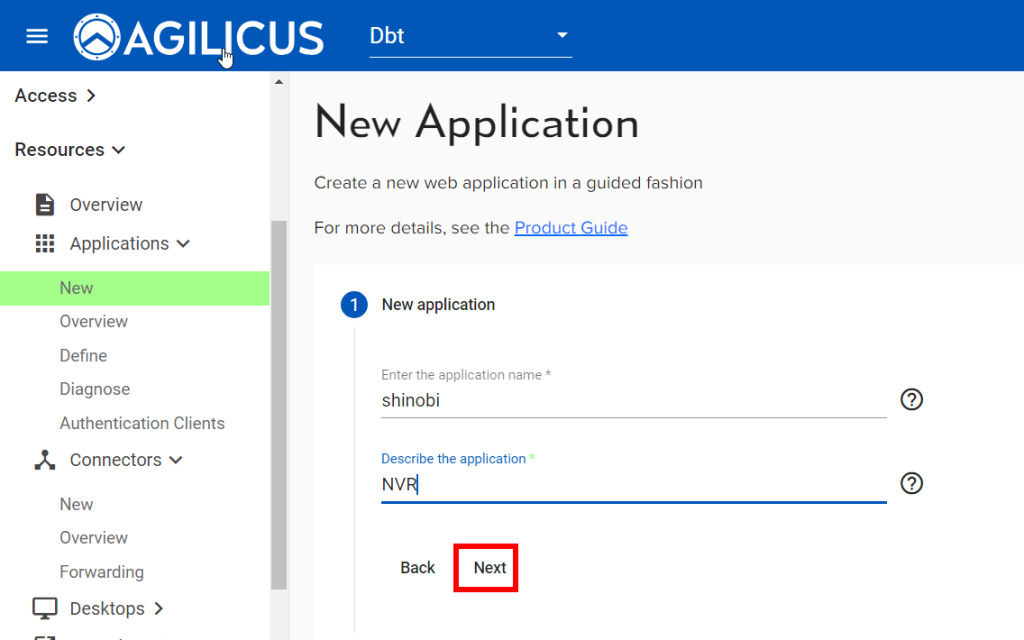
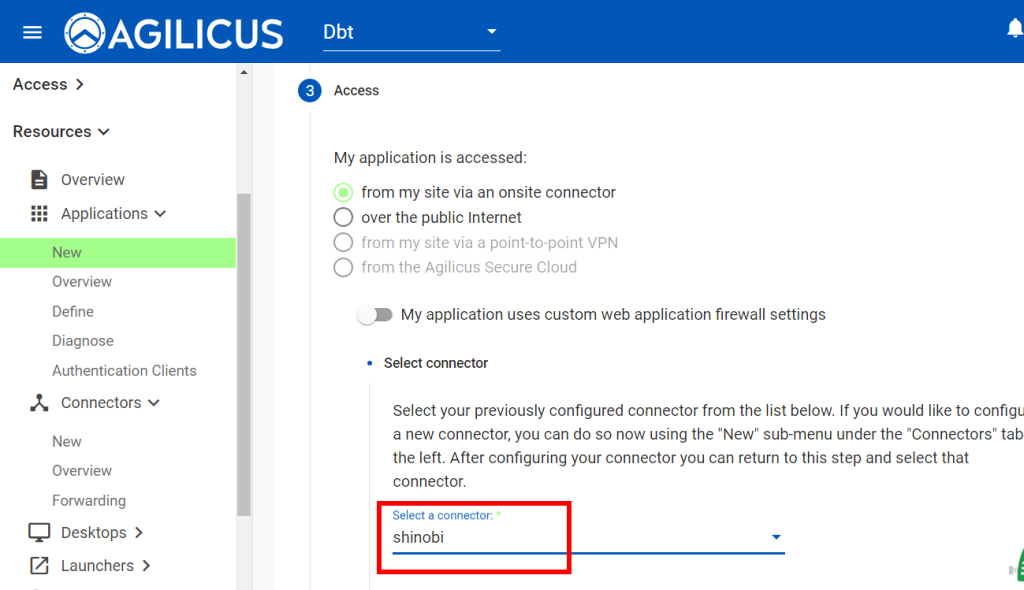
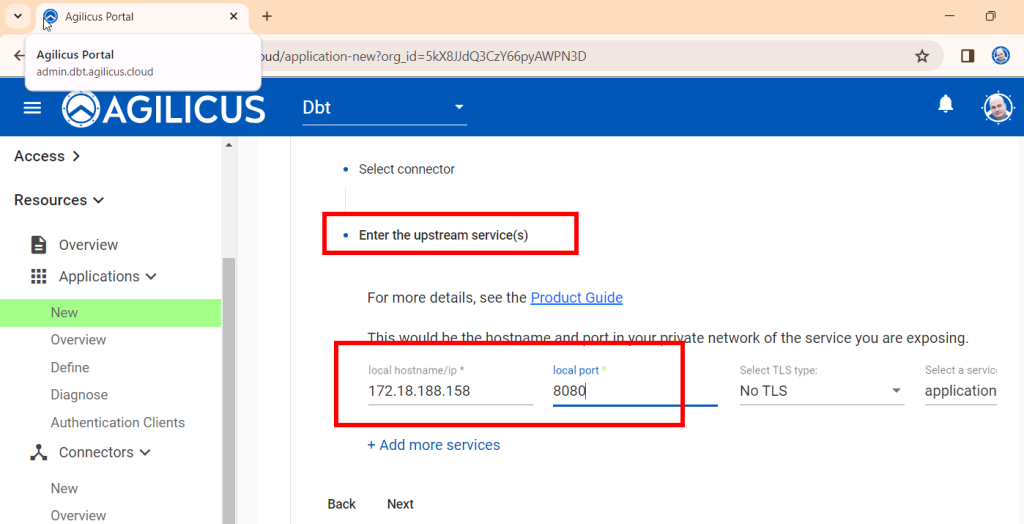
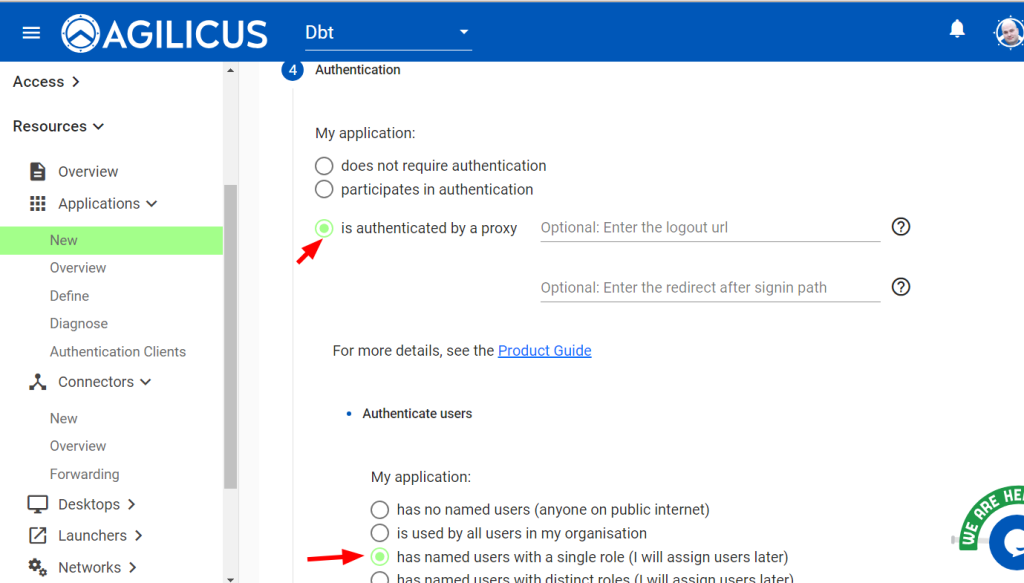
Step 3: Assign Permissions
Under Access/Application Permissions, add/update a row for your user, and, set the newly created application column to ‘self’.
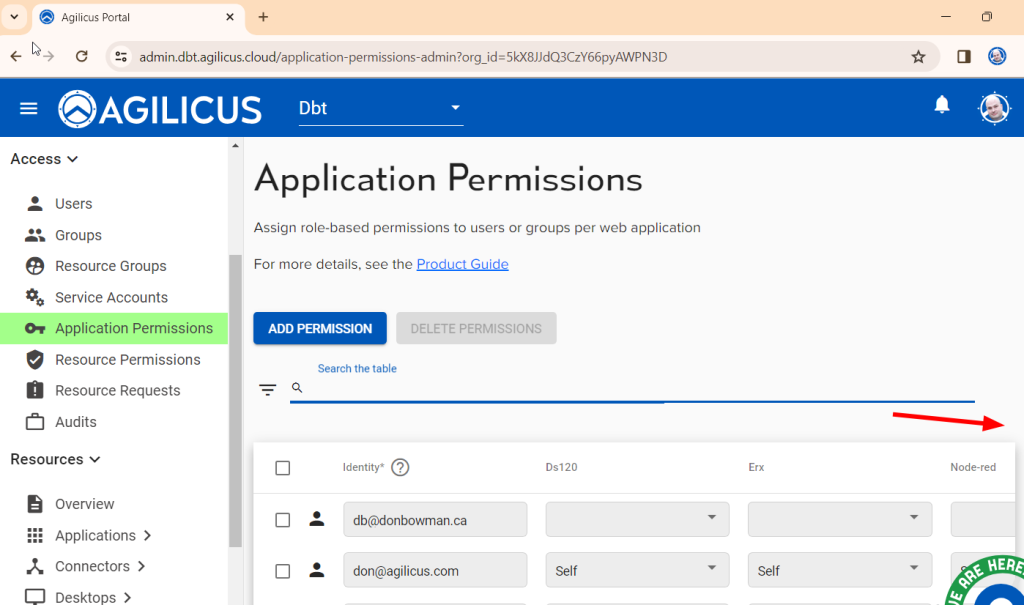
Step 4: Use!
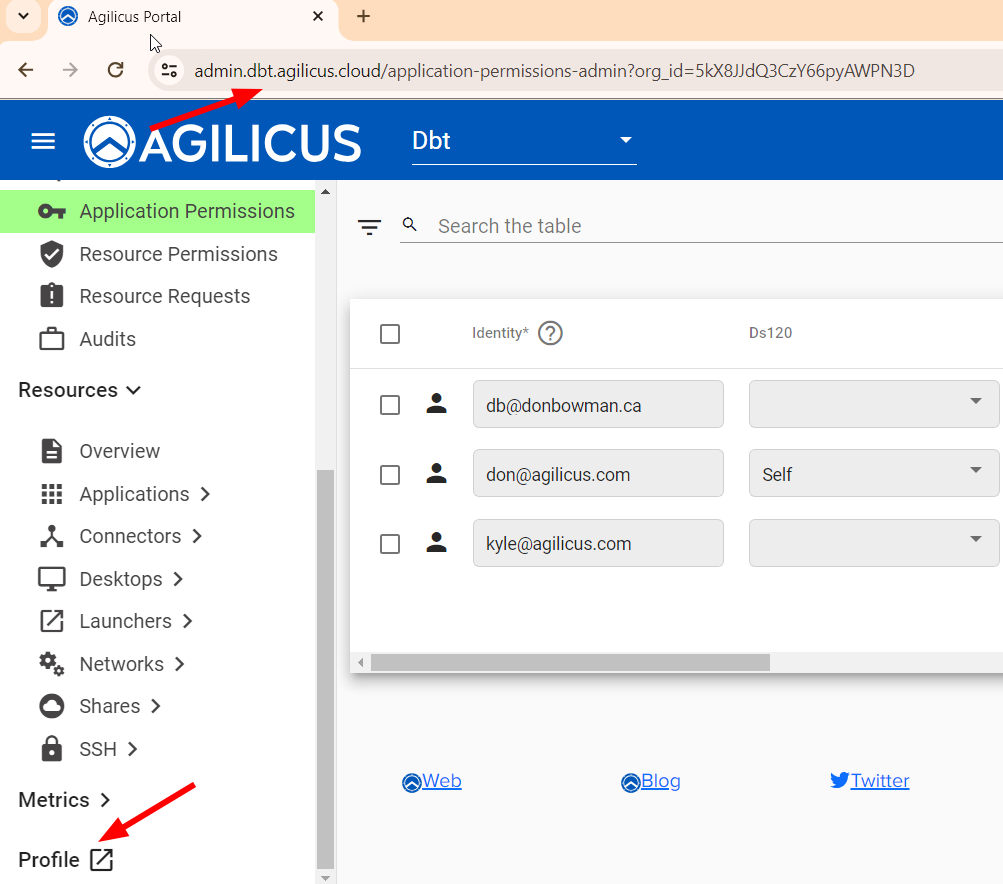
you may either navigate directly to https://APPNAME.__MYDOMAIN__ (e.g. above I called mine ‘shinobi’, and, my domain is dbt.agilicus.cloud, meaning I can open https://shinobi.dbt.agilicus.cloud). We can also navigate to profile (see the link at bottom left), which is https://profile.dbt.agilicus.cloud for me. Profile will have an icon for each app.
